web analytics

How to make a Fairy Wand

How to Make a Fairy Wand (DIY) Tutorial

I have always wanted to Make a Fairy Wand (and you can now check out my how to make a tulle wand tutorial), but not the usual kind of puff ball fairy wand, something different, more creative. Today I decided to get my craft on and started to conjure up what kind of fairy tutu type wand I could make to match one of Charlotte’s new play ballerina dress up dresses.

My initial thought was to make more of a “crystal ball” fairy wand. I had visions of sparkles in water and some really unrealistic things for the time I had scheduled, so I spent some time walking around Micheal’s to find some inspiration. That place sure is fun in the holidays.

This is what I came up…the project took about 30 minutes.

STUFF YOU NEED

What you will need to create this Fairy Wand (or one of your own style) is the following:

  • Dowels (i opted for a larger dowel and cut it in half w/ a hand saw…that didn’t go so well) $.99
  • Ribbon to wrap the dowel $2.99
  • Tulle (I had this at home)
  • Clear plastic Christmas ornament $1.29 (get 2 in case you hot glue mess it up like I did)
  • stuff to put inside the ornament..I used a stream of marabou fluff, other ideas are flowers, glitter, ribbons, bows or rhinestones. My marabou cost $1.99
  • hot glue  (took just 1 stick)
  • I also bought some charms to add on from the bead aisle $5.99

INSTRUCTIONS

After you have your dowel cut to the right length, the first thing you do is wrap your ribbons around your wand. What I did was opt for one large ribbon to do the initial wrap and then a smaller ribbon to go around and cover the remainder of the dowel you could see. Its fairly easy to keep wrapping this around and then starting the 2nd one above and it should fall into perfect place.

I usually dab hot glue on the bottom, middle, and top, so if I move my fingers and it slips, I don’t unravel the entire thing.

Leave some excess ribbon once you reach the top to hang down or, if you prefer, make up some korker curly ribbon and use those to hang down. At this point on my wand, I left both strands of ribbon hang and then cut additional pieces and hot glued on the top so I had several pieces flowing.

Don’t be afraid to get girly here. I am not sure you can overkill on the fru-fru when you are talking about a fairy wand.

Next I set up the “crystal ball”.

Take your Christmas ornament and pull out the piece that hangs from the tree. Its easier to hot glue when its flat. Take the top off and stuff inside with your filler. You can also leave it empty and add flowers or rhinestones on the outside. The trick here is that once you hot glue something on it, it doesn’t peal off very nicely. I discovered that when I put on my fancy Bird of Paradise, decided I didn’t like it, and tried to take off.

What was left was a huge gaping mess, so I had to put it back.

Oh well, it was my first try, right?

Hot glue the top onto the ball so its secure.

After I had the wand and ball done, I gathered some tulle with a ribbon and again let the ribbon have some excess tails. I made two of them, hot glued them together in a cross, and trimmed up the tulle. I also took a piece of the ribbon and wound it through the heart charm, and attached that to the tulle and made a knot.

Then I added the tulle “cross” directly to the top of the wand.

I took some of the larger ribbon and covered the ornament part of the plastic ball and then turned upside down and hot glued the ball onto the tulle.

I’m not going to lie here…while it was really stuck and not going anywhere, the ball attached to the tulle made it slightly wobbly. More so than I liked. In the future, it might be smarter to attach the ball directly to the top of the wand and then add tulle with a small piece of elastic or some other clever way I haven’t discovered yet.

At this point you are pretty much done!

Its all decor from this point out.  I added a bird of paradise ornament I found in the Christmas aisle at Micheal’s, but I am regretting it. Unfortunately hot glue made it where I couldn’t take it off, so make sure you are sure before you stick.

(left: assembly pre-dressed up  , right: all gussied with flowers and birds)

Although a bit gaudy, Charlotte was a fan of the sparkly, so it wasn’t a total loss.

Consider adding satin bows to the front like I did or maybe even bells to the bottom of your ribbons so it makes a “charm” sound when you walk.  I have another wand I am trying out later on tonight or tomorrow, so I will post the results of how that one worked out.

If you liked this article, feel free to share the link, stumble, or twitter.

Maybe someone you know has a fairy in their life that needs some magic.

~Trisha

Other sites that may inspire you make a wand

How to make a Ribbon Rosette (tutorial)

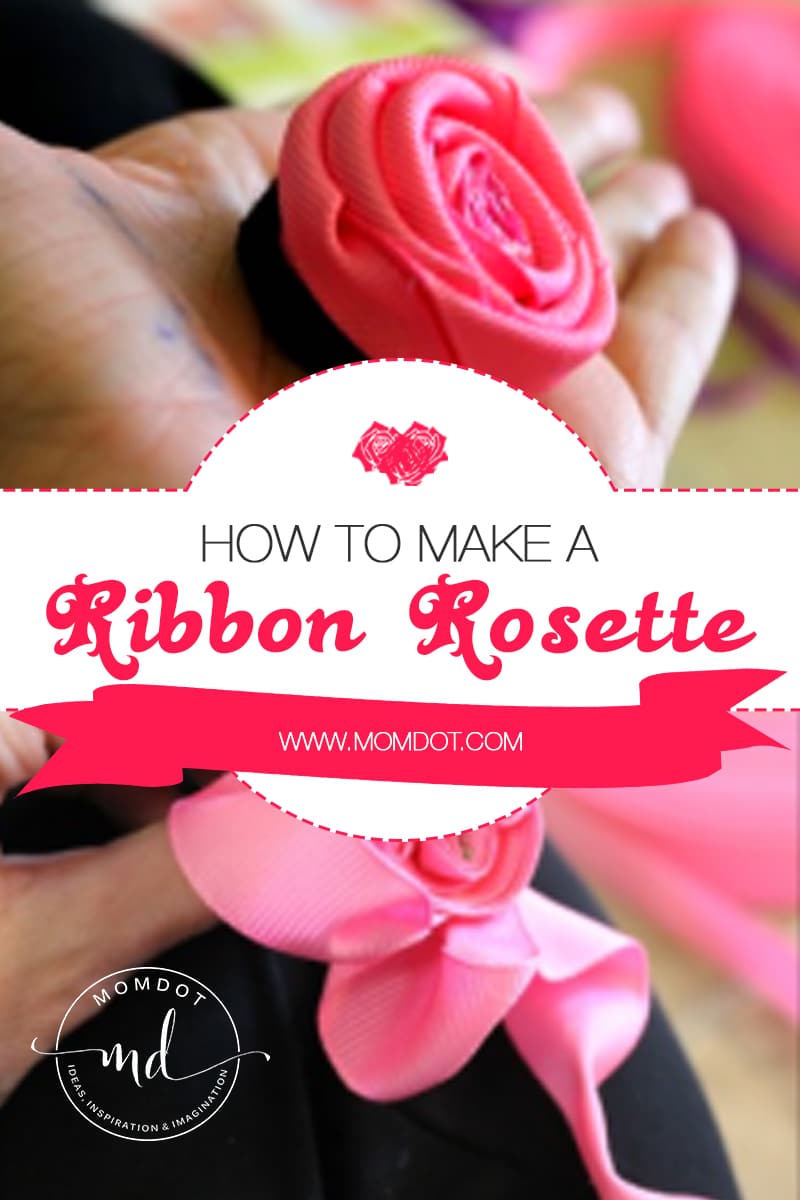
I should honestly name this How to NOT make a Ribbon Rosette, because I made about 4 million mistakes before I found something that would qualify in the category of “working”. After all these mistakes, which undoubtedly you have been there if you found this post, i thought it would be beneficial to share what didn’t work (atleast for me), but perhaps inspire you to try a new direction.

Here are my attempts to make a variety of Rosettes, although if you want a simpler craft, you can try my how to make a tutu instead! Working with tulle was so much easier than ribbon. HA! :
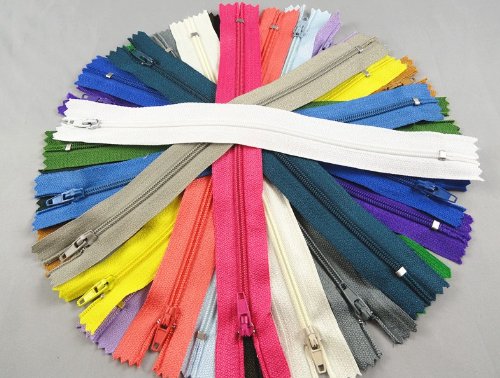
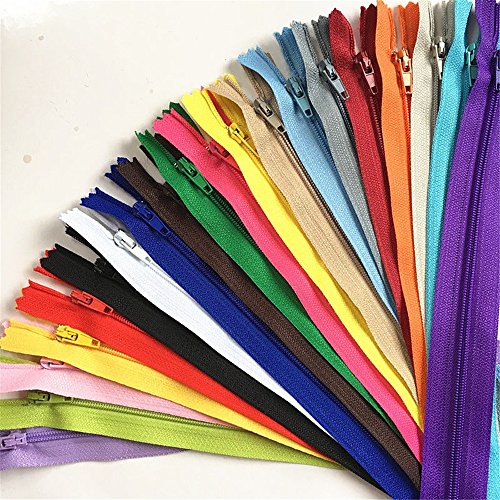
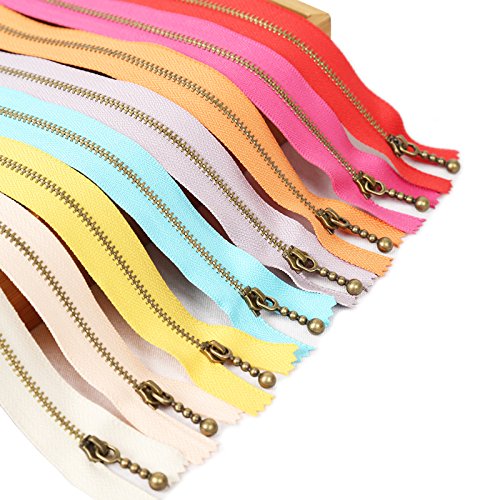
How to make a Zipper Rosette

Materials:

  • Floral Wire
  • Zipper
  • Hot Glue

Step #1: This step is going to be firm with all the Rosettes you make.  After the obvious of cutting the zipper in half, you will begin by securing an end piece to your wire and begin wrapping.

Step #2: Wrap the zipper around, dotting at the baseline, gather and stick. This is where I went wrong. My zipper was WAY too small and I ran out of length before I even had a rose.

Step #3: I took the remainder zipper size and began looping a figure eight around it to make petals. This gave me a half a flower. So there you have it….Half Flower Zipper Rosette.

*cough*

[Read more...]

How to refinish your Garage Floor

We don’t use our garage for our cars. Its household storage and where we keep the litter boxes for the cats. We have a cat door that goes from the inside the house to the garage and it allows us to keep that smell out of the public view.

As a result, the garage is in a constant state of smelling like pee.

Well, pee and and cat throw up.

If you have cats you totally know what I mean.

Finally, after about the umpteenth time of feeling knocked out by the whiff every time I went out there and grossed out by the flooring, I started to do some research on how to get urine up from the concrete. As a result I discovered that you can refinish your garage flooring with every little cost, which seemed like a great idea for us for maintenance purposes.

Now this was back over the winter and we have been waiting for the weather to warm up. When you redo your garage you have to have a temperature above 55 degrees. Living on the coastline, it was also important that we hit the spring weather and not the summer sun. Nothing like baking yourself while doing work outside.

The garage isn’t exactly a container of breeze.

So here we go….

How to Refinish your Garage Floor

(Do It Yourself Home Tutorial)

Keep in mind that we are not professionals. We are not handymen or handy women, we are just regular old mom and dad that did a home project and here are our results and how we did it:

Step #1) The first thing you need to do is head out to Lowes and pick up a kit. When you get there, its relatively overwhelming as you can purchase all the items separately or packaged together by companies like Rust-Oleam. We chose to do a kit so we know we didn’t leave anything out. The kits generally come in 1 or 2.5 car garage sizes. We chose a 2.5 car garage size to be on the safe side but we have an entire set of cans we didn’t use, so if you know your square footage you don’t have to waste money.

The kit was approximately $108 and included etcher, the paint and epoxy, the sprinkle chips, instructions and a 5 minute DVD (that we did watch). You can buy a tan color, a gray color, or have your tan dyed about 10 different colors at the paint counter. They have samples from green to mauve if you so choose.

  • A) Because of our garage situation where it was a complete mess, we also purchased a degreaser (Quickcrete) separately. The cost was about $24, but well worth it. Cleaning your garage flooring is the KEY TO SUCCESS in this project. If you use your garage for parking and have oil or grease, you will need to do the same thing. In fact, I recommend it period.
  • B)  Other supplies that you will need to pick up if you don’t have at home: A few floor stiff bristle floor scrubbers, paint rollers, paint brush for the trim, tape for your trim, and extension poles for your paint rollers.

Step #2) Once you are home, you have to begin the process of getting everything out and clearing the floor of loose dirt. Once we had the garage stuff laid out on the lawn (we had people stop thinking we were having a garage sale), you can just use a leaf blower to get the excess dirt out.

We put Charlotte to work. She is a great helper.

Step #3) Once the garage has the floor clear, you start with your degreaser. Read the back for the instructions but you work in sections around the garage. You mix with part water and then our in a section, scrub, rinse and so on.

The preparation of the garage itself took the longest out of the whole day.

Once you are done with the degreaser, you will move on to the etcher that came in your kit. Its the same process. The difference in etching is it has a citric acid in it (does not smell pleasant in my opinion), but it seemed to get up the rest of what was on our floor. The garage must remain wet the entire time you are doing the etching.

When you are done with both steps your garage has to dry COMPLETELY before you can move on. We put blowers on our garage to assist in drying, but it did take a few hours to get the concrete ready to go.

Tip: Buy a Long Squeegee to get out excess pools of water to speed up this process.

Step #4) After the garage is dry, mix your part A and part B and stir for a full 3 minutes. Once that is prepared, you start by doing the edges with a paintbrush. This is where you can learn from our mistakes. We did NOT put painters tape up to protect the brick sidewall trim. We will have to go back and either paint the brick or use a power washer to remove that paint. PUT UP TAPE to save your trim from bleeding over!

Once you are done putting up the tape, go around with a paintbrush and do the sidewalls with a paintbrush. Chris started at one end and I started at the other.

Step #5) When the edges are done, you can move on to the floor. You do the floor with your paint rollers and extensions and do it in 4×4 sections. If you try to do more than that you will find you cant spread your paint chips properly.

The idea is to paint, sprinkle, paint, sprinkle. We started in the back and worked our way to the front of the garage. Originally we had both been doing a side, but found it more effective to have Chris paint and I would come behind and sprinkle after he had a section done.

This part went pretty quickly.

We also let Charlotte sprinkle the chips on the wet paint.

If you sprinkle too many or make a mistake, its OK to paint over the chips in a section.

Final Results

(except the trim which we have to go back and pressure wash)

  • Cost: Approx $150 including paint rollers, kit, etc.
  • Time: Block off 1 weekend day
  • Can Kids Help? On the back it says keep children away…after all, it is a chemical. We let Charlotte help supervised. She is 6 and very responsible.
  • This project can be done with 1 person, but goes much faster with two adults than 1.
  • Pee smell in garage…completely gone


Coming up, we have some other home projects we will be sharing. I hope this was useful to someone. If you have questions, just leave below!


~trisha

How to Make a Fairy Flower Wand

The other day I made a sweet little fairy wand, a tulle wand, and showed you how to make a tulle pom pom. I had some left over materials, so I decided to make a flower fairy one.

Again, this type of wand (at least the way I made it) is meant for older kids that don’t have the curiosity to pull things apart. Because I chose to make mine with pins that go through the center of the flowers, please take care not to create something that you know for sure your child will pull apart and become a household hazard. Pins are no fun to step on.

Disclosure over.

How to Make A Fairy Flower Wand

Items needed:

  • box of lace pins
  • Styrofoam ball
  • dowel ribbons for the dowel
  • favorite flowers
  • glue/glue gun

1) Start by just taking the back off of each flower and pushing the pin through the middle and into the styrofoam. It took about 2 bundles of flowers for me to complete the entire ball. I made sure I pushed the flowers together because I liked the look of having all the flower petals mushed up, but you can choose to lay them flat.

Another thought is adding a rhinestone to the center of the flower once its pushed into place. That way the pin top is completely covered and it would add some bling to it.

2) Let your kitten help. Its more fun.

3) I then covered my dowel with my chosen ribbons, in this case it was purple and brown. I originally did it all in brown, removed it, did it in stripes and then thought I would add some leaves to the stem. Ultimately I didnt like the look so I tore it all off.

I think its ok to experiment because you can always start over!

4) Lastly I added a loop on the bottom so it was easy for my daughter to carry around with her.

I hope this inspires you to create some fun and fabulous fairy wands in your own home.

Happy Crafting!

~Trisha

Like this post? Consider tweeting or stumbling in order to help others let loose on their inner crafty mom!

How to make a {Girly} purse

A few weeks ago I was signed up for a Christmas stocking exchange with another blogger. Part of the rules (which I made myself and started to regret) was that you needed to be creative in your stocking….you could glue it, iron it, sew it, but you had to incorporate some sort of “making” it. As I looked around, I decided that it would be totally cheesing out of me to just get some letters and iron her name on a premade red stocking.

One thing about me is I cannot sew.

I cannot sew worth crap.

So I had to come up with another way that didn’t require some Grade A Grandma Type Sewing.

However, one thing I am is crafty. Creative. A problem solver. Sorta.

What you are about to see below is what I learned doing the stocking. After I figured a few things out, I went back and used the same technique to create a purse for Charlotte. I am going to share how to make a pretty purse, but also show you the pictures of the original stocking that inspired it.

Both things were made the same way and you can create your own items this way in any shape or size.

You will need:

  • Old shipping box
  • glue gun and glue
  • quilt batting
  • 1/2 yard material
  • 1/8th inch ribbon to sew with
  • large needle
  • straight razor
  • felt for the inside of the purse
  • 1 1/2 inch silk ribbon for the strap

The project cost me about $7 total, because I had batting, felt, glue, and ribbon at home.

Directions To create A Purse

(or Stocking)

1) First you need to decide the size of the purse. I measured and cut out the sides of the purse, both should be the same size (or as close as possible, I’m not an overly perfect cutter) and then used the straight razor to cut them out from the box. Be careful you dont cut up your rug, floor, or leg in this process.

(craft kitty gwennie)

2) After I had my two sides, I glue gunned the cardboard and added (double) batting to both of them so they were nice and fluffy.

3) I then laid out the material and left approx 1/2-1 inch on all sides. I put the batting part straight down (as it was the front of the purse) and glued the material to the back.

4) Cut out felt and lay in a square to “finish” the back, which in this case, is the inside of the purse.

5) I went back and measured and cut a bottom in the same length as the sides (but the width I wanted the purse to be, I just eyeballed it) and the strips that went up the side. I did not add batting, just material and felt. This should leave you with 5 pieces of covered cardboard.

6) Here is where the mock sewing comes in. Because you are sewing card board and using ribbon, your going to want to use a large thick needle. I had one the perfect size in my needle pack. I opted for a 1/8th ribbon stitching on the outside. I first took one main side (with batting) and a smaller side (without batting) and started my ribbon stitching through the material and connected to the other sides material. I followed this all the way down and around and back up to the other side. There were points I had to go through the cardboard and not just the material, but overall it was just connecting material to material.

7) Complete all sides and bottom this way. It took me about an hour and my fingers hurt by the time I was done, but the affect was cute.

8 ) Once done stitching, your purse should be pretty solid and stand up on its own!

9) Personally I wanted some more frill, so I added a ruffle around and had some extra, so I put the extra on the front and added a ribbon rosette to denote the front of the purse. I then took some 1 1/2 silk ribbon and hot glued it on the inside (side wall) and cut it at an appropriate length for Charlotte and secured int eh same fashion on the opposite side, leaving a shoulder strap.

My purse was slightly higher on the top than the sides I cut but I dont think Charlotte noticed. That’s the great thing about crafting for a 5 year old.

Finished!

This is the same exact technique I used for this stocking. Because of the batting, I did not iron on the letters or it would have defluffed it.I hot glued them on at the end. I also only used a front and a back and sewed the two sides together directly.

I used a flexible cardboard so I could put stuff inside when I was done.

That’s it! I hope this inspires you to create some stockings or some purses and handbags on your own! If you liked this post, please consider “stumbling”, “Digging” or sharing it with others so they can learn too.

Happy Crafting!

Trisha

Incredible Bows for your Beauty

This morning I wanted to share a website called A Little Pink Ladybug. Not only can you purchase some amazing hair bows which I would deem more art than anything else, you can purchase tutorials on how to create many beautiful items for yourself. Learning to make hair bows can be a way to get your creative juices flowing, provide gifts for your friends and family, or even a part time income from home.

A few of my absolute favorites from A Little Pink Ladybug:

Ballet Slipper Hairbow ($10)

Butterfly ($8):

Gingerbread Man ($10)

If you prefer to make them on your own, there are a variety of tutorials and e-books you can purchase. Hands down my favorite bow in the tutorial section is the Violin.

How incredible is this as a hairbow?

Violin PDF File: $5.00

[learn_more caption="Learn More" state="open"]Learn to make this exquisite Violin! Originally handcrafted by master ribbon sculptor, Karyn Ranzau. You will have each design carefully broken down step by step to recreate these mini masterpieces for yourself. Dozens of photos and simple instructions will guide you through this engaging art. [/learn_more]

Know of an amazing hair bow shop that I should share with everyone?

Or for that matter, an amazing store that features products fit for a princess?

Go to my contact form and let me know!

~Trisha