If you’ve been keeping up with our food dehydrator reviews, then you know just how handy they can be for dehydrating large amounts of fruits, veggies, and meats. But if you’re not quite convinced to buy a dehydrator just yet, or just don’t want to spend the money on one, there are still ways that you can dehydrate food without these machines! In this article, we’ll be exploring a few alternatives to food dehydrators and answering the question of how to dehydrate food at home without a dehydrator once and for all!
Alternative Dehydrating Methods
Though they may take longer to dehydrate your favorite snacks, these are reliable methods of dehydrating foods that you can try at home (without having to spend money on a dehydrator)!
Using the Sun

The sun isn’t just good for tans and Vitamin D.
Though this option for how to dehydrate food at home without a dehydrator takes the longest to dehydrate foods (up to a few days), it’s, in our opinion, the most fun dehydrator alternative and adds a touch of airy flavor to the food compared to the man-made plastic and metal drying process. Fruits, veggies, herbs, and meats all turn out delicious when dried in the sun, but sun-dried tomatoes are especially delectable!
To sundry your favorite snacks, simply slice your fruits or veggies thinly, then place your fruits, veggies, or herbs on a baking tray to dry out in the sun. Cover them with a breathable mesh material to prevent insects from landing on the raw food.
If you’re sun-drying meats, cut the meat into thin strips and hang them on a drying rack in a sunny spot (as shown in the photo above). Be sure to cover your meat in seasonings and cure before hanging them out to dry.
*TIP: Meat is best sun-dried in arid areas rather than areas with high humidity.

Using Your Oven

If you’re a more indoorsy type of gal (or fella), this dehydrating process may be to your liking.
You can actually use your oven as a large dehydrator when it’s set to low temperatures (low for an oven, we mean). To dehydrate fruits, veggies, or meats in your oven, set it to its lowest temperature, preferably under 200 degrees if applicable. If your oven doesn’t go under 200 degrees, just set your oven to Warm.
When dehydrating fruits and vegetables, slice them as thin as possible, around 1/4 an inch thick. Then, place wax paper atop a cookie sheet and put the vegetable or fruit slices on the pan. Fruits and vegetables will take around 6 to 8 hours to dehydrate completely. When in the oven, be sure to rotate the pans and flip the slices every hour or so for even dehydration. At the end of 6 hours, check to see if there is any moisture left. If there is, or the slices are easily malleable, they’re not done. Proceed to 8 hours of drying.
When dehydrating meats in the oven, set the oven to Warm. This will make the oven about 160 degrees — the perfect temperature for making jerky. Slice the meat into thin strips and be sure to cut off any fat so it doesn’t go rancid. Apply your spices and cures and then place the meat onto a wax paper-covered cookie sheet. As with the fruits and vegetables, be sure to rotate the pans and flip the meat every hour for even drying. Meat may take 8 or more hours to dehydrate completely, so be prepared for the long haul!
*TIP: For more even slices, try using a Mandolin Slicer.

Using Your Toaster Oven
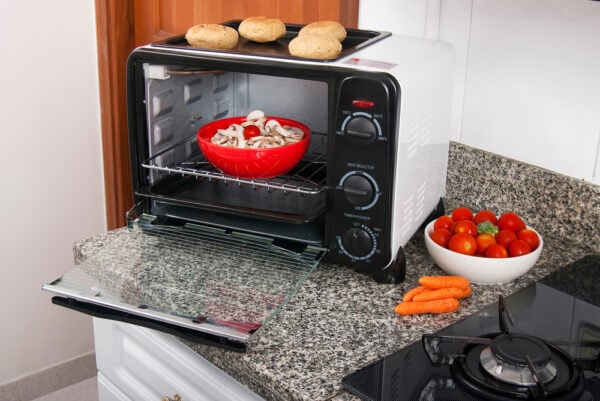
If you don’t have a full-sized oven or just can’t use your oven for such a long drying process, a toaster oven is an excellent alternative. Toaster ovens can be set at temperatures lower than that of a conventional oven, making it a great option for dehydrating foods. You’ll want the temperature to be within 200 degrees Fahrenheit, lower if possible (around 140 degrees). If your toaster oven doesn’t go below 200 degrees, use the Warm function, similar to if you were using a conventional oven.
As with the other dehydrating methods, slice the fruits, vegetables, or meats thinly. For fruits and vegetables, you may want to dip them in lemon juice for one minute to preserve color and taste. For meats, add your spices and cures before dehydrating. Place the foods directly on the rack or place on a small pan. It’s recommended that you leave the door open several inches and use a tabletop fan to help circulate the air inside the toaster oven.
Expect fruits and vegetables to take anywhere between 4 and 6 hours to dehydrate completely. Meats may take between 6 and 8 hours.
Storing Your Dehydrated Foods
Learning how to dehydrate food at home without a dehydrator can seem like a daunting task. This is especially true when it comes time to store the food.
Home-dehydrated foods can last anywhere between 5 to 10 years (with store-bought dehydrated foods potentially lasting longer) — but only if you do it right! In this section, we’ll be providing you with a few tips on how to properly store your dehydrated foods.
- Let the food completely cool before packaging it. Food that is still hot or warm will produce steam, which will build up in packaging and trap moisture inside, thus shortening the dehydrated food’s shelf life. When the food is cool to the touch and no longer steaming, then you can store it.
- Store the dehydrated food in freezer bags or air-tight containers. Air, light, and temperature can all have negative effects on stored dehydrated foods. When you go to store your dehydrated foods, be sure you’re using an air-tight container or jar, or freezer bags. If using freezer bags, ensure that all of the air is removed.
- Date your food. Labeling your cans and packages with the date it was stored will help you to determine how much shelf life it has left. You may also want to consider labeling the type of food so that you can be more organized.
- Store serving sizes separately. Whether you’ll be feeding a family of 4 or 2, you’ll want to store each family serving in a separate package or container. This will prevent you from opening and closing one large container and exposing unused dehydrated foods to the elements.
- Place the food in a cool, dim, and dry part of your home. As we mentioned above, light, oxygen, and temperature all affect the shelf life and quality of your dehydrated foods. You’ll want to store your foods in an area that is dark and doesn’t have high humidity content. The temperature should ideally be between 60 and 65 degrees Fahrenheit.
Recipes to Try
Now that you have a way to dehydrate and store your dehydrated foods, why not have some delicious recipes too?
Cinnamon Sugar Apples
Sweet and spicy and the perfect snack, this sugar cinnamon apple recipe will leave you wanting more!
Ingredients/Accessories:
- Wax paper
- Cookie sheet
- 2 apples
- 1 teaspoon cinnamon
- 2 Tablespoons sugar
Method:
Heat oven to 200 degrees Fahrenheit. Cut apples in very thin slices (about 1/4 inch thick). In a medium-sized bowl, mix the cinnamon and sugar. Then, add the apple slices and throw until apple slices are evenly coated. Place the slices on the wax paper and cook for 2 to 4 hours, until completely dehydrated. Be sure to rotate the trays every hour for even drying.
Banana Chips
You likely know all too well how quickly bananas become overripe. This recipe from MOMables will turn your brown bananas into irresistible banana chips!
Ingredients/Accessories:
- 1 Tablespoon Lemon juice
- Salt
- 4 Tablespoons Water
- 2 Bananas
- Wax paper
- Cookie sheet
Method:
Heat oven to 250 degrees Fahrenheit. Combine 4 Tablespoons of water with 1 Tablespoon of lemon juice. Slice bananas about 1/8 an inch thick. Brush with the lemon juice mixture and sprinkle with salt. Bake for 2 hours, flipping halfway through, until crispy. Allow to cool.
Classic Peppered Jerky
You can’t go wrong with a classic. This jerky recipe from JerkyHolic is simple to make (and yummy), but it does take some time!
Ingredients/Accessories:
- 1 pound of beef or venison
- 1/4 cup soy sauce
- 1/4 cup cold water
- 2 Tbsp brown sugar
- 2 tsp ground black pepper
- 1/2 tsp sea salt
- 1/2 tsp garlic powder
- 1/4 tsp onion powder
Method:
Cut any fat off of the beef or venison and then slice thinly into strips (about 1/4 an inch thick). Combine all of the dry and wet ingredients together in a large bowl and mix well. Then, place the meat strips into the marinade and let soak in the fridge for 8 to 24 hours, depending on how flavorful you want your jerky (24 hours is recommended).

- PERFECT JERKY, EVERY TIME: Beef jerky,...
- The ultra-sharp 10-INCH BLADE is the...
- STAINLESS STEEL JERKY BOARD: Makes...
- 4.100% SAFE AND CONVENIENT: Made from...
- SATISFACTION GUARANTEED: Enjoy our 100%...
Final Thoughts
When it comes to how to dehydrate food at home without a dehydrator, there are a few alternative methods that work just as well! No matter which method you use, we hope we were able to guide you through the process! Happy dehydrating!