I do a lot of crafts around here.
Mainly easy ones because, let’s face it, we do enough hard things in life as a mom. When I sit down to craft, I want it to be simple, fun and usually with purpose. Now last week I shared with you a same day printing deal on CVS and due to that partnership, I printed about 40 photos myself, including 8x10s, 5x7s and tons of 4x6s. I have been creating all sorts of fun photography holiday crafts.
If you missed on, here is a list.
- DIY Customized Photography Present Tags– these are perfect for kids who cannot read to differentiate which present is theirs
- Hanging Metal Frame – great as an ornament on the tree or simply on the wall
- 5 minute DIY Photography Coasters : Water resistant and a great way to keep your memories at your fingertips
Except these two 8x10s I had made were just sitting here…and sitting here.
And then it hit me. I wanted to try something new. I wanted to try to make a clock! Don’t flick this article off yet. I promise, its not hard. If it was too hard I wouldn’t be sharing it. Making a clock kinda scared me myself. I had never done it before and when standing at the “clock pieces” aisle at the craft store, it all looked pretty foreign. I couldn’t even SEE what pieces were in the little box. But for $7.99 on a clock piece set, I figured it was worth a shot. And to my surprise, it was easy and I LOVE LOVE LOVE the result!
How to make a Clock 
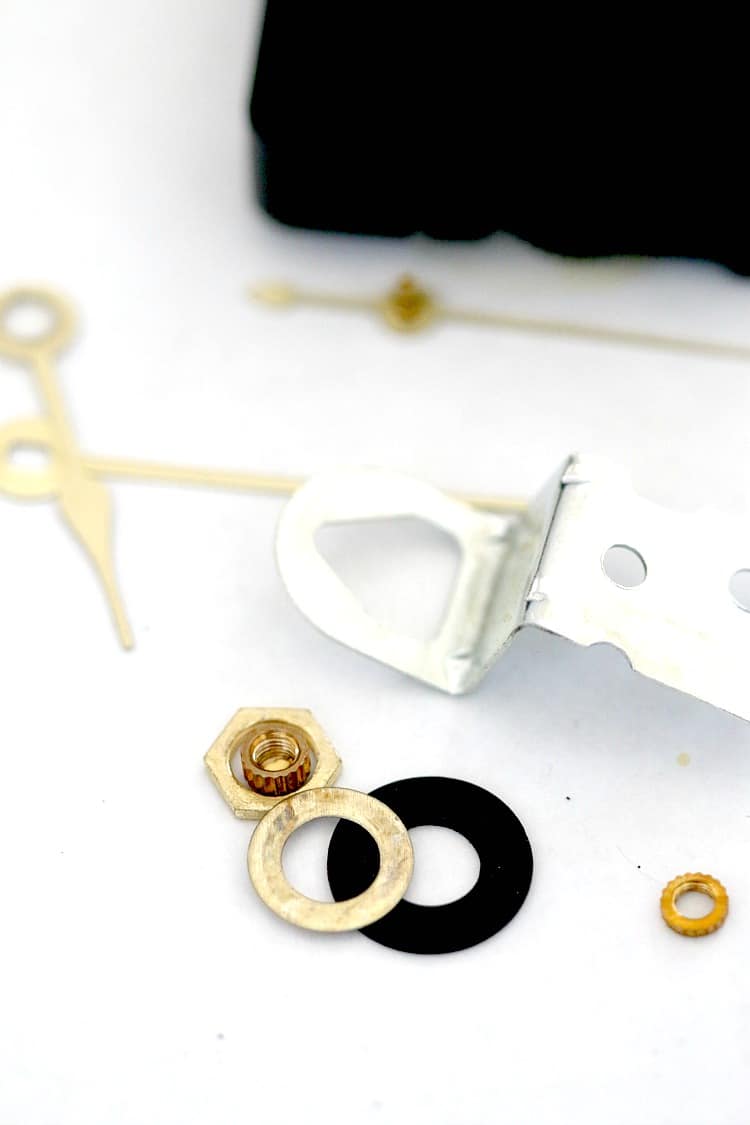
Here are the parts you will need to make your clock
- A drill and drill bit that matches the size of the hole you need to create – do not let using a drill scare you. I am not a huge fan of digging out power tools. Mainly they cause a mess. But you will need one and you will need a drill bit specific to the size of hole you need to create. Generally drill bits come in a case with a variety of sizes and chances you have one in your house
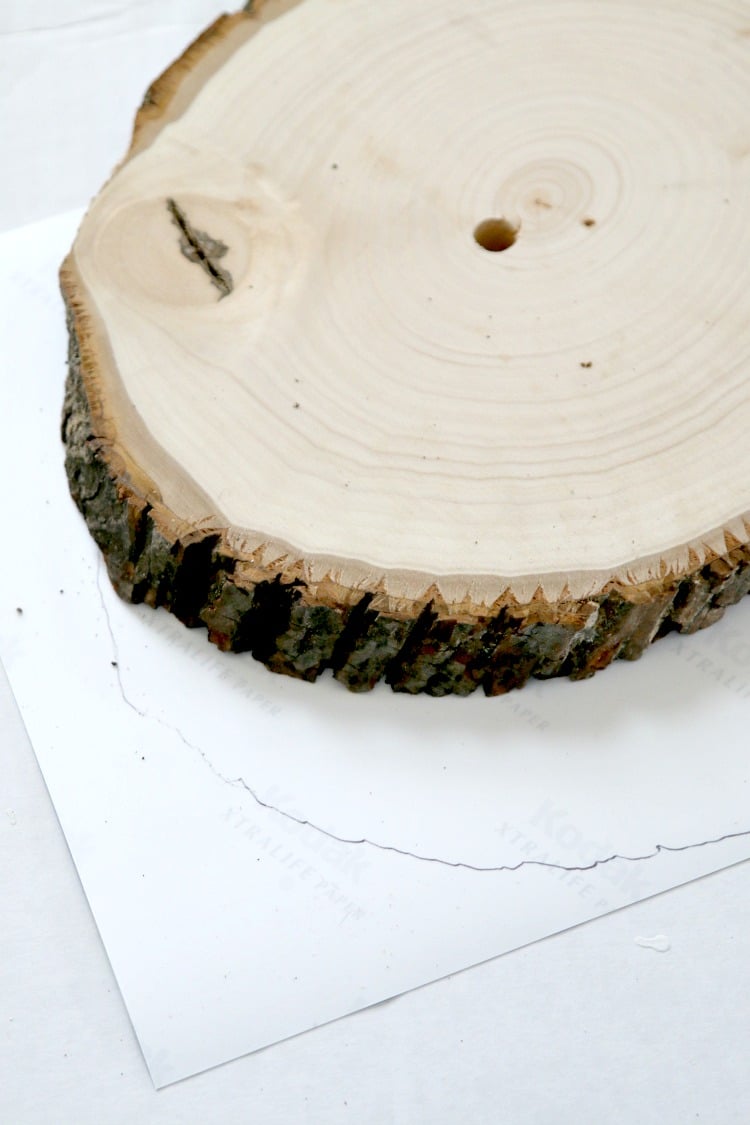
- a piece of wood – I used about a 3/4th inch piece. You can pick up wood at any craft store or, if you are lucky, find one outside. I used a flat piece that I purchased at Hobby Lobby
- modge podge – for this project, I used antique modge podge which is what i have in my house right now
- clock pieces – when you hit up the clock aisle, you will find a ton of different clock making parts. The main thing you have to look for is the SIZE of the piece and that it will match the size of the wood you are pushing it through. I bought a 3/4 inch clock piece and so I tried to find a piece of wood about that width. You will also note there are ticking and silent clock pieces and they do have a hanger on them as well so its easy to hang your clock. Mine was battery based, took 1 double A and cost $7.99
- picture– I picked mine up same day at CVS, so no worries if you want to do this project and don’t have an 8×10. You can upload one, they will print it, and you can pick it up- TODAY!
Instructions to create a clock
- The first thing you have to do is drill the hole for your clock piece. I started to do this myself but we had this whole issue not finding the right size so Chris took it down to a neighbors to drill the hole out.
- Now lay down your image and place your piece of wood on top and trace it. This provides a loose sketch of the area. Cut out and trim to where you want the picture to fall on the wood.
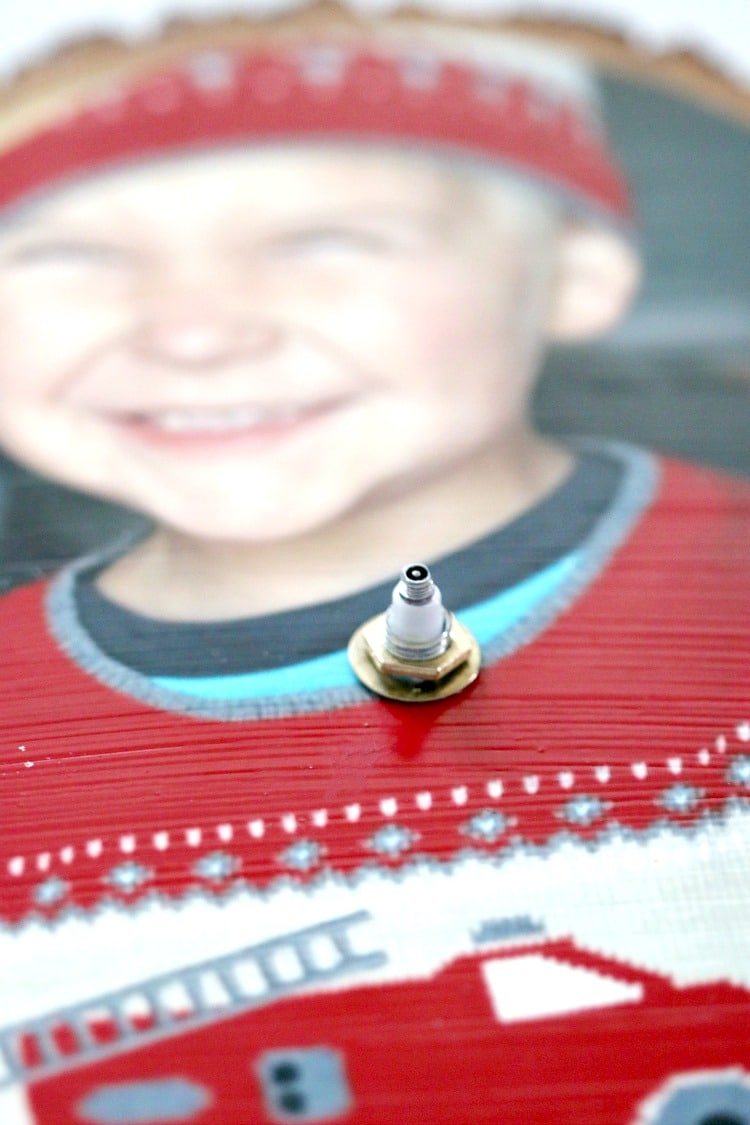
- Modge podge the entire piece, lay down your photo, and modge podge over. Let dry completely.
- Use a screwdriver to find your hole and press through the photo.
- Now you are ready to assemble the clock. Follow the instructions on the clock pieces. Its super simple, they just insert in a specific order. If you purchase this set, its the main piece with a washer, insert, then another washer, nut, your clock hands, another nut and your second hand.
- Done!


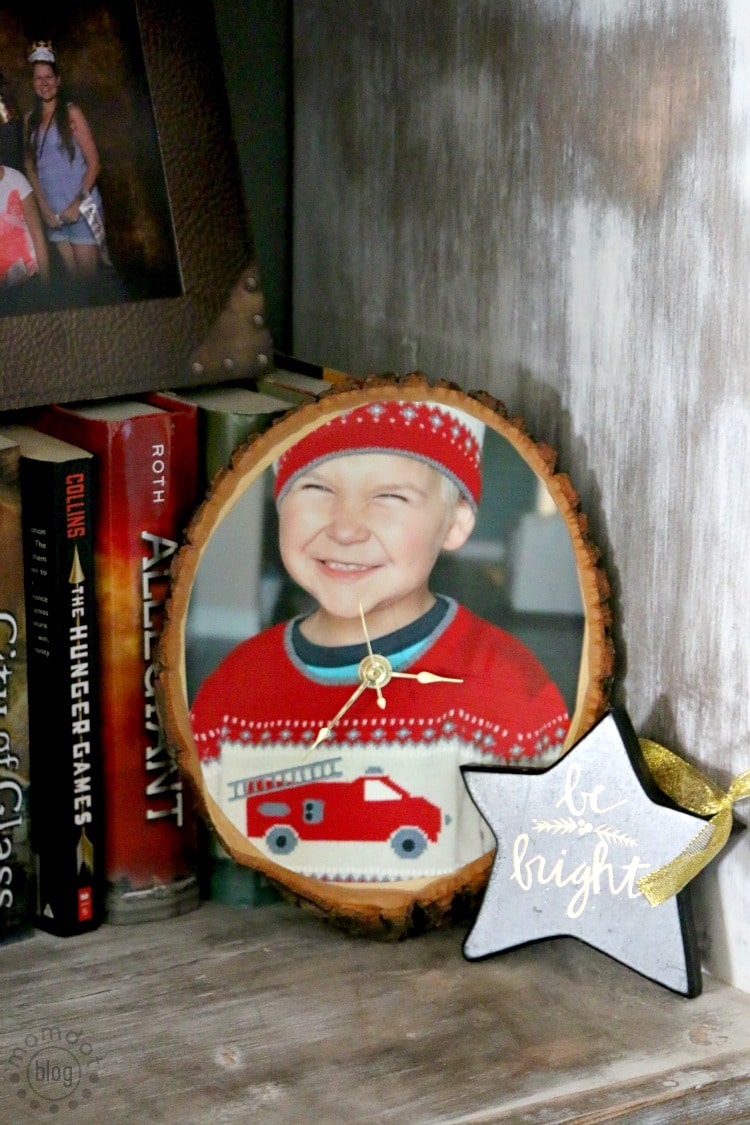
And look, it works!
Of course my son will not let me give it away now. He is enamored with himself on the clock.
Remember, if you like this post, please take the time to follow all my projects and finds here on Pinterest.

That is absolutely adorable! I’ve seen those pieces in a craft store and always thought it would be fun to make but never thought about adding a picture behind it. Beautiful!!