This weekend Charlotte, P and I spent a lot of time getting our Halloween crafts ready. I know it’s not October yet, but as the holiday season is upon us, how could I resist! I have created a new Halloween Crafting category so you can easily find all the goodies from now through the season. At some point in October, I’ll add a Thanksgiving and a Christmas one, and share those as well!
But for now…let’s get our Spook on!
This DIY is so easy that even my best friend Kim could do it. It only requires 3 things and you can alter your needs as you see fit- this is just one fun idea.
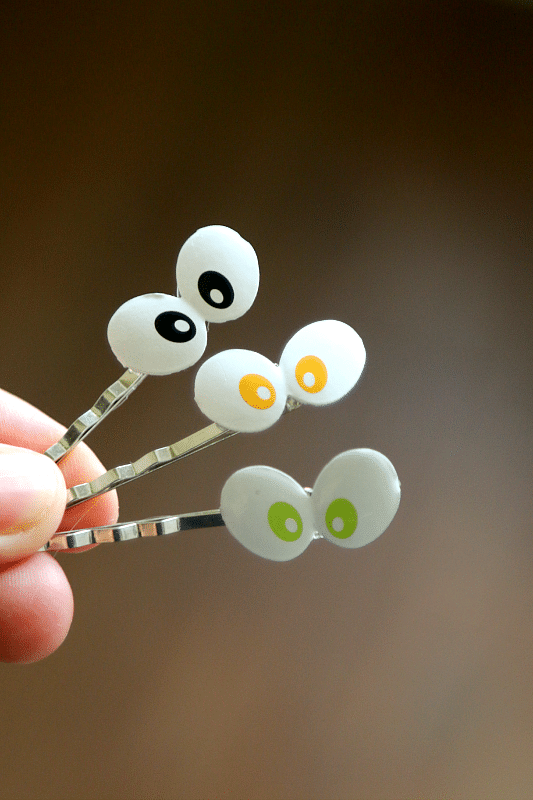
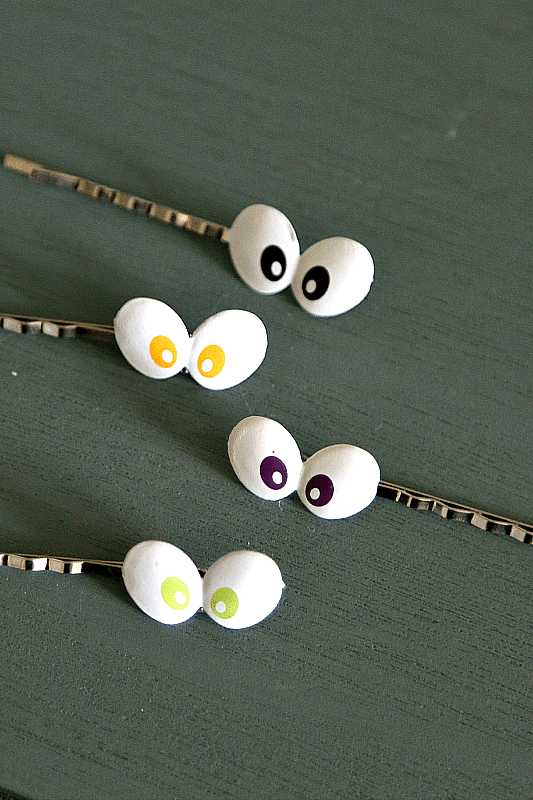
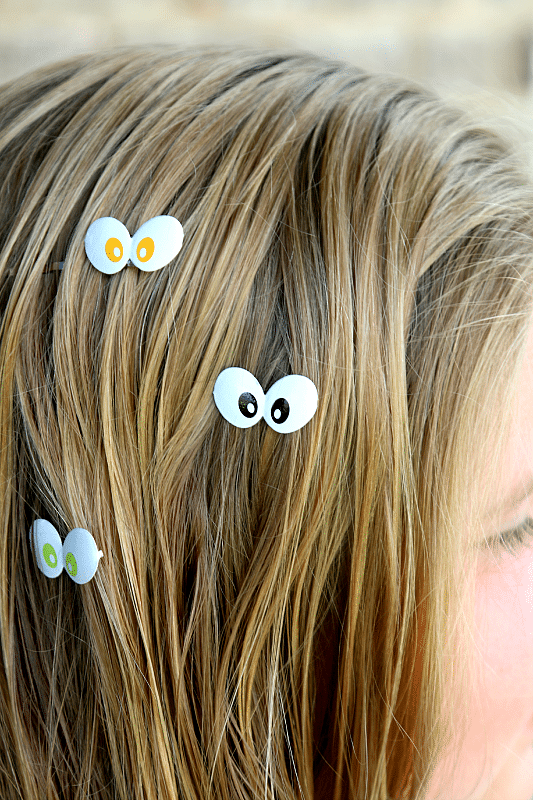
Halloween Hair pins
*Halloween DIY Inspiration
- Spooky Eyes – found in scrap booking section at Hobby Lobby, they have prongs on the back
- Blank Bobby Pins
 with a tiny base on them
 - Hot Glue
 with a tiny base on them
1) Although this craft is super self-explanatory, I need instructions and visual to learn, so if you are like me, here ya go. Open the spooky eye package and take out your eyeballs. Easily snap off the “prong” backing by bending back and forth OR if you have a strong pair of scissors , just cut.


2) Hot glue down! Hot glue is my jam, so I use it for everything. Charlotte is 9 so she takes care of her items well and this is all the securing I need. If you have younger children or your children are a bit rougher with items, you could use a stronger glue to secure the eyes to the bobby pin.
3) That is it! This craft took…oh…. 3 minutes tops and most of that was waiting for the glue to get hot! You can put them in just as a way to hold hair whispies or stuck the bobby pin under the hair for a more of an “eye peek” look!


Want another one?
Do not leave without checking out this fun Halloween Tutorial for your little one or follow all my Halloween Crafts right here!
~Trisha
These are adorable! I would love it if you would link them up to my Halloween Linky {Link is in my Sidebar} Simple & Cute! Love it!
Kim
Oh these are too cute and simple. I’m going to head out and buy the stuff to make these for Zoe, she’ll love them!