First I should probably explain myself. When I started as a blogger, I sorta came this direction because I was a professional crafter. I actually owned a little crafting business and made projects that people bought (I now give my instructions away like How to make a tutu bowholder) and slowly over the years drifted into tons of other projects.
And I still do LOVE those projects.
But after a heart to heart with myself, I realized that I really miss sharing tutorials, crafting, DIY, and kids activities full time. It comes easy to me and I love it. I hope you love it too. So over the next year I hope you will join me as I share some of the great ways my kids and I connect. I will be showcasing activities for all age groups, including mom. This month please note that I am concentrating on Valentines Day.
That being said, it’s super cold outside today and as we are not making it anywhere past the front door, Charlotte and I dove into a science experiment that we had a blast doing and we really want to share with you!
Kids Activity and Tutorial: Streaming Food coloring in oil and water
I originally saw this “idea” on a picture with some really bad instructions by Martha Stewart. Great idea but the execution out of the box from picture to reality is almost none. Here are a lot better instructions on how to make this a success in your home.
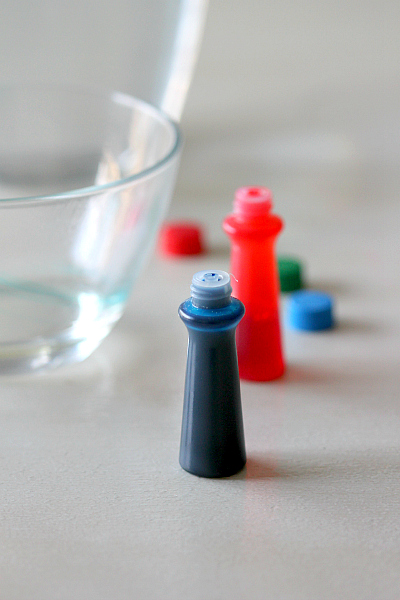
You will need to gather
- tall drinking glass
- water
- bowl
- 1 tbsp oil
- LIQUID food coloring
- fork
- lots and lots of cleanup rags
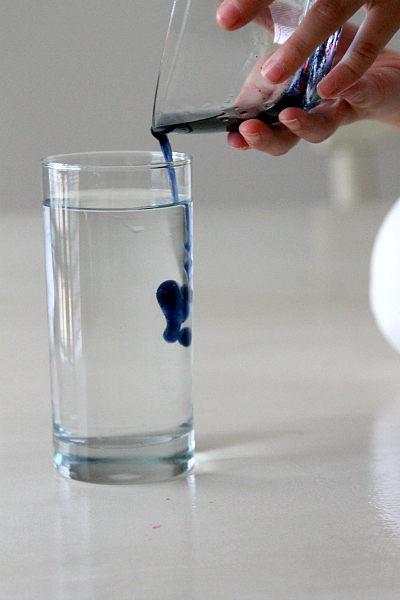
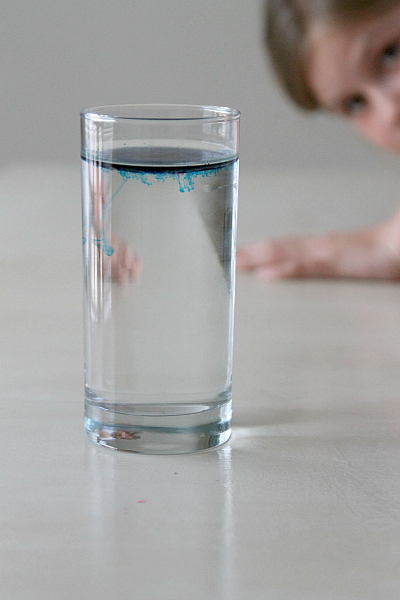
1) Fill up your jar (we used a clear tall glass as well in our experiments) with water and set aside
2) Put 1 tbsp of oil in a separate bowl and add a few drops of liquid food coloring. I would say use a few drops of blue, a few of red, and a few of yellow for unique results. If you use red, blue, and green, a lot of it mixes together very darkly, which may or may not be what you are going for. We found different results by varying how much we added of what color every time we did this. Remember, this is a kids science experiment, so feel free to get creative! If you do not like what you get, dump out your water and start over.
side note: I have a lot of food coloring types on hand. If you have the kind that you normally add in chocolate or pancake mix, this will not work, even if you saturate it in water. Make sure you use liquid food coloring – trust me. I tested this out about 10 different ways.
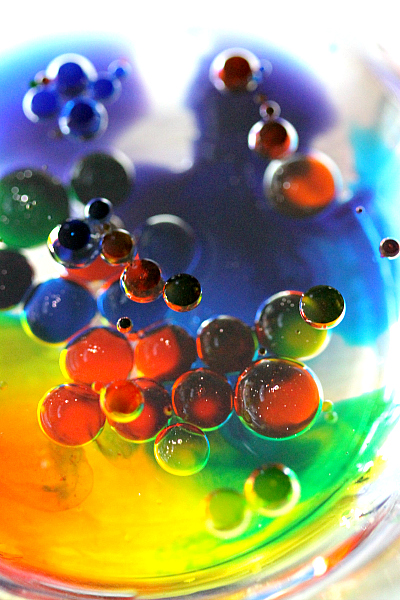
3) Take a fork and mix up your oil and food coloring..it will gather together in tiny bubbles of colored oil
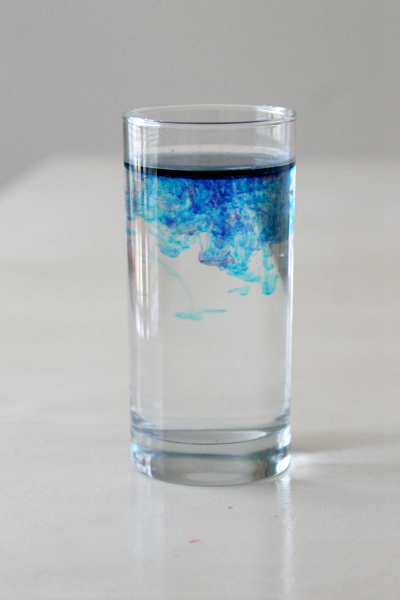
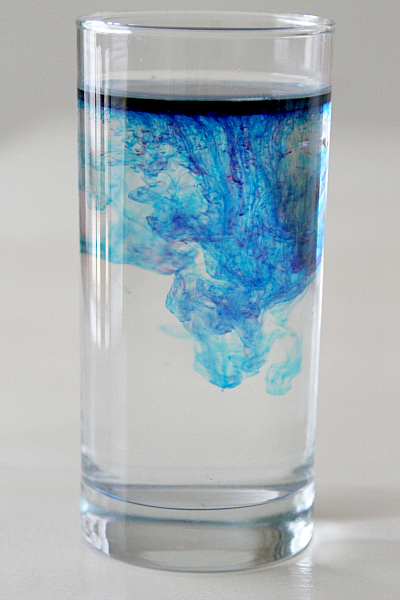
4) Pour into your oil mixture into jar with water. Let it sit and wait..in a few seconds, your streams will start creating little waterfalls!

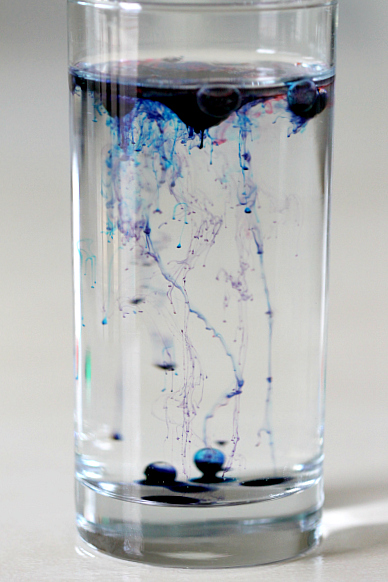
5) Let’s change colors and try again! Set up your water, mix new colors in oil and pour:
Tip: This time we poured fast, so our food coloring got stuck in oil bubbles and rose up from the bottom!
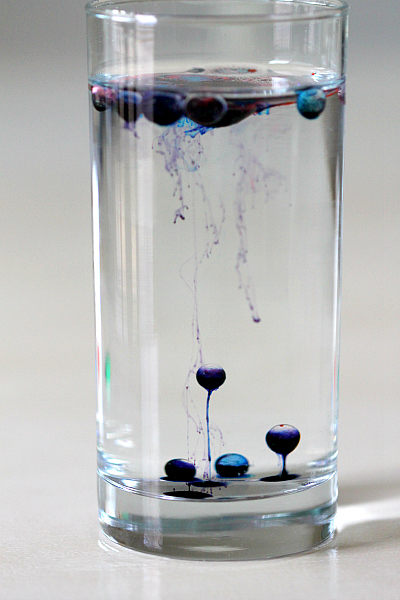
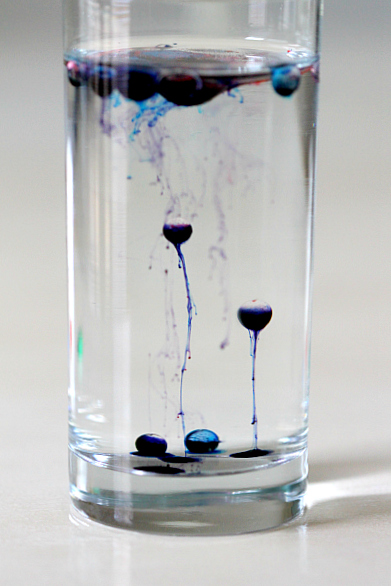
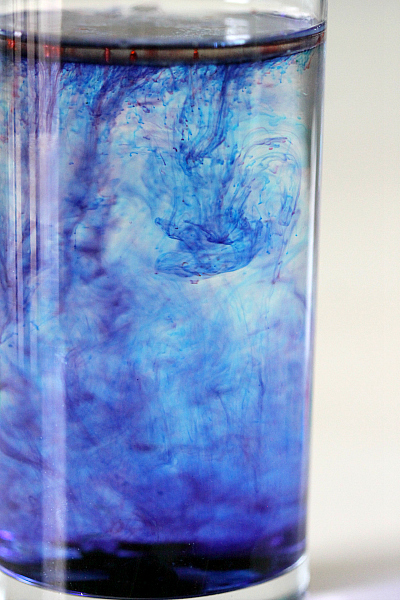
However, if you pour slow it stays on the top and in a few seconds starts “breaking free” of oil to stream down into the water.
Note: If your glass immediately fills with dye, chances are you used the wrong food coloring or way way over filled your drops. A little goes a long way in seeing individual streams.
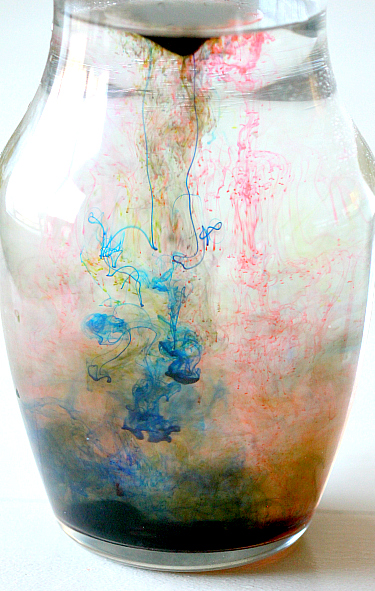
Charlotte watching…she said COOL!!
Slow pour….red and blue:
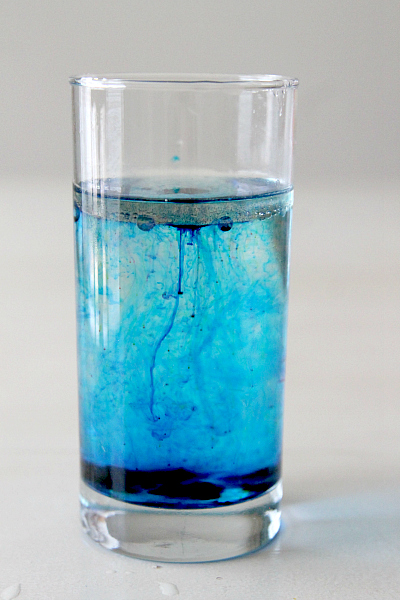
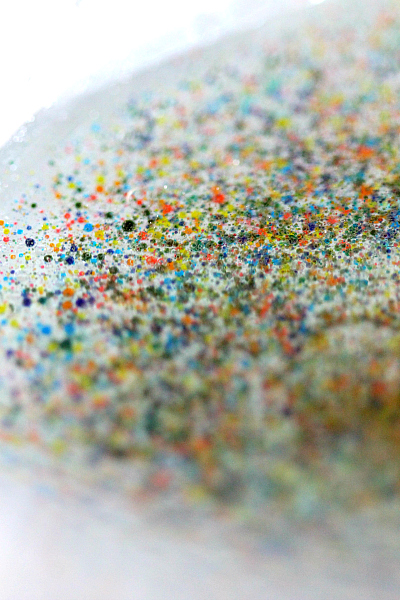
It’s a new result every time we mix colors and clean up is a breeze….dump into the sink. Done!
Except for us….we of course left rings of tested out dyes all over the counter…in which case those “lots and lots of rags” I mentioned initially will come in handy.
Enjoy!
Trisha
Thanks for linking up your indoor Waterfall project on Mommy Club Wednesdays! I love it!
I’m featuring it on this weeks linky: http://milkandcuddles.com/2014/01/wednesday-linky-link-up/
Thanks again!
I love experiments like this!
Thanks for joining the WWDParty! Please be sure to link to us in the future! We want to spread the word AND be able to feature and pin great posts like this!
Wow – how cool is this! Thank you for linking up with us at #WWDParty – I hope you have a wonderful weekend!
Thank you SO much for linking up to Mommy Club Wednesday! I love this experiment, not only is it beautiful to look at, but could be used to teach some great science concepts. Also- I really love your tutorials , and I’ve missed them! So I’m glad you’re doing them again! Hope you link up more of them in the future!
This is a really neat idea!!!! Bookmarking for the weekend to do with my kids. =)
That’s so neat! We watched this on Mister Rogers but I’ve never tried it myself. My daughter would love it so we’ll have to sit down and give it a try.
I remember doing something similar with my kids. We made an “ocean in a bottle” with the food coloring and water and oil. It was in a clear plastic water bottle and they carried it around forever watching the waves.
A very fun thing to do with young kids. Thanks, Trisha. I’m going to do it with my grandson soon,
Love this idea! I think we will do it tomorrow since we are off school cuz it is soooo cold outside!
That’s really neat and simple too! My kids would like making these – and best of all, easy cleanup!
How neat! Interesting to learn that you were a professional crafter. That explains the cool posts.
This is very cool. We will be doing this soon! We did something similar for fourth of July.
Very cool!!! My kids would totally love this!