 Need to know How to cap a Sprinkler head? This is your lucky day! This week we embarked on an adventure I like to call “let’s build a pond in our yard even though we have no idea what we are doing.” It actually turned out to be not as complicated as I thought and over the course of the next few days, I am going to share how we took a boring old garden space and turned it into a really beautiful piece of landscaping in our yard. Now when it comes to tearing up your yard, especially when digging, you can count on a few bumps in the road.
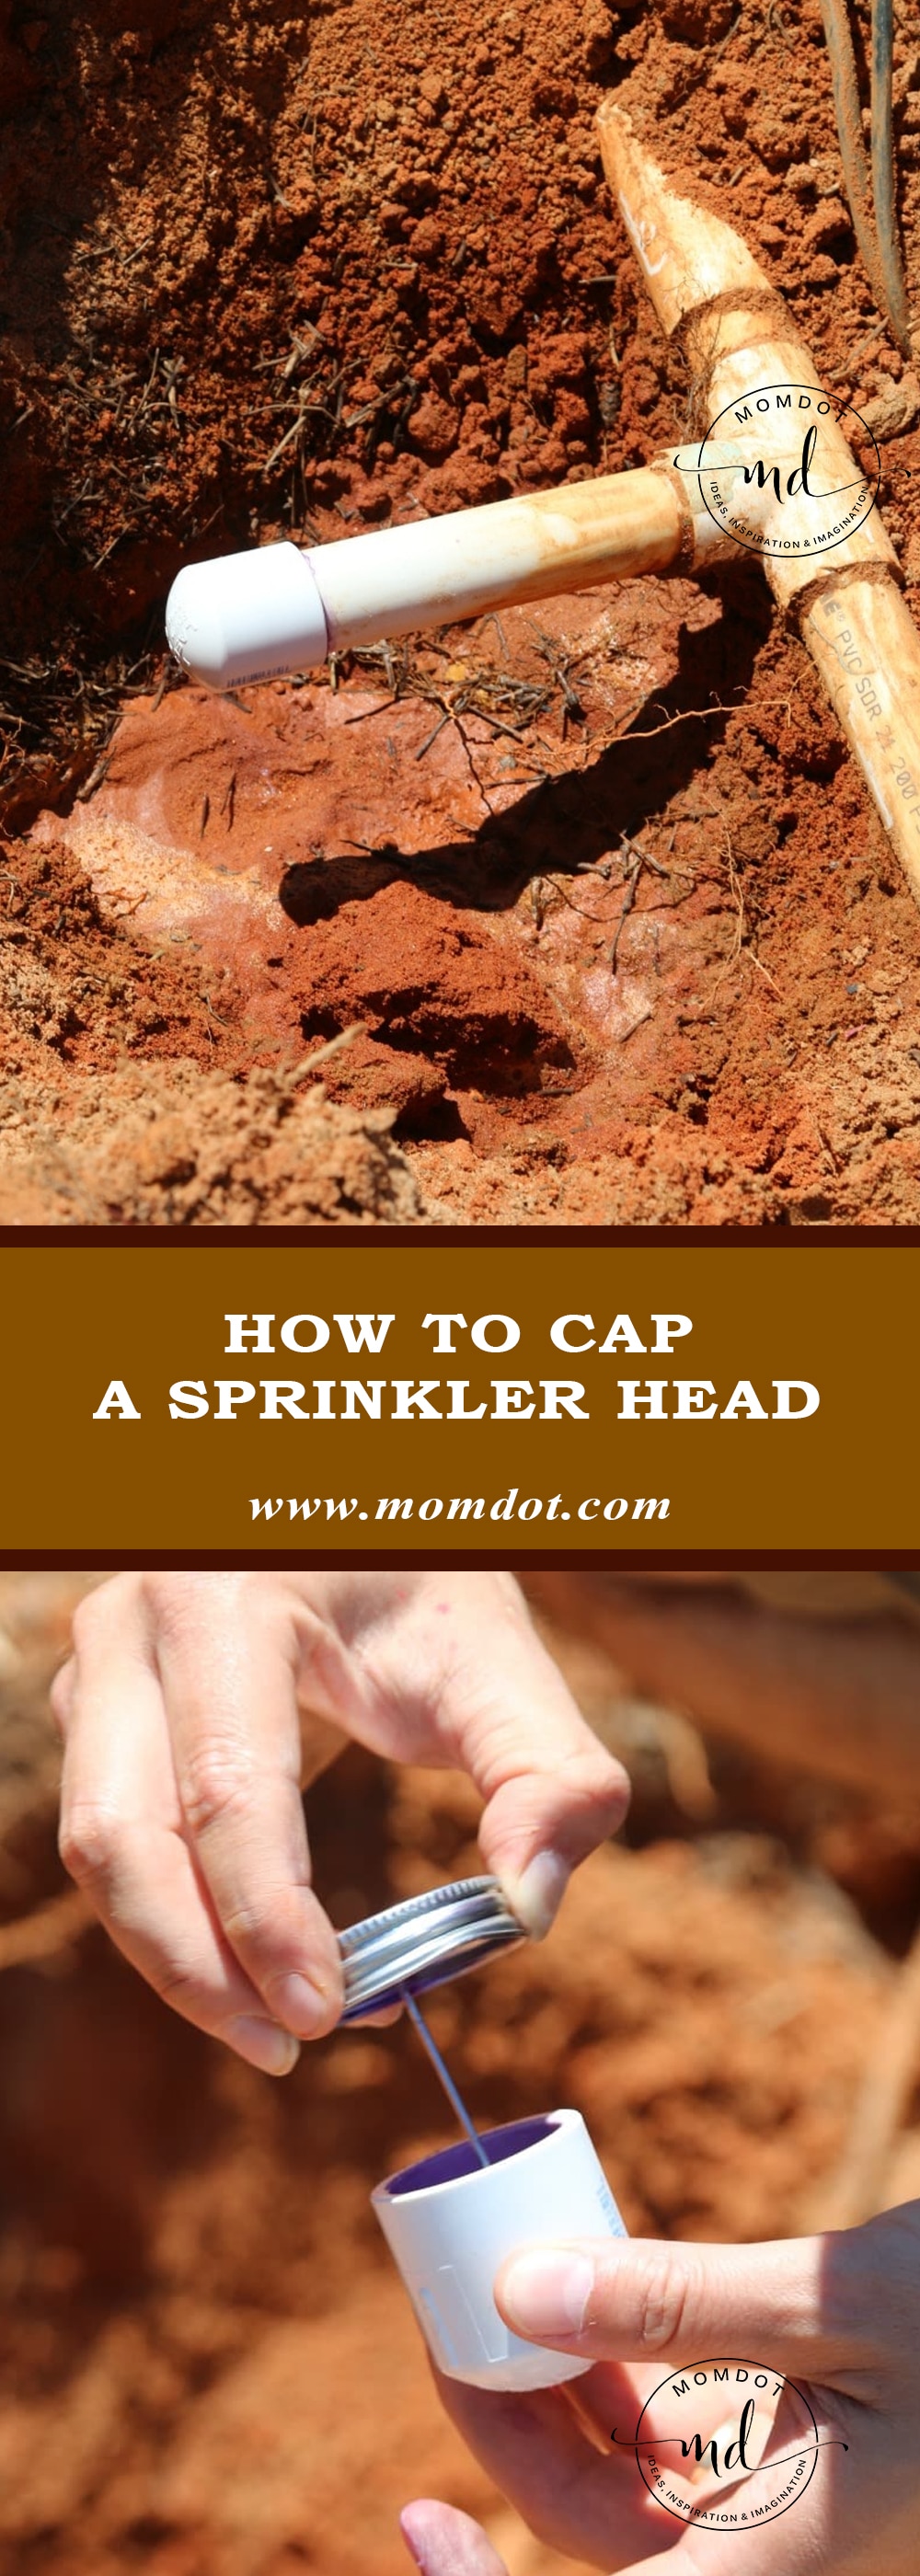
There may be roots, power lines, water lines and in our case, PVC pipe from a sprinkler system that ran straight through the area we were working in. Unfortunately, a pond is not one thing you can just get around the pipe over, so instead, we learned how to remove and cap the sprinkler head. I wanted to come share this totally easy DIY with all of you should you encounter this same issue while digging.
Before you get started- you will need a few things to cap a sprinkler head. You will need the cap itself (we got ours in Lowe’s in the plumbing section. Make sure you know the size of the pipe before you go as there are many sizes. Once you dig up the line you can typically see the size of the pipe stamped on it.
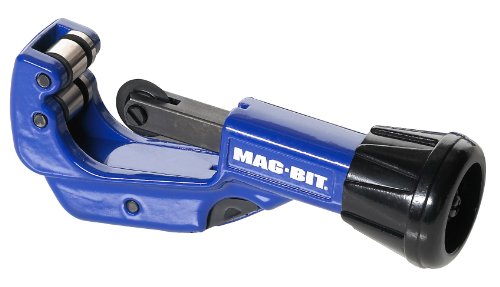
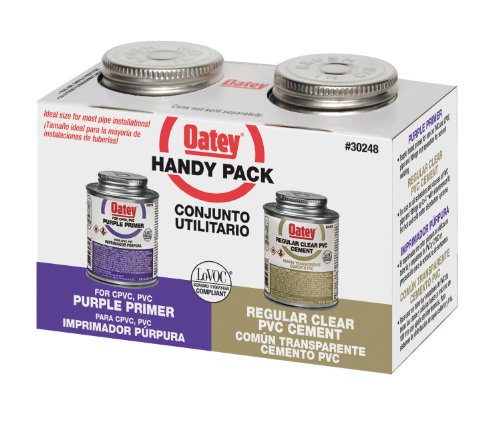
Take a picture of that and bring to the store), a pair of PVC pipe cutters, and PVC pipe cement/primer . The cost for these items were approximately $35.
If you are sick of driving around to get ONE MORE ITEM at the store ( I know this feeling), you can pick up both items here at Amazon, get free shipping on Prime, and save yourself some time.
MAGBIT 801.114C MAG801 Tube Cutter Copper/EMT 1/8-Inch – Oatey 8 oz. PVC Cement and Purple Primer
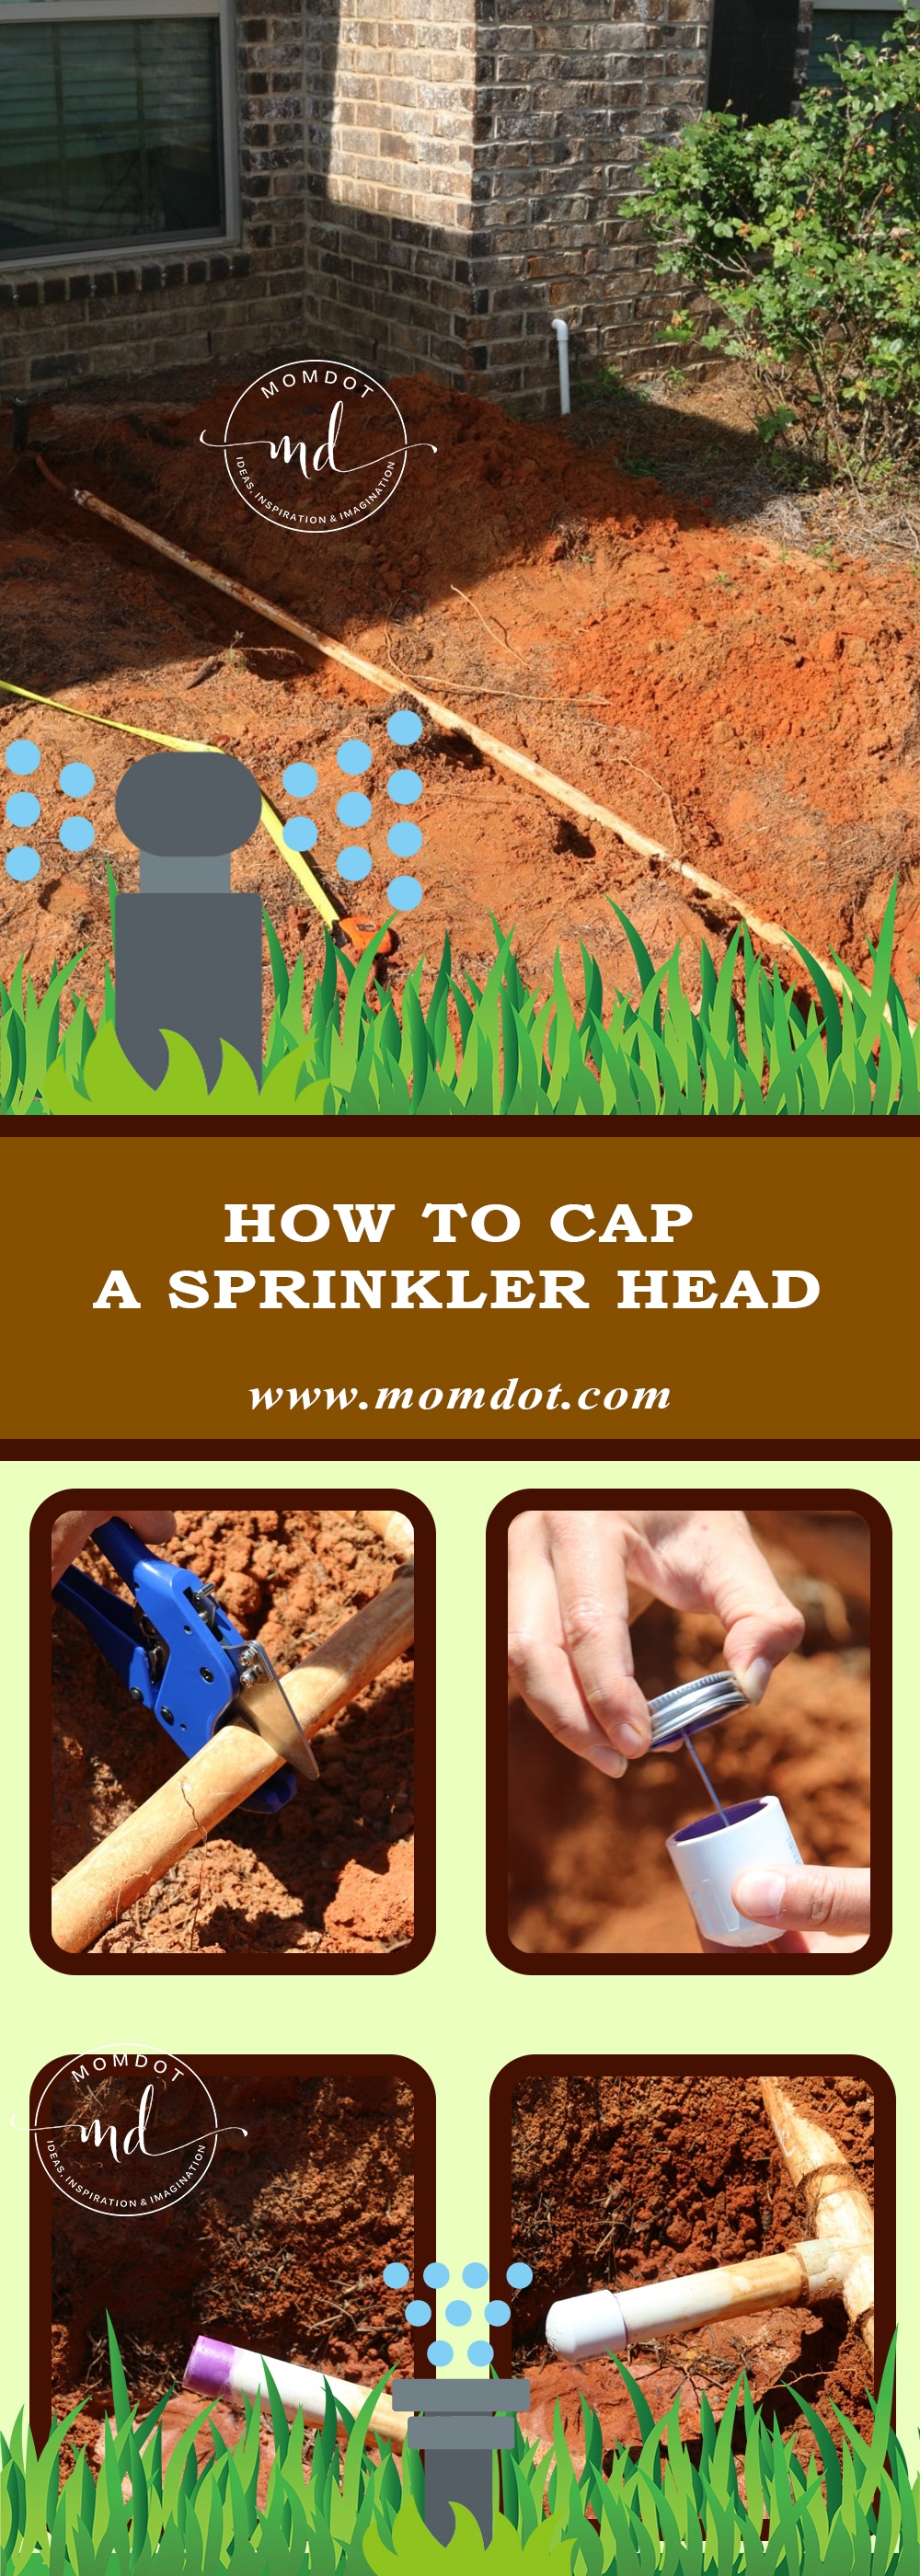
How to cap a Sprinkler head
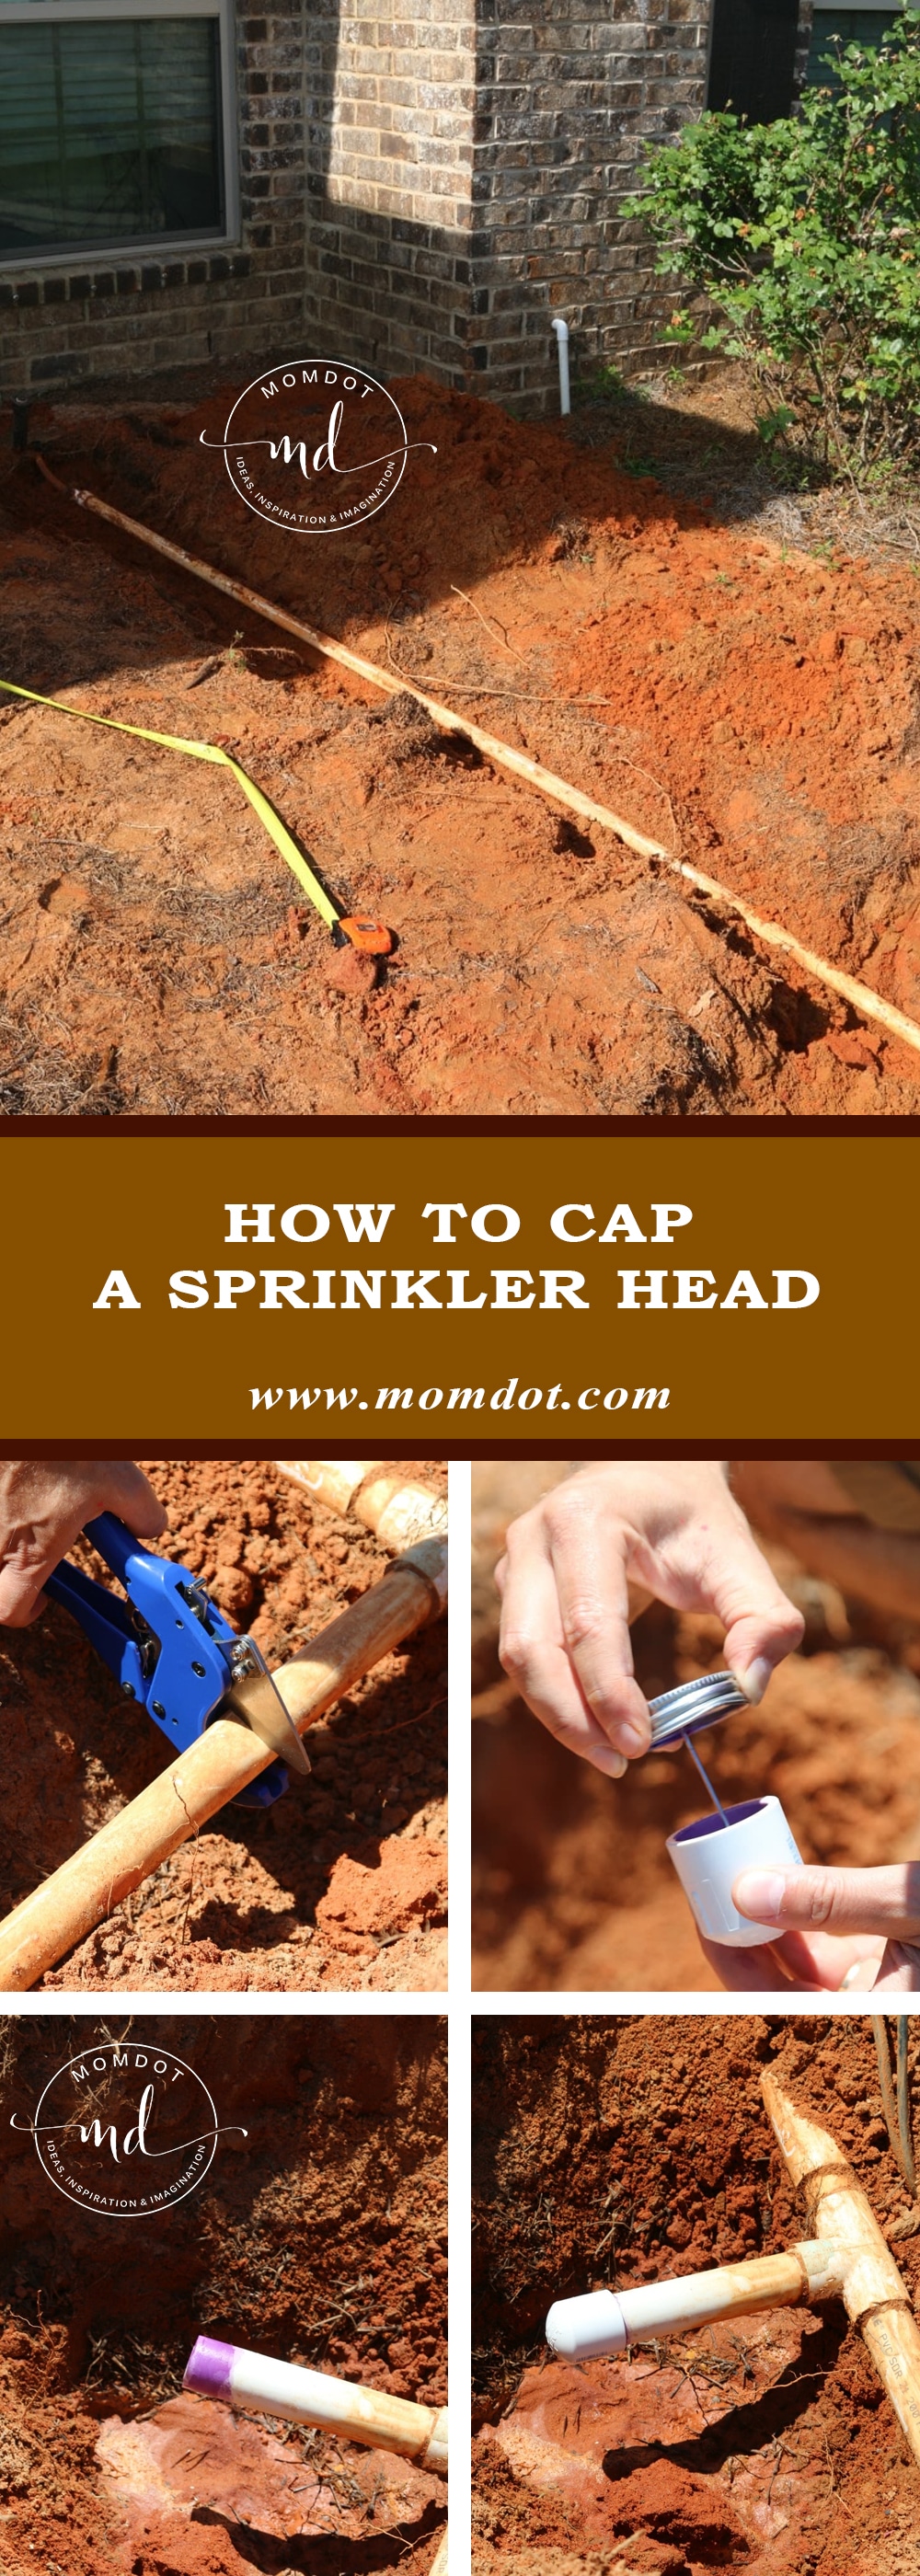
In our yard, we have about 10 sprinkler zones. PVC pipe runs in a grid throughout our front yard, back yard, and garden.
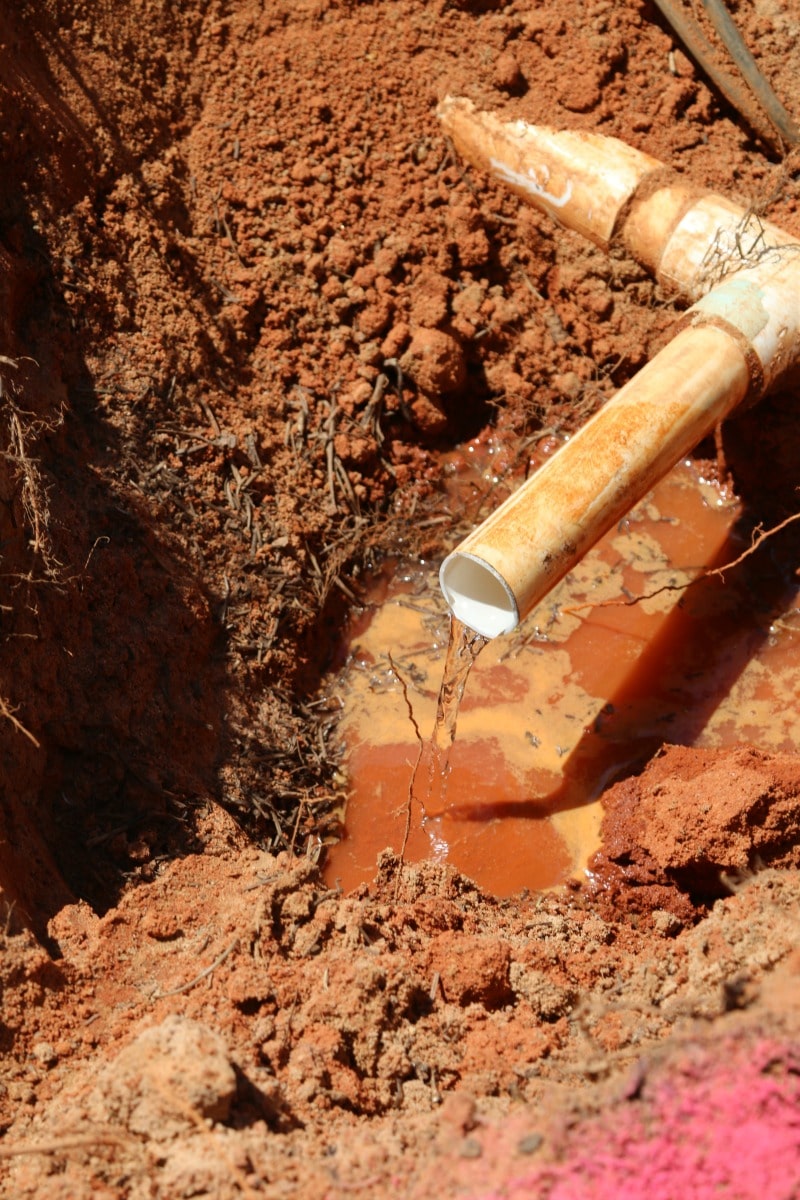
In the case of the pond, we were building in the garden area near the window and, as you can see, a pipe ran right through it. The pipe connects from the main system and has the head on the very end. You may be looking at all and saying
How do I cap off a sprinkler head?
- To cap off sprinkler, first turn off the water to the pipes. If you skip this step, you may regret it.
- Make sure you have Oatey Medium Clear PVS Cement and Purple primer and PVC pipe cutters on hand.
- Cut sprinkler pipe clean and let finish draining.
- Prime and Cement on Cap. Let dry a full 24 hours before testing pipe.
Now that you read the snippets, if you have time and want to know more, check out step by step our sprinkler DIY.
Step one of capping off the sprinkler head.
Turn off the water (ha!) and dig it out very carefully.
We knew it was there because we installed the system (by “we” I mean a company) when we moved in.
It was easy to start from the head of the system and dig out all the way to the base.
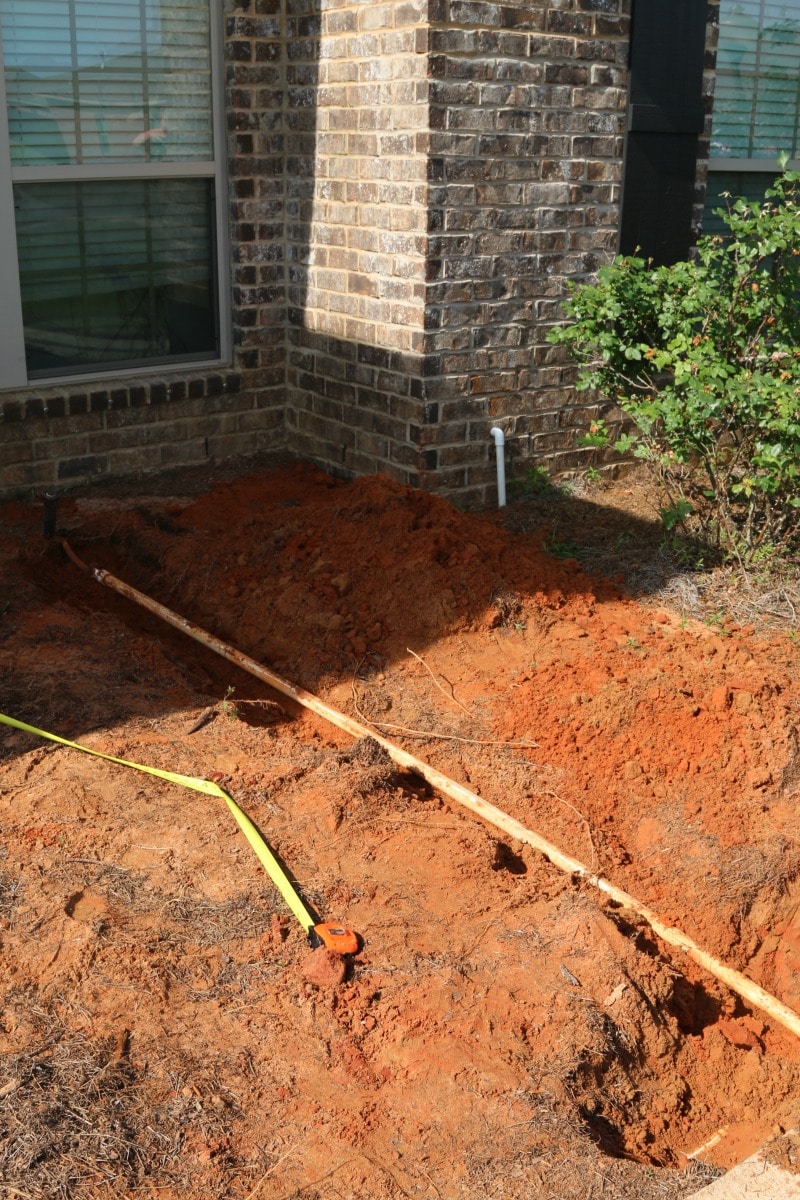
Step 2: Here is where you need some stuff. You can buy Oatey Medium Clear PVS Cement and Purple primer at any home improvement store or on Amazon.
You will also need a PVC pipe cutters that is the correct size for your system. There are two kinds. One that you just squeeze, and one that clamps down a little at a time like a ratchet.
We splurged on the ratchet version (an extra $10) and it proved seriously easy to use.
The brand is Brasscut PVC cutter and you can grab it at Lowes. Again, before you buy one, make sure you know the size of the pipe you are cutting.
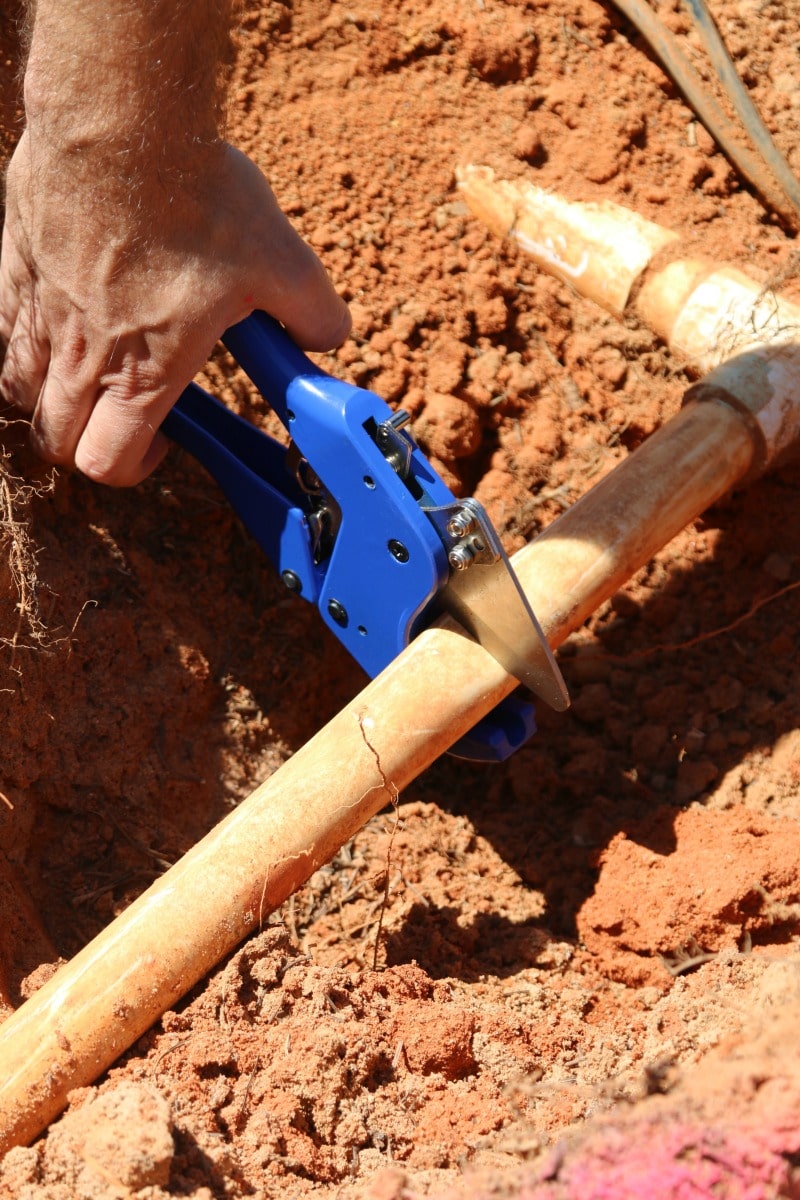
Step 3: The pipe cut clean through very easily and then excess water from the previous cycle poured out.
We let that drain, which took a few minutes till it was done.
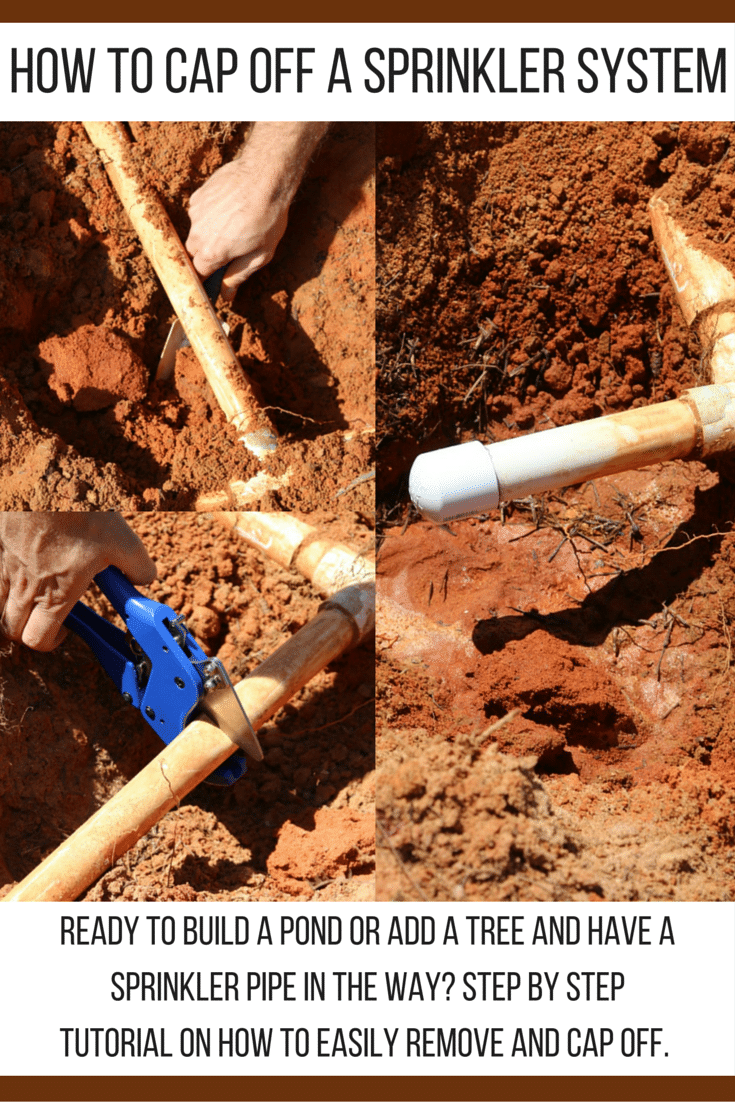
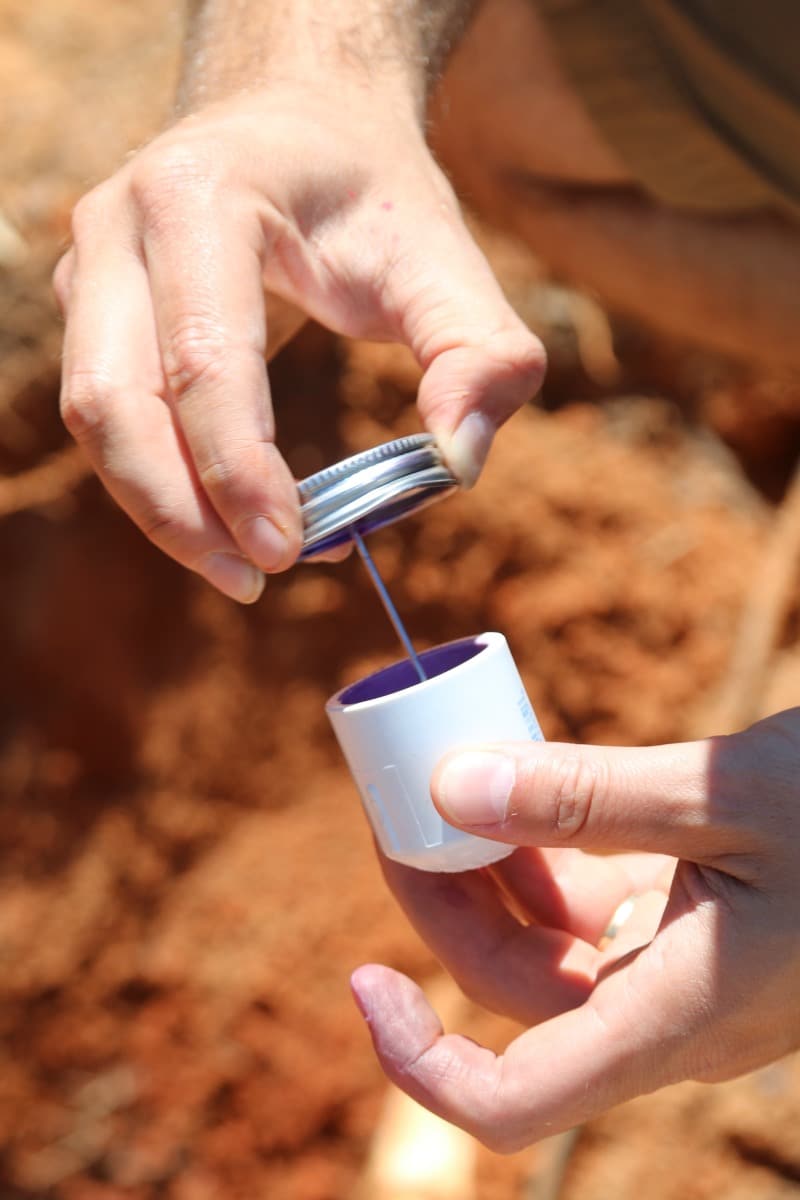
Step 4: Now very carefully open your PVC ceemt and primer.
It’s EXTREMELY strong smelling and it’s also hazardous, so be careful with this.
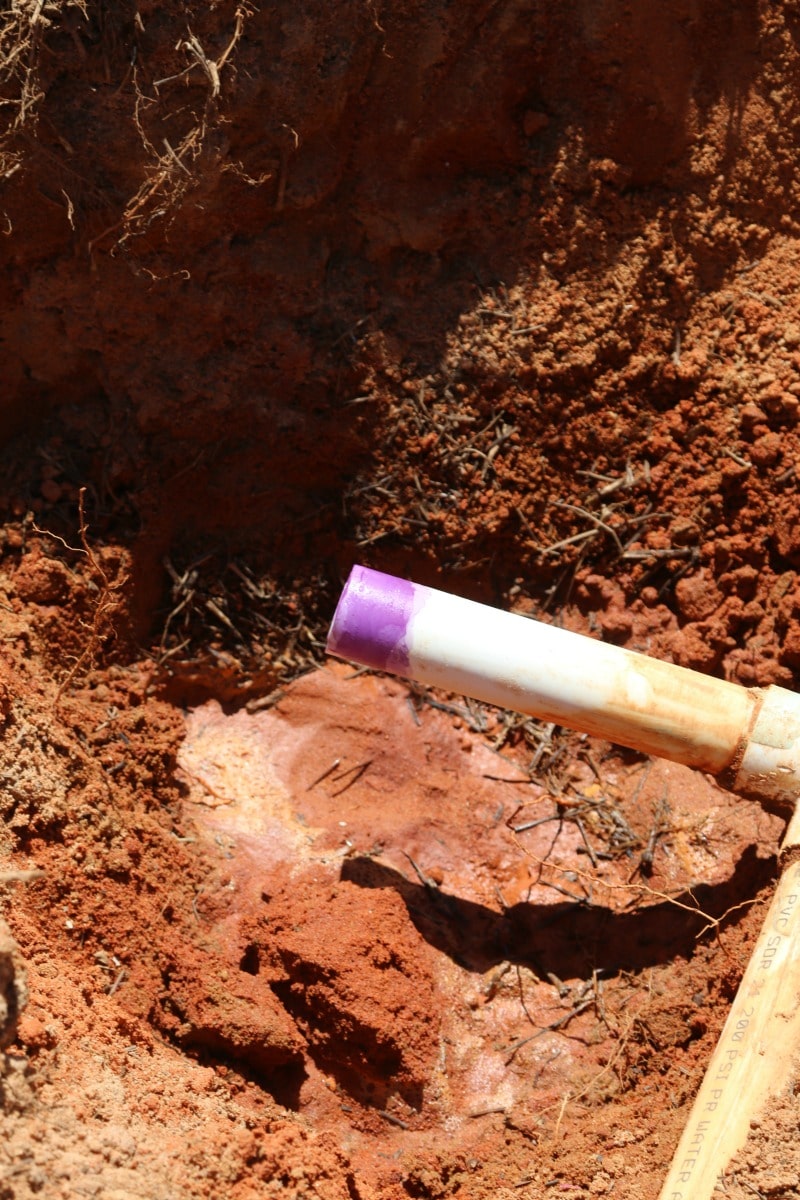
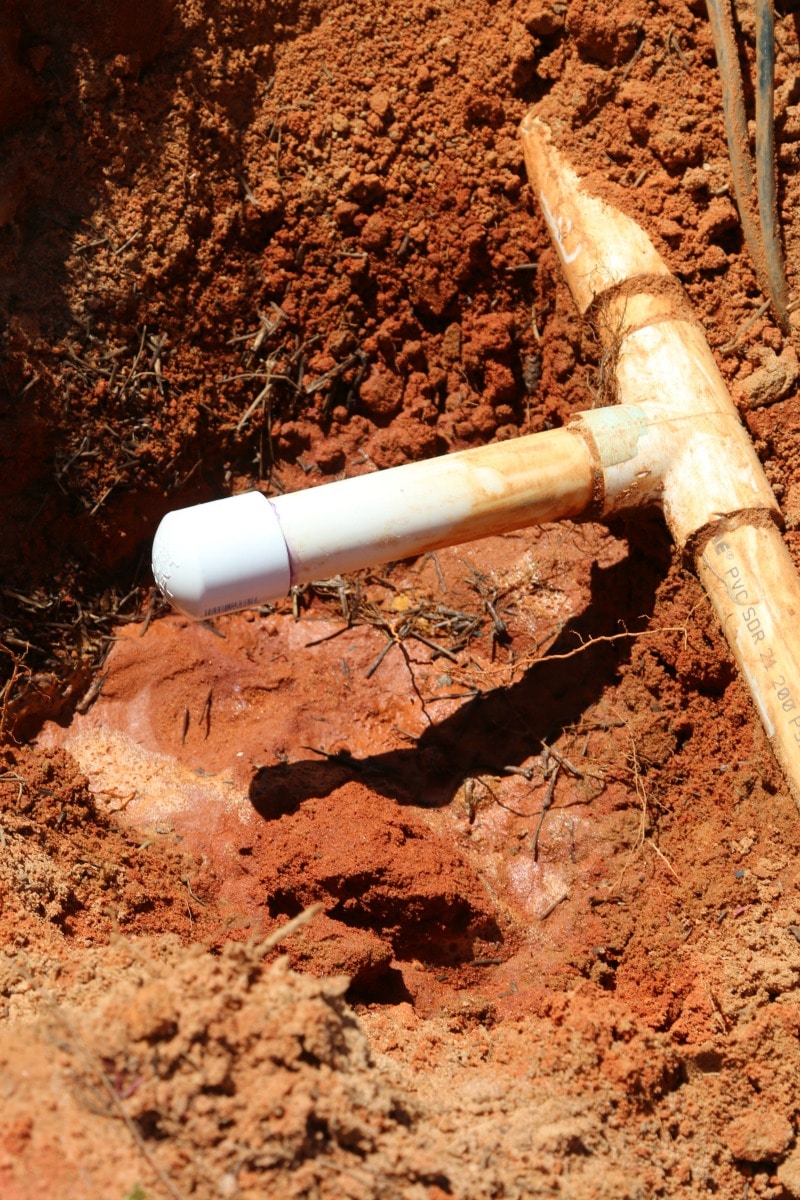
Prime your pipe on the outside and in your cap, then while wet, add your cement and secure the end piece on.
Oatey 8 oz. PVC Cement and Purple Primer
That’s it! Now we let dry (turned off the sprinkler a few days to be sure!) and our area was clear of any sprinkler head or pipe in the area. Capping off a sprinkler head was far easier than we thought.
Now that your sprinkler is out of the way, lets move on to How to Build a Pond.
~Trisha