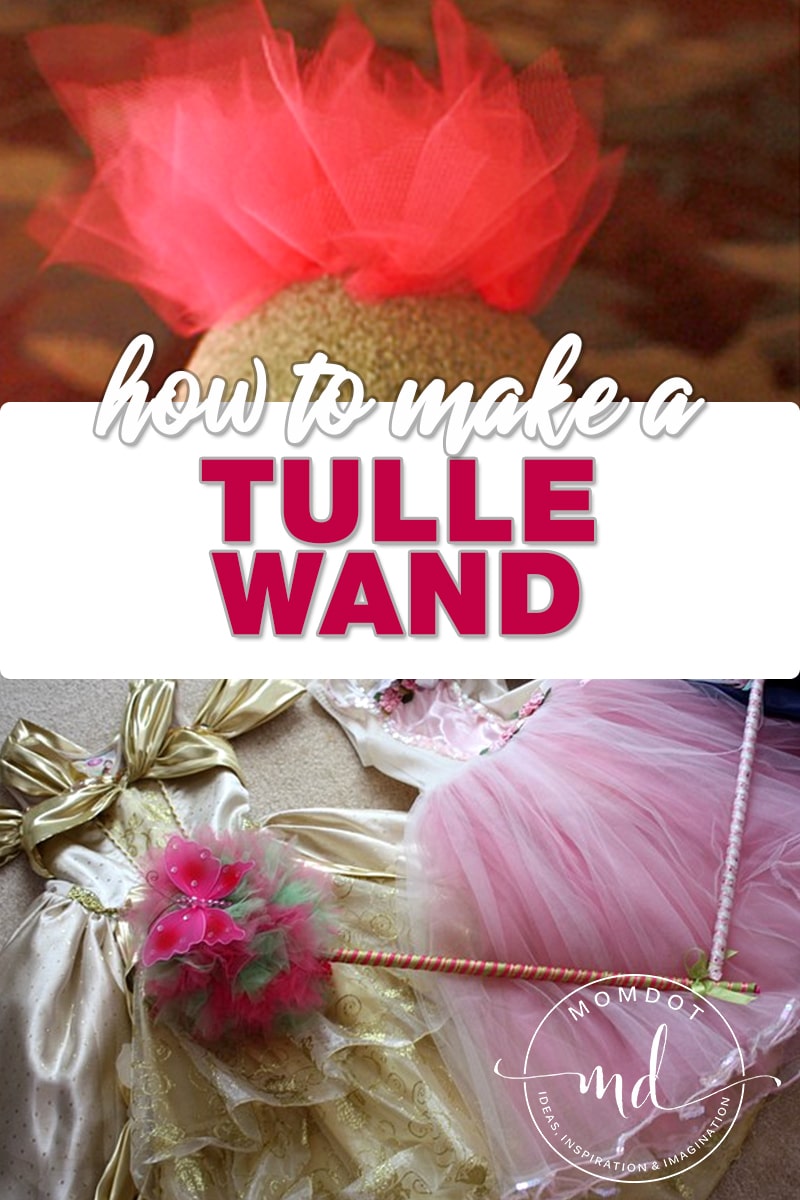
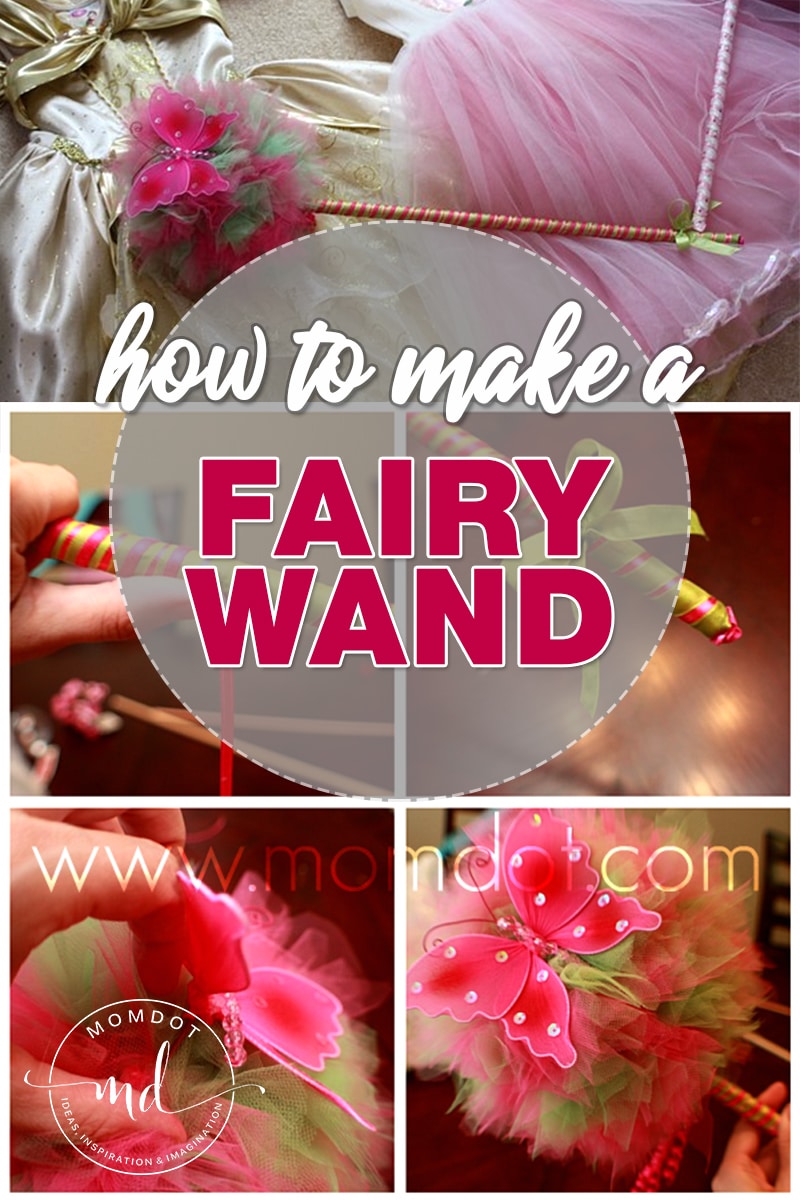
After doing the post on how to make a fairy wand, I had extra materials that I had bought in preparation and decided to make a tulle wand. Here is a how to make a tulle wand tutorial and a few do it yourself directions that will hopefully inspire you to create for Christmas or even Halloween if you are still looking for an outfit completer for your princess (or fairy!).
To Make this Tulle Wand you will need:
- Styrofoam Ball (they come in lots of shapes, I have just used a ball) (2 for $4 at Hobby Lobby)
- Straight pins (I used bridal and lace ones) ($1.89 at Micheal’s)
- Dowel (I used the other half of the one from my fairy wand) ($.99)
- Ribbons for the dowel (I got these 50% off at Hobby Lobby yesterday, $1 a roll)
- Butterfly or other decor ($1.99 at Hobby Lobby)
- Tulle (I had this at home)
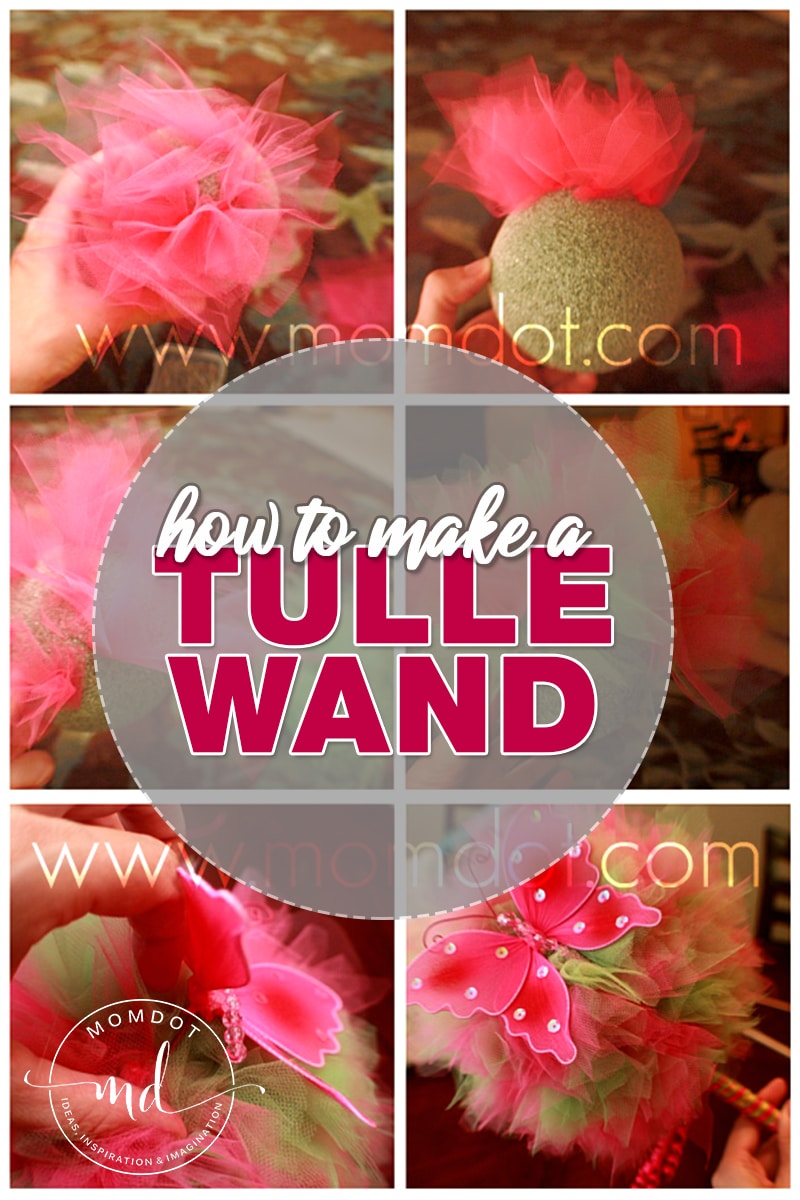
The first thing I did was cut my tulle into squares. I actually have tulle from the bolts, so its pretty long. I cut off about a 2 foot piece and cut length wise and stacked them on each other. Then I gathered and cut about every other 1.5 inches so it cut the tulle in long strips. Then I stacked the strips and cut again in 1.5 inches so basically what was left at the end was little squares. I didn’t pay too much attention to keep them even and if they are all jagged, its not a problem at all.
Its more about getting them closer to the same size over the exact shape.
I wanted to do my tulle ball in 2 colors, so I cut several preparation piles of tulle squares in two colors. Once you have your squares you can gather several squares at once (I thought 3 squares worked well) and I twisted the bottoms together which form more of a solid piece of tulle to stick your pin in.
Once gathered, stick pin and push into your tulle ball.

Continue until the entire ball is covered. It took me a few hours watching TV actually to fill it up how I wanted it.
Originally I had pushed in my dowel to create the spot for the wand, but that was pointless. At the end I couldnt even find the spot and had to make a new hole, so dont bother making a hole ahead of time.

 (gwen helped me)
Once your tulle ball is done, its time to work on the wand.
I covered mine in hot pink ribbon, dabbing hot glue along the way every few inches to make sure it didnt runravel on me. Then I did a second color to cover the rest of the dowel.
After the dowel was covered, I added some Korker ribbon strings I had prepared before I started.
 If you don’t know how to make korker ribbon (which is curly ribbon), all you do is heat your over to 275 and wrap your ribbon around your dowel, secure, lightly spritz with water over the dowel/ribbon, and bake for 10 minutes in the oven. Once you take it out, its curly. A lot of people put hairspray or other chemicals to make the ribbon stiff, but I generally don’t bother.
I added my ribbon to the top of the dowel and then removed some of the tulle to push a hole into the Styrofoam. Once I had the dowel inside the tulle ball, I pulled it out and put some hot glue on the dowel and put back in to secure.
Now from this point on its pure decoration.
I decided to take another strip of smaller hot pink ribbon and wrap around the dowel because it felt unfinished. I then added a small bow decorative bow in matching ribbon on the bottom. I also put a flower on the very bottom of the wand to give it more of a finished look.
Almost done, I pushed in a butterfly, which Charlotte really liked.


Because this wand has stick pins in it (although you cannot see them and they are unlikely to come out) its not really for a child that would be pulling the tulle out.
I would say more like 5 and up, but please judge your child and how likely they are to pull it all apart before you make this kind of wand. You can also check out my How to Make a Fairy Wand post for a hot glued version.
I think it turned out quite pretty! It is also super lightweight because its made with Styrofoam.

What do you think?
~Trisha
How easy and so cute!! I love this so much!!!!!
I ♡ THIS SO MUCH!!! Cant wait to hit my local craft store and get started
This would be perfect for my girly girl.
How gorgeous!! I am definitely going to make one of these for my little Hannah! These would make a gorgeous photo prop too!!
I made this for my 4 yr old granddaughters birthday party, it was a big hit at the party and she absolutely loved it, I did not use pins I poked holes filled with tacky glue and then poked the tulle pieces in
You are awesome!! I have 3 girls who have decided to be fairys this halloween and i was not looking forward to paying close to 15.00 a tutu, then add in accessories *like the wand, headband, etc.*. Thanks to your ideas and easy to follow directions im able to make 3 little girls very happy and on a budget none the less. Thanks!!
Instead of using the pins, can you just use the hot glue? I’m doing an Abby Cadabby party for my soon to be three yr old and these will make great party favors/decorations but some girls are not five and I want them to last!
Excited to make!
I think that the glue would bleed through the tulle?
I was thinking with the pins..to add glue to them before putting them into the ball. Probably alot more work, but think it might make the pins more permanent.
You and your craft and sit are amazing! Thank you xx
Love your Idea on the wands but i really need help on how to make the dress on the bottom of your page. my future daughter in law wants one for the flower girl. who happens to be my grandaughter, so she will get lots of use out of this.
that was just a costume. 🙂
@Staci, I was about to ask the same thing….for safety sake. @Trisha- THANK YOU so so much for sharing these ideas!! I am thinking of starting a little business doing kids birthday parties. Who could say no to this idea! 🙂
I don’t know how to put a ribbon around the waist. Is the elastic be abble to strech with the ribbon? I don’t know how is going to work. Can you tell me, please. Thanks
Anyway, your tuts are adorables
Very nice can’t wait to make one for my lil grand.
OMG! I have been reading and study your website since last night at work! I have already made a tutu and hairbow holder for my girls! You are saved on my favorites for sure!!! I can’t wait to try the purse project this weekend with my girls!!! You are SO creative and gifted–thak you for the wonderful ideas!!!
aww, thank you so much..that made my night.
It would be really really helpful if you were a little more specific about how much yardage of Tulle one needs to make this. Also, how large did the cut squares of Tulle need to be?
that would honestly depend on the size of child you were making it for, so each person would need to determine the length and thickness based on age and waist.
So adorable! I can’t wait to hit the craft stores for some supplies to try this and the tutus. For those of you worried about the pins – what if you dipped the pin into hot glue and then pushed it into the ball? I would think that the glue would keep the pins from coming out as easily.
Very cute…however, I would worry about the pins as well. You could wrap the tulle pieces around a pencil, dip in glue, then “plug” them into the ball…trust me..they won’t budge. any good tacky glue will work…
Hi I was wondering the same thing as one of the other lady’s, is there a way other than using the pins? I dont want my little girl to pull on it and it comes out. Also too I love the tutu’s they are so cute and was thinking of making some for my friends babies and mine, has anyone thought of a good idea to make them in to a dress? I did see the halter one but is their any other idea’s? My brain is trying to come up with something but Im lost! LOL
Thanks!
Hi Love the wand…. I actually got all the material to make this for my daughters 1st bday, I just was wondering about how big is the square. how many inches by how many inches. it would be so helpful. I just love this wand. Thank you 😀
This is perfect for my little flower girl to carry in my wedding. I am going to have fun making this and probably more as Im sure I will change my mind throughout the course of making it. Oh well, a variety is nice and that way if something happens to one, then we will have a backup. Thanks for the instructions
Adorable! I can’t make one for my Fancy Nancy 7 year old! thank you!
Have you had any problem with the pins coming out? I purchased the items needed to make the wonderful wand, but was wondering last night if the pins might work their way out? Or is this not a problem generally?
I just love your wand tutorials. Headed to the craft store to see what I can find to make one with.
wow! What a great craft! I will be trying to make one for my princess today! Thanks for posting!
That’s really cute!
They’re gorgeous. I’m looking forward to making them for my girls!
Exceptional wand making Trisha! I love these and any little girl would too!
You are so very crafty!! I love these!!
lol! Love that Gwen helped you!
They are adorable – you’re super crafty!
Super adorable!
I wonder if our children’s Christmas activity would want to use this as a craft. The little girls would love it.
Very pretty!
Those are adorable! You should sell them on etsy, I’m too lazy to make stuff like that and would rather buy it. 🙂
Wow that is adorable Trisha Great Job !
Very pretty thanks for the tip I think I’ll try making one for my little princess 😀
I think it’s beautiful. YOU are so creative and I know your daughter is going to be so excited when she see’s it. great Job
How wonderful, I love ribbon detailing.