How to make a Picture Frame, an easy DIY tutorial on a perfect homemade Christmas gift. Create a picture frame with no glass that can stand on its own and done in minutes.
This is a sponsored post written by me on behalf of Duck Brand® for IZEA. All opinions are 100% mine.
When you think of how to make a picture frame, you likely think of four pieces of wood cut at an angle, lots of time, glue, and skill. I am here to share with you a much easier way to create a 5 Minute Frame that is so child friendly that it makes the perfect homemade Christmas gifts.
Let’s get started! 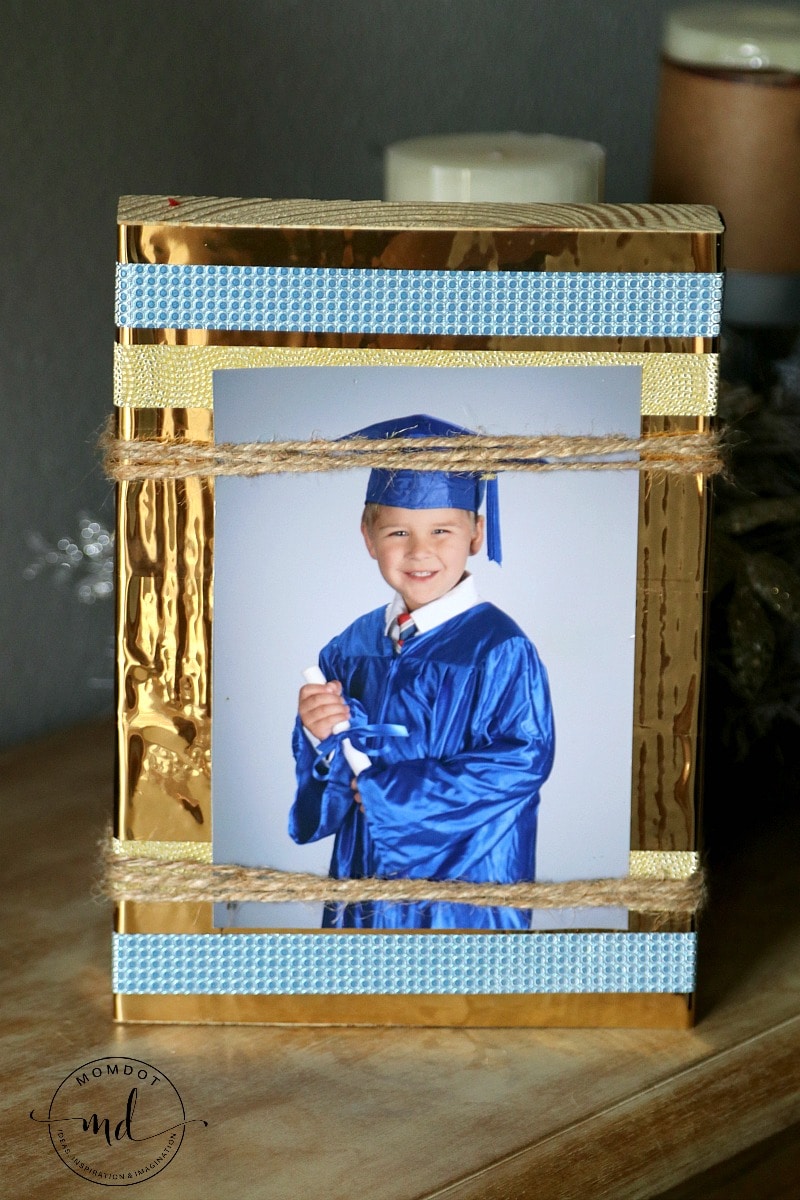
How to make a Picture Frame
To get started on your DIY frame you will need a few things. 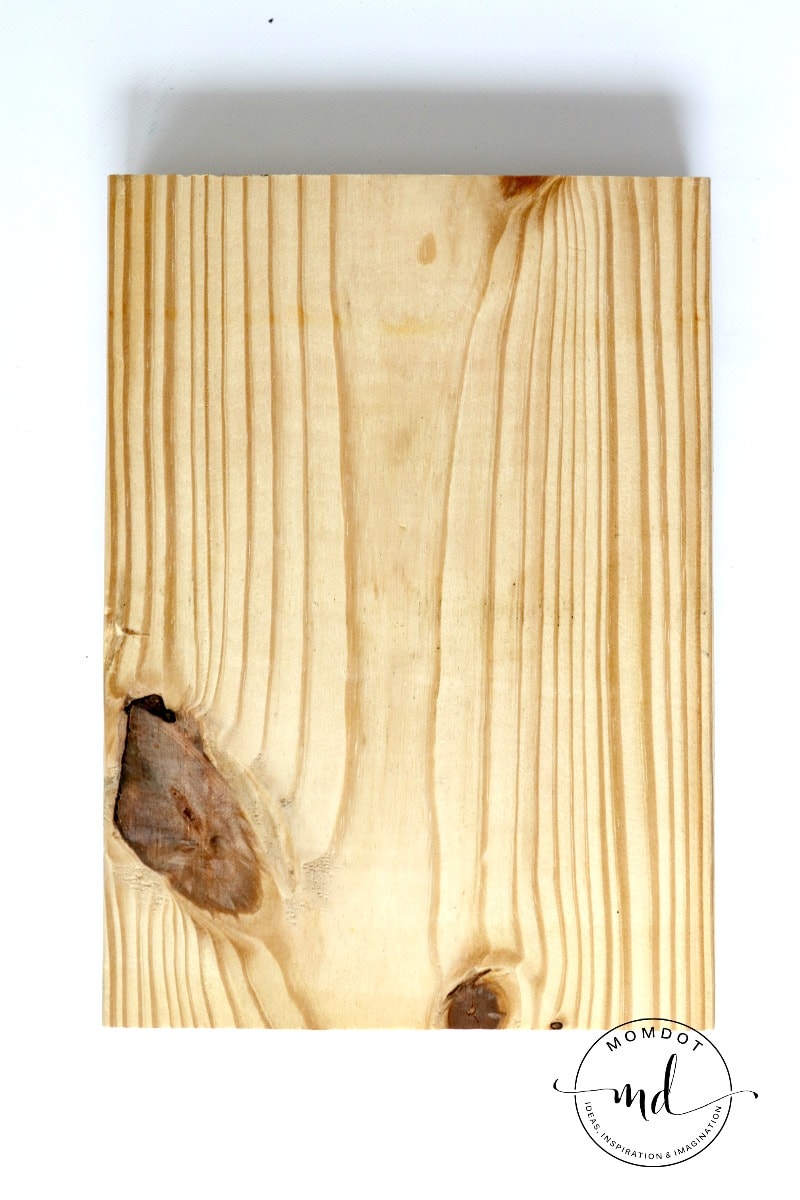
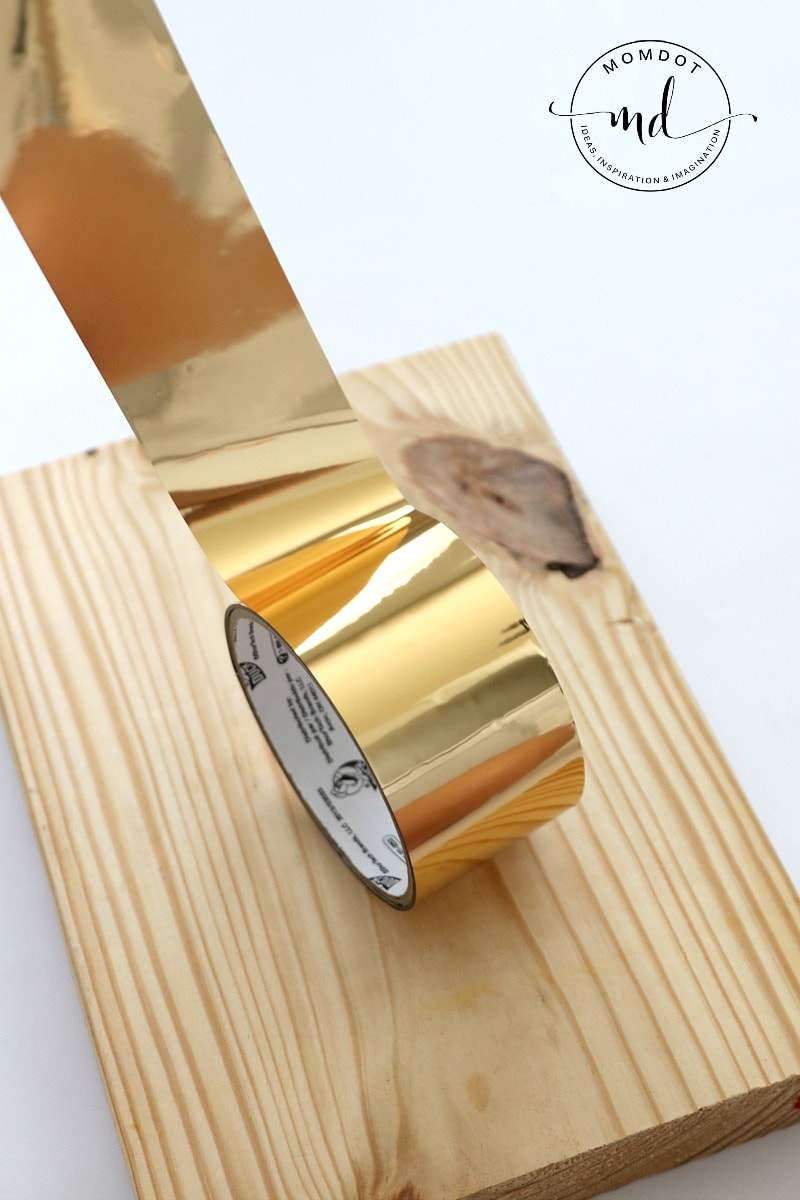
7 x 10 block wood: I had mine cut at a local home store.
Just search the wood section, find a long piece of wood about 1.5 inches thick and 7 inches wide and have cut at the 10 inch mark in length. The store did it for me and left me with about 9 blocks of wood for under $10!
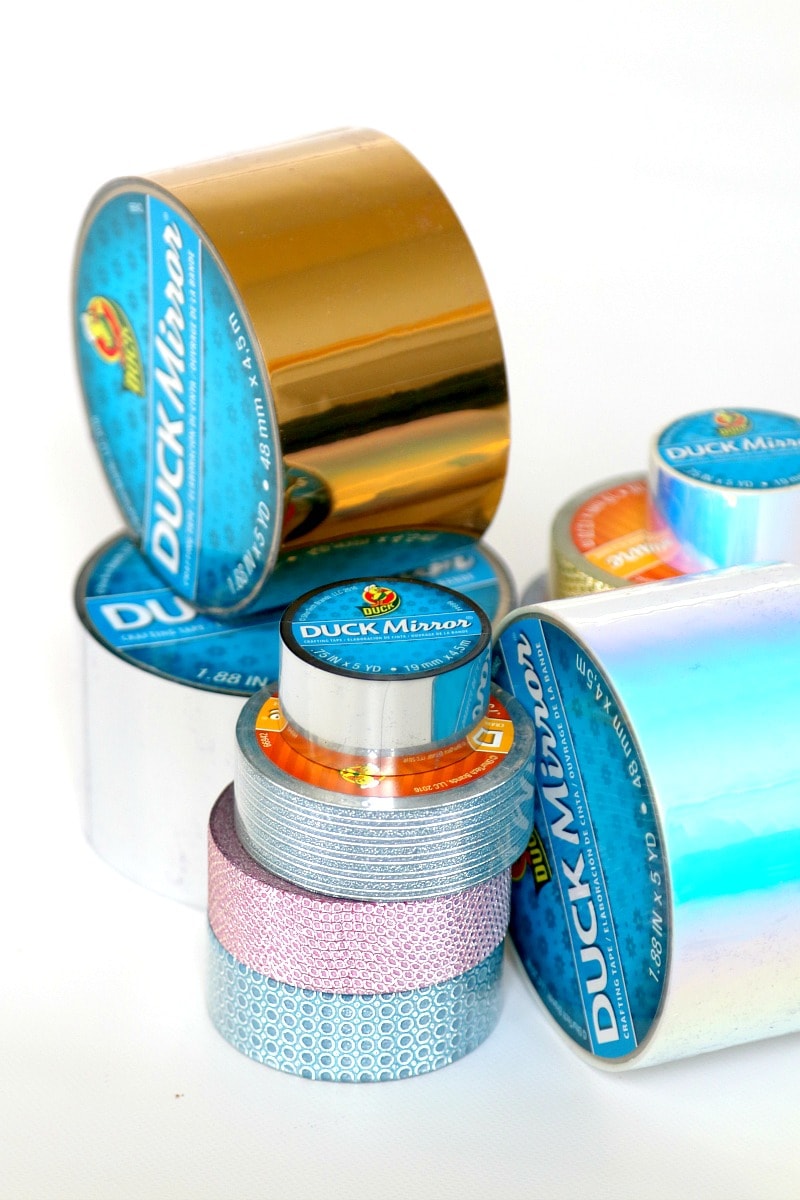
Duck Tape: I love using this reflective and decorative Duck Tape.
It sticks super easy but doesn’t get stuck so hard that if you make a mistake you cannot remove. Additionally the smaller decorative pieces can be torn without scissors, making this frame craft perfect for kids to create and pass out as gifts as well.
From a parenting perspective, any time I can get out of not using paint on a project I do!
Twine or Ribbon: I have twine at home that I use to hold to the image in place but feel free to customize with ribbon of any color.
Used in this post are:
- Duck Mirror® : feature a unique mirror effect that adds a shine and dimension to almost any of your DIY and craft projects. They’re ideal for scrapbooking, decorating and even for adding embellishments to other Duck Tape® creations. This new innovation works great with electronic cutting machines so you can create your own designs, shapes and letters.
- Duck Texture®: Featuring trendy colors and patterns, you can add a textured surface to any craft or DIY project. Personalize your school supplies or bulletin boards, add embellishments to Duck Tape® projects or create your own craft that you can actually touch and feel. Durable and easy-to-apply, this mini roll lets you take your style and personality with you wherever you go – no scissors required
DIY Frame Instructions
If you prefer, here is a simple video to show you how you can make this frame with wood and duck tape!
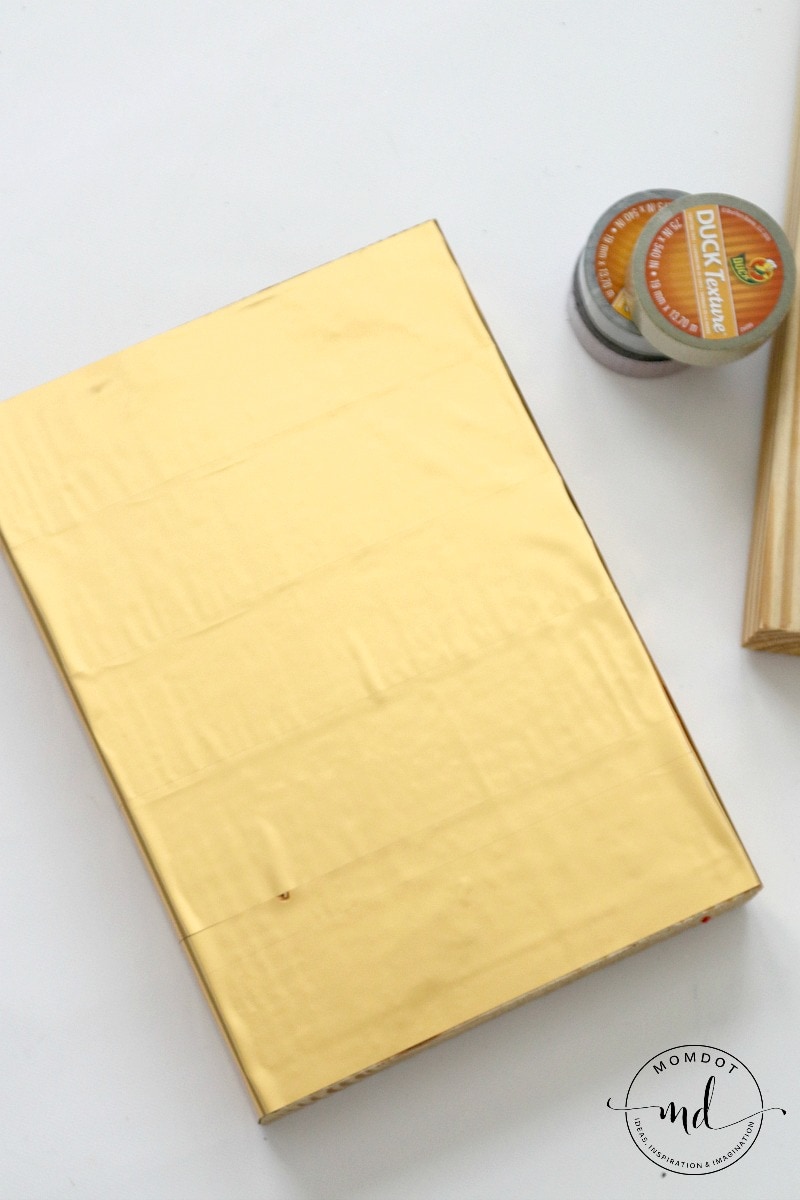
Using your Duck Mirror® tape, simply wrap your block of wood.
Do one stripe at a time so you can make sure you have full coverage.
Your choice is yours to do the back or not, but my roll had enough to complete two frames with partial back coverage.
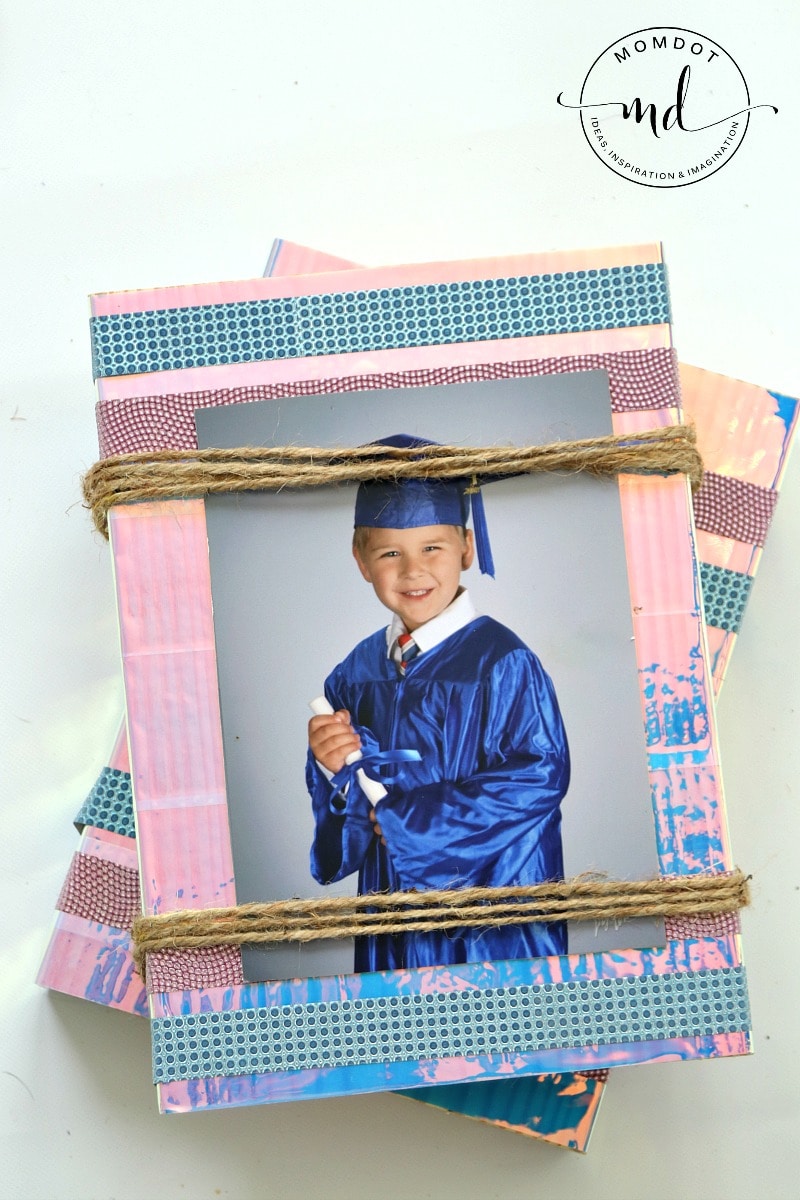
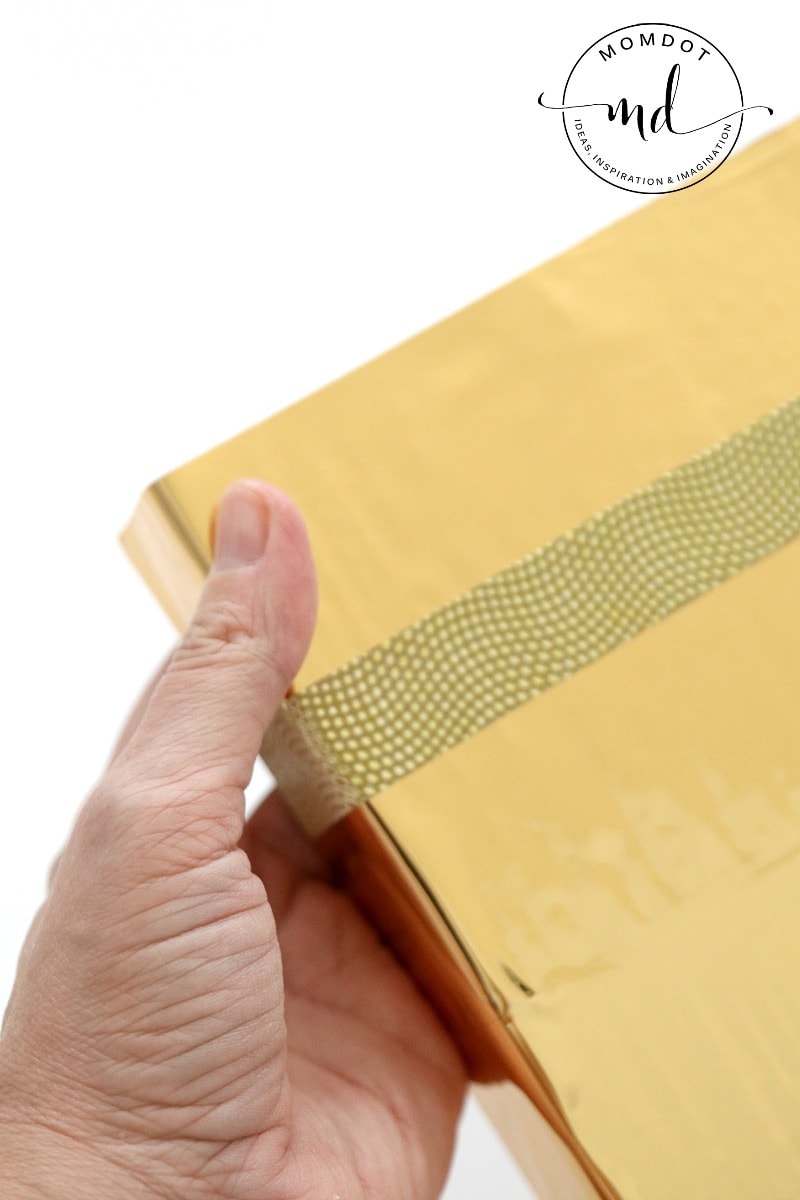
Now add on your decorative tapes in any pattern you like.
This helps not only bring some texture to your frame, but cover up any seams that may be obvious.

Once your pattern is complete, wrap the top and bottom of your frame in a few loops of twine or ribbon, keeping close to the block of wood, and tie off in the back.
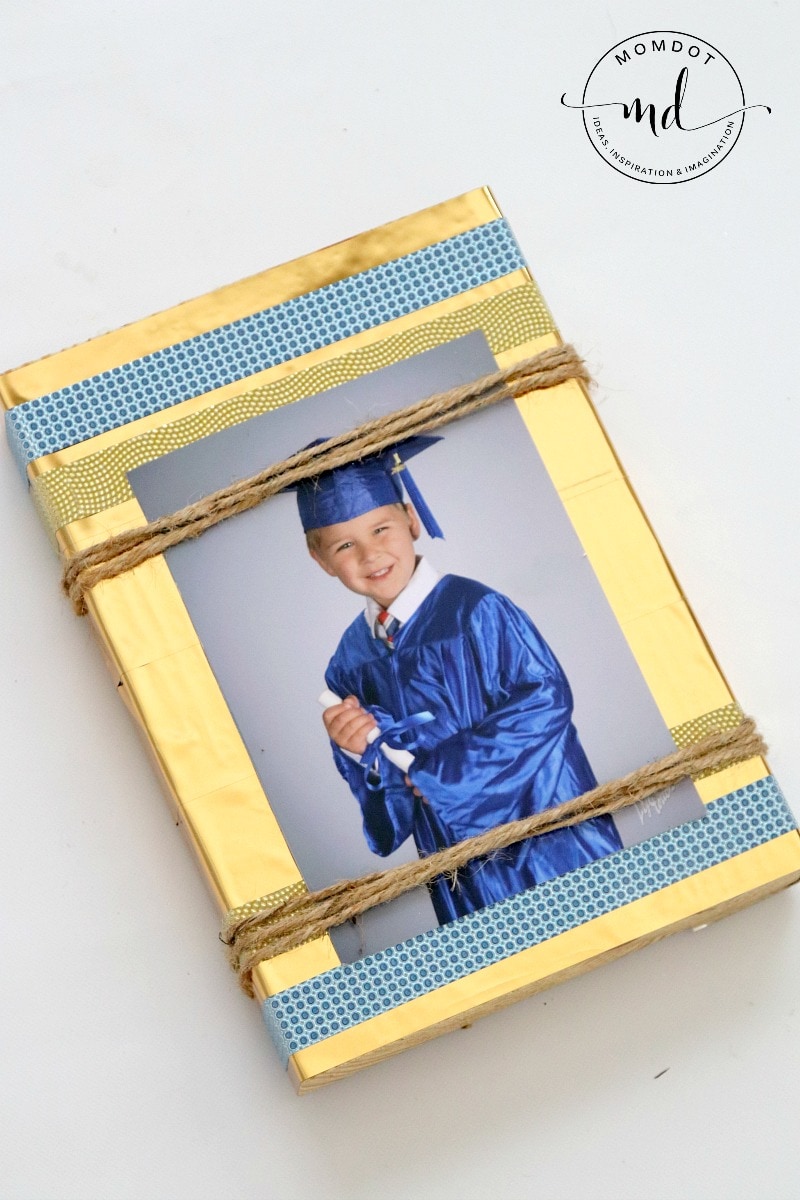
You are done! Simply slide a picture under neath the twine and set your wood up. The 1.5 inch block is super sturdy and doesn’t need any additional propping.
This frame works perfectly on a book shelf.
Looking for more awesome projects you can complete? Make sure you Follow The Duck Brand on Instagram