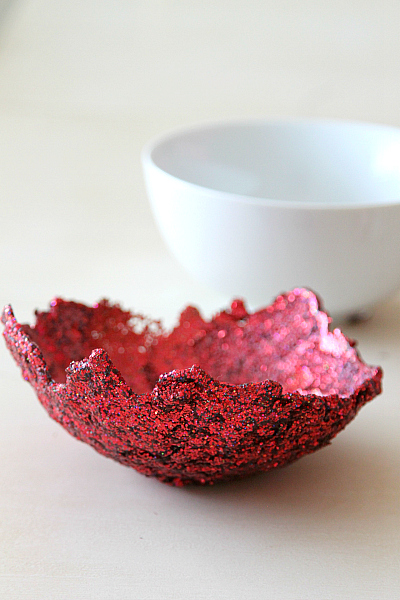
Glitter and Modge Podge: I see it in crafty craft sites everywhere.
It seems like everyone has figured out how to make these two melt into some sort of amazing greatness. Me? I am just happy to find a reason to USE the gallons of glitter that are sticking all over this house. Originally I saw a picture of a glitter bowl out there in social media. I really wish I knew who to give the credit to, but please know that sticking glitter on a balloon doesn’t belong to me.
I am just a craft testing bystander.
Here we go:
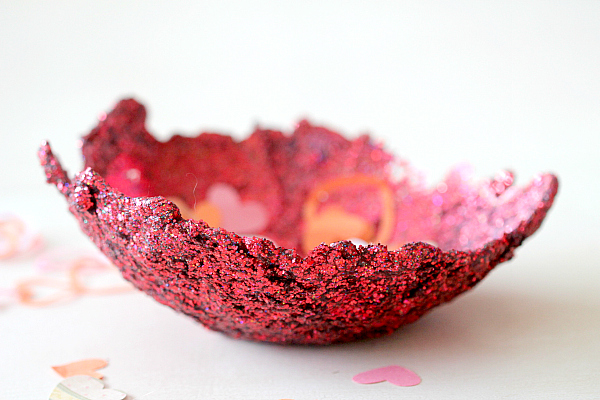
Valentines Day Glitter Bowl
You need
- Hoards and Hoards of Glitter
- Modge Podge
- Paintbrush
- Balloon
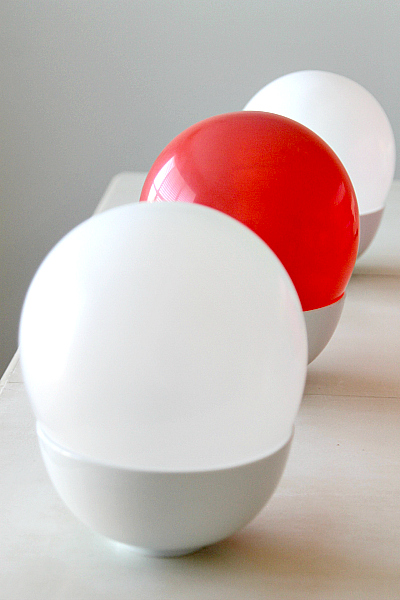
![]() Blow up balloons and sit inside a bowl:
Blow up balloons and sit inside a bowl:
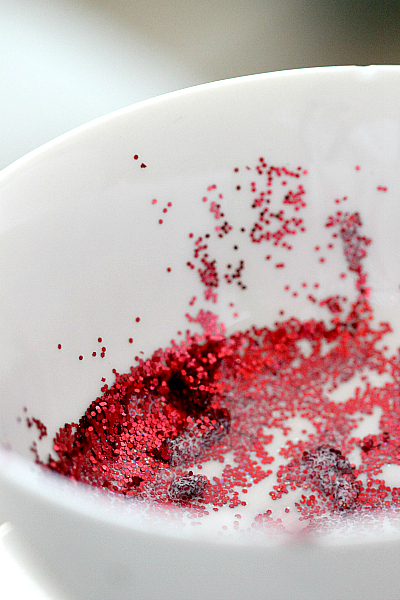
![]() Mix together a crap ton (that’s an official term) of glitter and modge podge. There are not measurements here because its really going to depend on the size of the bowl you are making. It needs to be fairly thick though.
Mix together a crap ton (that’s an official term) of glitter and modge podge. There are not measurements here because its really going to depend on the size of the bowl you are making. It needs to be fairly thick though.
Like so:
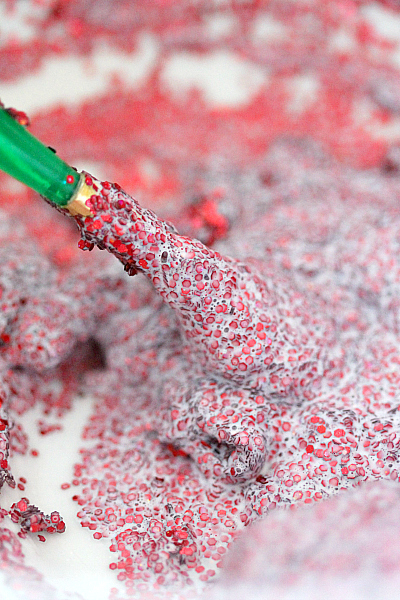
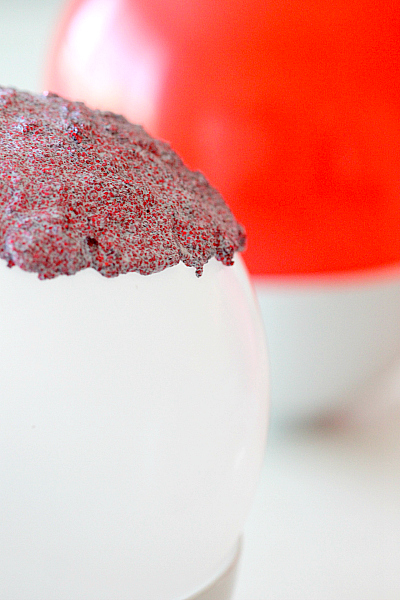
![]() Start adding to your balloon in small quantities working around the balloon and shaping into the bowl. How far you go down will depend how large you want the bowl. No part of the balloon should be showing through so fill in all the holes. To be perfect honest, I ran out of modge podge half way in so my bowl wasn’t as tall as I wanted.
Start adding to your balloon in small quantities working around the balloon and shaping into the bowl. How far you go down will depend how large you want the bowl. No part of the balloon should be showing through so fill in all the holes. To be perfect honest, I ran out of modge podge half way in so my bowl wasn’t as tall as I wanted.
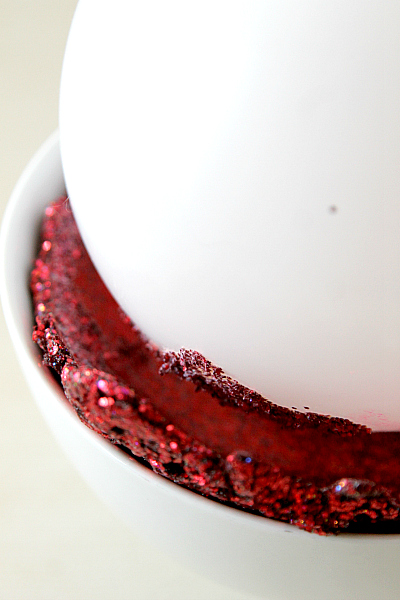
![]() Let the balloon dry. This took about 24 hours for me but depending how large and how thick your bowl is, this may take longer. Do NOT get tempted to remove it before its time. As it started to dry, it looked less and less like glue and more and more like glitter.
Let the balloon dry. This took about 24 hours for me but depending how large and how thick your bowl is, this may take longer. Do NOT get tempted to remove it before its time. As it started to dry, it looked less and less like glue and more and more like glitter.

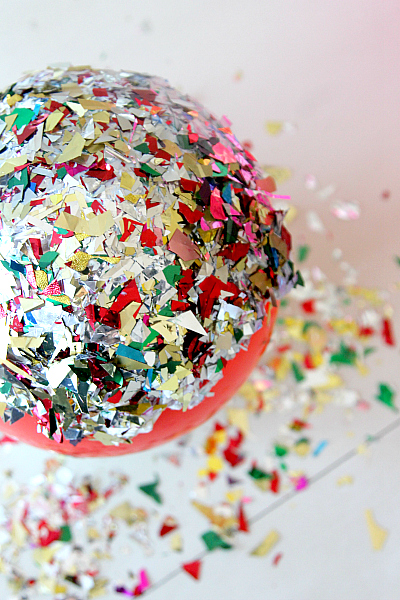
If you are wondering about the balloon in the background, I also tried one with confetti. Its taking a bit longer to dry so as of now its not available to show yet.
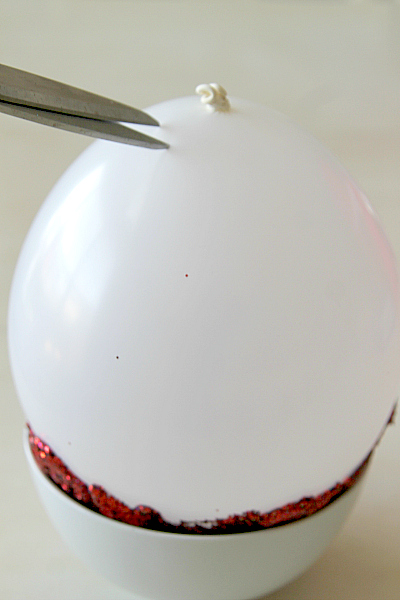
![]() After the glitter goo is completely dry (again, may take a day or two!) you can pop your balloon. I cut a hole at the base so it slowly shrank. It made a cool sucking sound as it separated from the glitter.
After the glitter goo is completely dry (again, may take a day or two!) you can pop your balloon. I cut a hole at the base so it slowly shrank. It made a cool sucking sound as it separated from the glitter.
My bowl was flexible a bit and looked really cute. Ideally I’d like to try this craft again and fill the balloon all the way up the sides so I could sit a plant in it.


Want to follow along with more Valentines day crafts? Follow my Pinterest Board here!
Do you love Valentines Day Crafting as much as we do?
 We have great full picture and DIY tutorials (denoted with a
 ![]() ) or you can check out some of our amazing blog resources for tutorials from other talented bloggers!
) or you can check out some of our amazing blog resources for tutorials from other talented bloggers!
I’ve been looking at these a ton. I was wondering though… Can you put food in them? Use them for parties?
How neat!
This is something I could see my daughter really liking!
This is fantastic!! I have some blue wintery glitter that I need to use up. This is a fabulous idea that I have seen but never realized how easy it would be to make a glitter bowl. Thanks for a great tutorial!
This is such a neat craft idea. I love using glitter to create new things.
I love this idea. Will plan to make several of these with my niece and nephew…they love Aunt KK’s craft projects. 🙂
I LOVE this idea! How fun! And let me say that it cracked me up that you used the term “crap ton”. I love you for that!!! This will definitely be worth trying! 🙂
Loved this when I saw the start on facebook. I am absolutely trying this.
So pretty! How durable is it?
You know, its pretty durable! Its flexible too, so its a really interesting texture. I was telling my spouse that Id like to make a bigger one and put it around a flower pot.
That’s super cute! I’ll have to try that.
This is a beautiful craft project that makes something that looks like a treasure.
that is cute, I made a pinata for my kids one year for a birthday doing the same method!
That is so pretty and who doesn’t like a messy, gloppy craft? Everyone does!
OH my goodness! This is such a cool project. I’m going to pin this for later. I would love to try it when my kids are older and not putting everything in their mouths in site. 🙂
I love that you made a craft that required Hoards of glitter! The bowl is great – hope we get to see the bigger one too!
That is really cool, I totally want to try that!
I love glitter to I think this is beautiful. I could see myself making a big mess with the modge podge. I think it would be fun though.
Love this idea! I really want to try it!
sparkles. marvelous. i <3 glitter
This is so pretty! I would make one but my hubby has glitter seizures. He sees glitter and seizes up. He has some crazy idea that someone is going to get glitter in their eye and lose an eye. lol
This is so cool! I want to try this with the kids.
This is so awesome.
This is the coolest thing I’ve ever seen!! Love it and I’m going to try it!!!
I love simple crafts, and that confetti one is adorable. (Does the glitter really stick in the bowl or does it still get on your hands and face? Glitter can be annoying like that! haha)
This looks beautiful. I’ve never done anything quite like this before and I love it. I may have to give this a go, it may not look as nice as yours though. 🙂
Love it! Pinned this to try over the weekend!
This is super cute – I love it! I have tons of glitter sitting around I need to use up.
Oh wow! This is great! I loved looking at all the step by step pics! This is truly absolutely perfect for Valentine’s!
I never mixed glitter and paint before. It looks so cool in the picture where you are first mixing them together. I am so not crafty. I wouldn’t have a clue how to do this without your step-by-step directions.
This is really cute! I have a lot of Modge Podge around so we will have to try this!
My daughter wanted to try a similar craft using buttons instead of glitter. I just haven’t gotten around to trying it yet. Cute craft!
Fun craft for the kids.
Too cute! And perfect for Valentines Day decor! Of course my daughter would want a bowl like that around all year long!
I heard someone talking about this, but never tried it. Thanks for showing me.
My niece is looking for some cute craft ideas for her daughter, this will be perfect!
I love glitter and I love this idea! My girls will go crazy if i let them do this craft 🙂
This is such a cute idea!! I love the way it came out– perfect for holding conversation hearts.
I am for sure doing this! I love this! I just need to find the same style balloon that is latex-free. Or I could wear gloves. Hmm… I am pinning this for later use.
Oh that looks like so much fun to create!!!
Now that looks like fun to make. How long did it take you clean up the left over glitter. LOL!
Um…you can “clean up” glitter? HAHAHAHHAHAHA.
it would be cute as a candy bowl. is the glitter coming off?
in my case I think I got a bit premature on the balloon popping, so some came off on the balloon where it wasnt dry, but honestly the Bowl itself in the dry places its not coming off. I bet there would be a sealer you could use to harden it up though. I need to go to the store. Its surprisingly flexible.
once you buy more mod podge you could give it a couple more plain coats to seal it
It almost looks like part of an egg! You could make it in a pastel color for Easter! VERY cute idea!