How to Make a Fairy Wand (DIY) Tutorial
I have always wanted to Make a Fairy Wand (and you can now check out my how to make a tulle wand tutorial), but not the usual kind of puff ball fairy wand, something different, more creative. Today I decided to get my craft on and started to conjure up what kind of fairy tutu type wand I could make to match one of Charlotte’s new play ballerina dress up dresses.
My initial thought was to make more of a “crystal ball” fairy wand. I had visions of sparkles in water and some really unrealistic things for the time I had scheduled, so I spent some time walking around Micheal’s to find some inspiration. That place sure is fun in the holidays.
This is what I came up…the project took about 30 minutes.
*SALE* 9 GLITTER Tulle Rolls each one 6 BUT WAIT!! GET YOUR TULLE!!
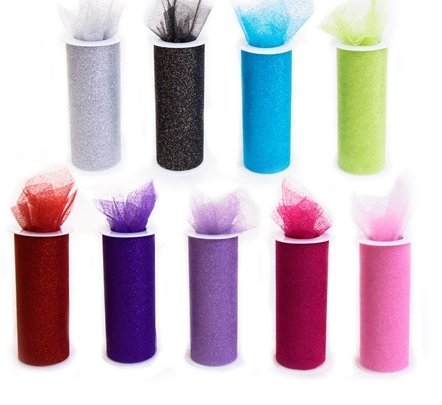
These size tulle rolls are easiest to make fairy wands, pom pom balls, pretty much any tulle craft. They wrap so easy! If you buy tulle off the bolts at the craft stores, they have to be cut every which way for a tulle ball and that makes the craft frustrating.
I found this awesome set that gives you a variety of colors for all holidays and occasions.
WHAT A DEAL!!!
<—————–
STUFF YOU NEED
What you will need to create this Fairy Wand (or one of your own style) is the following:
- Dowels
 (i opted for a larger dowel and cut it in half w/ a hand saw…that didn’t go so well) $.99
 - Ribbon to wrap the dowel $2.99
- Tulle (I had this at home)
- Clear plastic Christmas ornament $1.29 (get 2 in case you hot glue mess it up like I did)
- stuff to put inside the ornament..I used a stream of marabou fluff, other ideas are flowers, glitter, ribbons, bows or rhinestones. My marabou cost $1.99
- hot glue (took just 1 stick)
- I also bought some charms to add on from the bead aisle $5.99
 (i opted for a larger dowel and cut it in half w/ a hand saw…that didn’t go so well) $.99
 to wrap the dowel $2.99
 (I had this at home)
 $1.29 (get 2 in case you hot glue mess it up like I did)
 (took just 1 stick)
INSTRUCTIONS
- After you have your dowel cut to the right length, the first thing you do is wrap your ribbons around your wand. What I did was opt for one large ribbon to do the initial wrap and then a smaller ribbon to go around and cover the remainder of the dowel you could see. Its fairly easy to keep wrapping this around and then starting the 2nd one above and it should fall into perfect place.
- I usually dab hot glue on the bottom, middle, and top, so if I move my fingers and it slips, I don’t unravel the entire thing.
- Leave some excess ribbon once you reach the top to hang down or, if you prefer, make up some korker curly ribbon and use those to hang down. At this point on my wand, I left both strands of ribbon hang and then cut additional pieces and hot glued on the top so I had several pieces flowing.
- Don’t be afraid to get girly here. I am not sure you can overkill on the fru-fru when you are talking about a fairy wand.
- Next I set up the “crystal ball”.
- Take your Christmas ornament and pull out the piece that hangs from the tree. Its easier to hot glue when its flat. Take the top off and stuff inside with your filler. You can also leave it empty and add flowers or rhinestones on the outside. The trick here is that once you hot glue something on it, it doesn’t peal off very nicely. I discovered that when I put on my fancy Bird of Paradise, decided I didn’t like it, and tried to take off.
What was left was a huge gaping mess, so I had to put it back.
Oh well, it was my first try, right?

Hot glue the top onto the ball so the wand is secure.
After I had the wand and ball done, I gathered some tulle with a ribbon and again let the ribbon have some excess tails. I made two of them, hot glued them together in a cross, and trimmed up the tulle. I also took a piece of the ribbon and wound it through the heart charm, and attached that to the tulle and made a knot.
Then I added the tulle “cross” directly to the top of the wand.
I took some of the larger ribbon and covered the ornament part of the plastic ball and then turned upside down and hot glued the ball onto the tulle.

I’m not going to lie here…while it was really stuck and not going anywhere, the ball attached to the tulle made it slightly wobbly. More so than I liked. In the future, it might be smarter to attach the ball directly to the top of the wand and then add tulle with a small piece of elastic or some other clever way I haven’t discovered yet.
At this point, you are pretty much done!
It’s all decor from this point out. I added a bird of paradise ornament I found in the Christmas aisle at Micheal’s, but I am regretting it. Unfortunately, hot glue made it where I couldn’t take it off, so make sure you are sure before you stick.
 (left: assembly pre-dressed up , right: all gussied with flowers and birds)
Although a bit gaudy, Charlotte was a fan of the sparkly, so it wasn’t a total loss.
 Consider adding satin bows
 to the front like I did or maybe even bells to the bottom of your ribbons so it makes a “charm” sound when you walk. I have another wand I am trying out later on tonight or tomorrow, so I will post the results of how that one worked out.
If you liked this article, feel free to share the link, stumble, or twitter.
Maybe someone you know has a fairy in their life that needs some magic.

~Trisha
Other sites that may inspire you make a wand
- On my site if you like my wands is a How to make a tulle wand
- Create a Wand
- Flower Wand (this is a method I use w/ tulle…demo coming soon, her pics are cute)
- Do it yourself craft wand
- Magic Star Wand
- Wand and Halo
- Tulle Wand
- More Star Wand instructions
- Magic Wand Craft
Love all you ideas! Have made several tutus and will be making more – will surely be using some of your ideas. Thanks for all the ideas and how to’s. Your instructions are very detailed and don’t leave me hanging trying to figure out how to finish it. I know you spend lot of time and put for much effort to make them available to so many people. It is truly appreciated. Keep up the good work.
Want daughter…heart breaking…seriously thought Trisha you are so creative, that’s just awesomeness!
Oh I just love it! Too bad I don’t have girls to make them for!
So Cute!!! I miss my daughters being little girls. We always loved to do crafts.
My daughter Hannah would so love me if I made one of these for her.
I am wondering how you found plastic ball ornaments that do not part in half. I have been looking but just find the ones that part in two. Beautiful directions, love your ideas
Oh my goodness that is a creative, fun idea!! Thanks for the tutorial!! And Charlotte is sooooo cute, as always 🙂
BEAUTIFUL! I wish I was crafty.
Kas
This is great! I’m going to share with my SIL as I think she was looking for something just like this (and your daughter is super cute!)
That is so cute! My daughter would love this and I just might have to make it for her for Christmas!
I think its beautiful!
I think it turned out gorgeous! Any fairy girl’s dream wand.
That is so pretty… any little girl would love this. It is perfect for any princess dress up, not just for Halloween. I’m going to share this with my girfriend who has to daughters who LOVE to dress up. Thanks.
Now I need to make 2 of these for my nieces for Christmas and I wonder if I could boy this up some to make some “laser/magic” wand thingy for Owen …. interesting thanks Trisha.
Pretty!!!
(Do they come in kitten sizes?)
Fabulous Fairy Wand!
Looks pretty good for a first try! ;D
Awesome! Love it. Also love the gap-toothed fairy princess. 🙂
GORGEOUS!!! You’re SO creative Trisha! And Charlotte is growing to be such a beauty!
That rocks! I want to do that in my Sparks troop. Thanks for sharing!
ooooh love it! you are crafty!
That is one awesome fairy wand. I never take the time to be that creative. You definitely have a talent.
Nice how to!
I may just make one for myself. Super cute.
So pretty Trisha. You are a great girly mommy because you are so creative and so …pink! lol
I think it’s adorable, any girl would love to have this. Great tutorial!
That last picture of Charlotte is adorable! What a great tutorial, and it turned out SO so cute.
Very crafty girl! Charlotte looks so much like you!
Trisha that’s awesome!!
Very nice Trisha!
Thanks for the great idea! With 3 girls in this house, this would be awesome to do as a project!
That is gorgeous! I want one!
that is amazing!