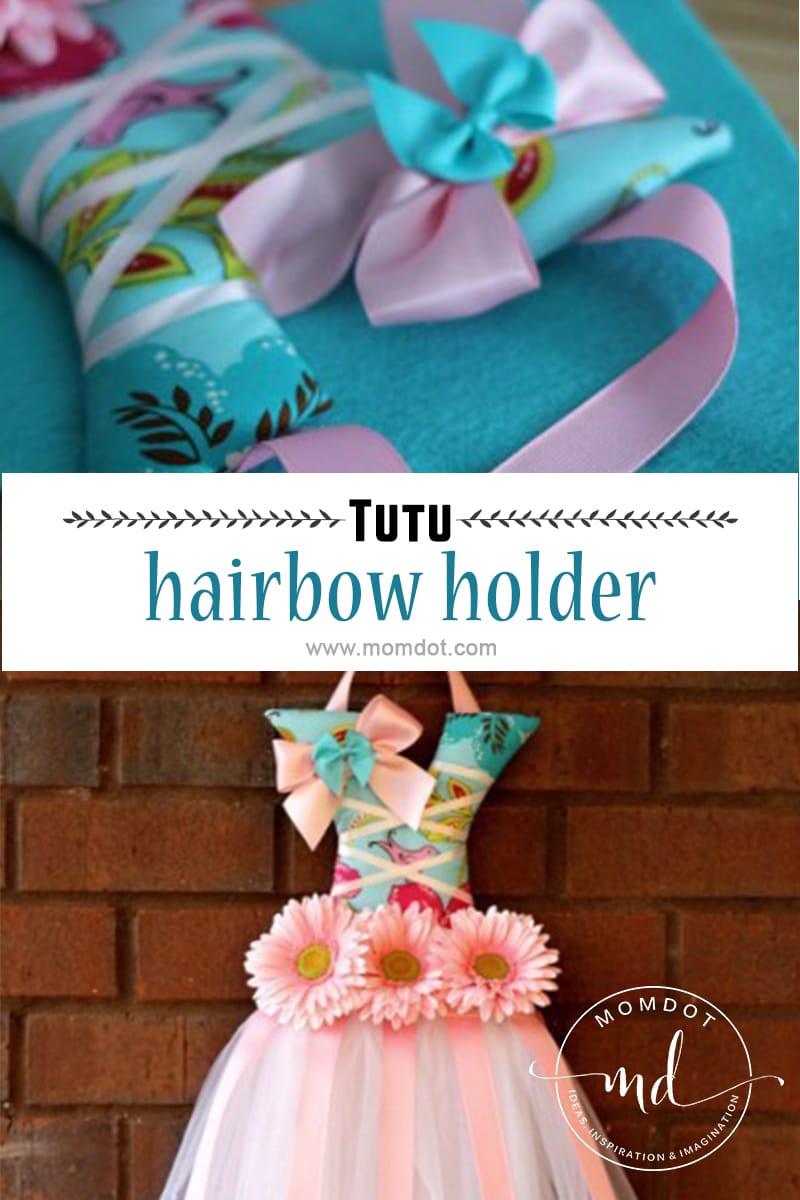
If you are here randomly, you may be wondering where the other tutu hair bow holder instructions are. This is the 3rd step, so you may have to go backwards to one of these posts:
- How to make a tutu hairbow holder (step #1, bodice)
- Free Tutu Hairbow holder Tutorial (step #2, skirt)
This is step 3, finishing work to include details and your back.
Last we left off was #15 doing the middle of the skirt. On we go!
16) At this point the main part of your bowholder is complete. What you want to do now is some finishing work. Initially I said that a few creases on the front were not a big deal for me because I knew I would use some tricks to cover them up. If you are going to keep your bodice plain, just make sure you work on that a little longer so it has no mistakes on the front.

For the middle, my two favorite ways to do the middle part are three ribbons on the front and flowers. In this case, I used flowers. I just buy the ones from Hobby Lobby and pop the tops off and hot glue down. I prefer Gerber Daisies in the middle because they seem to have them in lots of colors and have good coverage on a bow holder.

17) I also love a criss cross bodice. Take two equal length satin ribbons and hot glue the ends on the bottom and flip over and cross and glue in the back. I dont bring my ribbons all the way over and around because its a waste of ribbon, so I just double back. You can use this to cover up creases fairly well by strategically placing ribbons over those spots. The criss cross has a very practical purpose as well by allowing your smaller tinier clips to be placed at the top.

18) I also always add a shoulder bow. Just create your bow with your satin ribbon. I prefer matching double bows to pull it all together.
19) Now you are ready to do your back. (Tired yet?)
For this part you need a piece of felt that goes about 2 inches all the way around your bodice. The easiest way to do this is to lay your felt onto the back of your bodice and TRACE IT with a pen, and then cut out. Your piece will be bigger, obviously, but will give you a starting point.
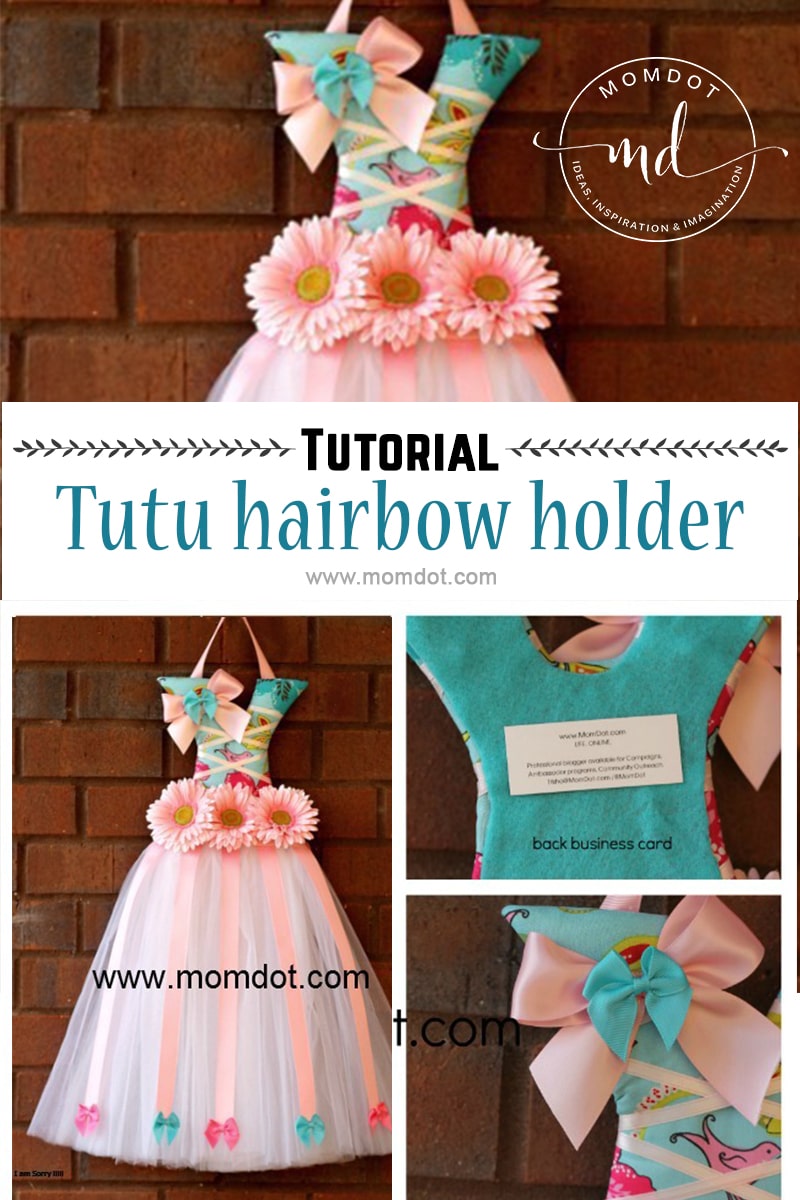

20) Starting with the neckline, hot glue around the edges to seal up the bodice. I always start in the neck area, work across the shoulder, then do the other neck area and shoulder. This will leave you with some excess felt. VERY CAREFULLY start to trim around the back and then glue down. Do one side at time. If you trim too much, felt as a tiny bit of give and you can pull it, but heed my warnings on this. Take your time trimming up. Once each side is done, you can trim the bottom in a straight line.


That’s it!! Now all you have to do is hang and enjoy.


The other parts of this post:
- How to make a tutu hairbow holder (step #1, bodice)
- Free Tutu Hairbow holder Tutorial (step #2, skirt)
- Tutu Hairbow Holder Instructions (step #3, this post/detail work/back)
NOW AVAILABLE: Go here get your FREE DOWNLOAD for the Tutu Bodice Pattern
Want to make more? Get your tulle and start creating!
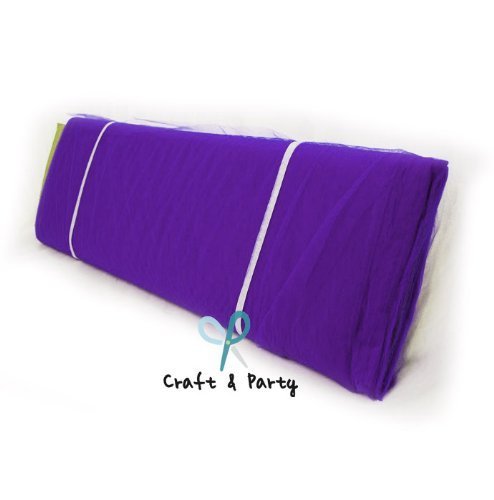
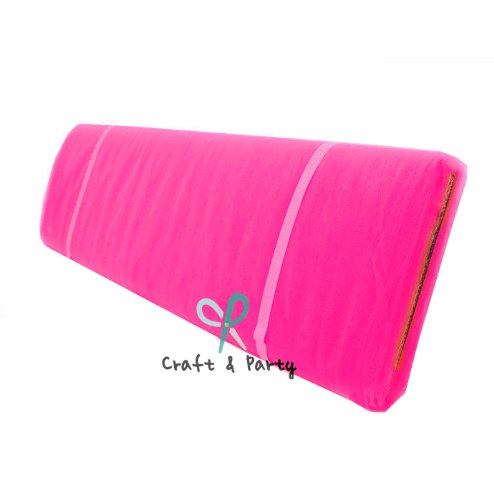
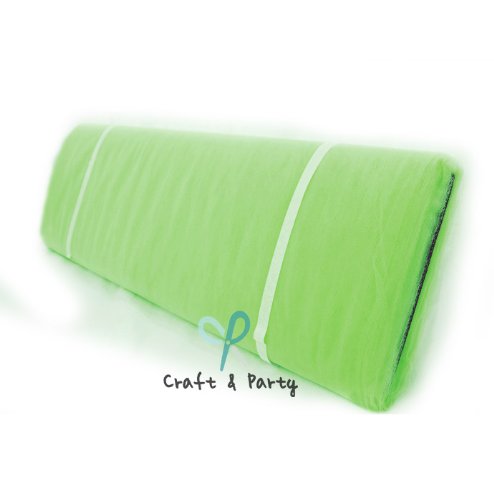
These look best when the skirts are super full and you need to purchase tulle on a BOLT. Bolts can be expensive at the craft store, so I highly recommend you purchase a bolt (or two or three to mix colors) to make this craft.
Make sure you have your tulle ready for this craft because it takes a LOT. Buying it by the bolt is the smartest thing you can do. It’s pretty inexpensive on amazon and often with free shipping for less than half what you can get at the craft stores!
Stock up here at the best prices I have found.
&
Ever Shine Tulle Bolt, 54 Craft and Party, 54Ever Shine Tulle Bolt, 54Tulle Bolt, Apple Green, 54

If you liked this tutorial, please consider sharing the link on facebook, stumble, or twitter for others to enjoy and learn to create! Want to learn more? I love tulle and if you do too learn How to Make a Tutu
If you create a bowholder based on my tutorial, I would love to see it so email me your pictures! (trisha (at) momdot.com)
Browse more bowholder style inspiration.
~trisha
I am so excited if you love this post and want to share this tutorial with your audience. The rules on this post is that you may use (1) photo and a link back to the article with proper credit. You can email me at [email protected] if you would like to share any other part of my content on your site.
Thank you for the time it took to do this. I made one and over it!!!
Love it
The detailed instructions were wonderful and very well written. (I usually stop reading instructions when they get boring.)
I can wait to try this project 🙂
Thank you.
Thankyou Maria! I hope that it works well for you and if you need help, email me personally, [email protected]
Great directions on tutu bow hanger. I can’t wait to try this. I make tons of bows. Now I need toventure out to the holder and these are the cutest I’ve seen.thanks,Margie Howell
I wish you lots of luck! Let me know how it goes and feel free to send me a picture of your final product!
Yay! Tried it last night, now my gidls want some for there friends. Lol.
I am so happy it worked for you!
I LOVE IT~~ these are so beautiful and yes I probley will try to make one…I bought one I guess someonehadmade but these are outstanding~~so good to know just exactly how to make it…THANK YOU for sharing and your instructions were so easy and fun to follow….I am a visual learner and this was GREAT !!! I am really excited about seeing more of your post….
i love your tutorial. I will be making this tutu for my daughter room and I will send you a picture so you can see my bow holder. Thanks for sharing your instructions Trisha!!
Hi! This is great! I was wondering id the tulle has to be 6 inches wide or can I get 3 inches wide?
Thanks for sharing these great instructions! It was so easy to follow. I love your designs. I’ve been wanting to make something for all my granddaughters hair stuff & this is perfect!! Love my end results!!
Love this thank you for sharing. I am going to try this very soon
Great, creative tutorials for busy moms! I love the idea that you are sharing these ideas with other moms rather than charging a fortune for directions. The give and take between today’s stay at home moms is wonderful to see. Technology brings moms of all ages closer together! I’m making a bow holder for my 4th grand child, thanks for the tutorial!!!
I just made a sofia the first inspired bow holder for a little girl’s birthday gift!! I couldn’t get all the stuff perfect but I was able to work around and I am so pleased with the results. I even incorporated a spot for headbands. 🙂 Thank you again so much!
This is the best bow hanger I have seen around. They are so beautiful. You did amazing work. I want to try and make a few for my nieces for Christmas. Just in case I totally screw up do you still sell them and if so how do I go about getting a few and how much are they?
I dont think you will screw it up! I have had a lot of newbies email me perfect ones after these instructions. But just to answer you, I no longer make them for sale. I know you can do it!
When you glue the tulle down, then add the ribbon across the waist, how do you keep it from being “bumpy” bc of the tulle?
I do three rows of middle ribbon so its pretty smooth. The first one that goes accross is bumpy but the extra pieces hide it and make it a waist line
Great bow holder and fun to make. Thanks for sharing directions. I placed a strip of quilt batting under the first ribbon at the waist to hide the bumpness from the tuille. It looked pretty good.
love this idea……..excellent directions…..will try this soon……..thanks for sharing…….how long did you cut your tulle for the small one?
Can’t wait to try this, I am not super crafty but you have such clear instructions I have the confidence to give this a shot. Hoping to make one for my grand daughters for Christmas, Of course it might take me that long to get it right but I love it
This ia adorable. I can’t wait to make it. I have 5 grandsons and a 2 year old granddaughter. I am excited.
Thanks for the very clear instructions! Mine came out super!!!
muy espectacular gracias por compartir
Thinking of starting a small business making haircuts, tutus, etc and I am excited now after seeing your blog. You are very creative and the tutu hair bow holder was so cute. Thanks again for sharing.
I wish you a lot of luck with it~!
I was wondering if you could do a tutorial on how to make those pretty bows.
Honestly Its just a regular bow like you do on shoelaces….i just made so MANY of them that i got good at it. LOL!
Check out Jak Heath’s website for wonderful bow making instructions.
Love, love, love this hairbow holder. Going today to buy supplies! I can’t wait to try it.
I didn’t see a measurement for the length of the bodice until after I cut mine out and then read some of the people’s comments. Mine only turned out to be almost 8 inches. Will this still work?
sure! The size is totally up to you!
Thank you so much!! Such a beautiful design I will love to make one of this or many if possible 🙂 I’m a crafty mom also but my problem is at the moment of charge $$$$ I don’t know how much my husband complain because I do so much staff but I never make a penny 🙁 so how I should do that ? I don’t have idea well how much you think I can sell one of this beautiful bow holders? Thank you again for such an amazing tutorial
Fab !! thank you for sharing cant wait to make a bunch these will help rase our PTA funds in sure 🙂
A million thanks for sharing this tutorial and all your little secrets to make such an awesome project!
I made one for my baby and a friend saw it, fell in love with it and asked me to make one for her nieces. Needless to say, I’ve made and sold a few. As a single mom, I am in much appreciation for you sharing this. Again, Maddie and I thank you!!
These are adorable.
Just made one for my little cousin. Went awesomely!!!!!!!!!! Would love to post a picture :p thanks so much for the tutorial!!
perfect for my kiddos who wants everything girly stuff done by. thanks for the tutorial, ill be doing this one for my eldest kid as a present on her 10th bday
Thank you for sharing, it was very kind of you. I am working on mine now. Have high hopes of making three for my granddaughters.Boy when you said are you tired yet, my fingers are pooped.haha. Thank you again and I will take a picture of my bow holder, of course it will not be as beautiful as yours but I am sure trying. Bet by # three it will look a lot better and be a little easier to do. Thanks fo all your troubles. JoAnn
I cannot wait to see it!
Thanks! for your super easy tutorial.
OMG I LOVE This! I was just trying to figure out how to make one (I saw a wood one at HL somewhat similar but not as gorgeous!) I can not WAIT To make my first one!! I am hoping it will be this weekend!!
Thank you for the tutorial. Just madevmt first one for my daughter and it looks beautiful. Can’t want to make another for my other daughter. 🙂
Thank you so much for sharing. I want to give my 6 nieces and daughter something special for Christmas this year and I priced these wonderful bow holders and was about to change my mind since I do have 7 to buy for. I love crafts and thought about making it but was afraid it would not turn out as pretty are yours. Now you have made it possible for me to give all the girls one. May God continue to bless you the way you have blessed all of us that have found this site.
These are absolutely adorable!!!! I can’t wait to try making 1 for my daughter. I know she will absolutely love it! I already made my daughter a bow and poney o holder using a pink picture frame that I decorated for the top part. I was wondering how wide and long are your ribbons used to make the big pink bow and the white bow on the left shoulder and back? How long do you leave the tails on the bows?
Thanks,
Shelly Plemons
actually I have never measured them! I just cut off a piece and tie and then adjust. The beauty of crafting is that its up to you!
Do you have a tutorial for making the tutu for kids and adults?
Just finished making this for one of my five girls! Thank you so much. It turned out even prettier than I hoped for. Thank you again for sharing your talent. God Bless.
Thank you soooo much for your tutorial! Very detailed! I just finished the bodice which was ten times easier than i would have thought! Love it and my niece is going to love her tutu!!
I have loved your bow holders for years now, but couldn’t afford one. Thank you so much for the directions. I would like to put wings on mine. How exactly do I attach them?
AWW, Thankyou for saying that! You can buy wings for inexpensive at Halo Heaven online..just google it. They do like $3 wings. Or if you watn to pay retail, but very pretty, they do butterfly ones at Hobby Lobby in the birthday section. The way I attached them is once the back is on the bodice, you can lay the wings on the back. Make sure that you have the front of the wings facing forward. Then take a small piece of felt and use it to hot glue the middle of the wings down. There will be a spot on every wing that connects the right to the left in the middle. Basically i put the felt up and down and the wings are horozontal..so it makes like a T. Then to keep the wings from flapping, i would take either a rhinestone or a small tiny ribbon and hot glue the back and use that to press part of the wings down on the back…not the part that shows obviously, but just on the back. I am not sure if this all translates well in text. HA
I just bought all the meteral and ribbon to creat this beautiful bow/headband holder. I have one question how long shoukd I make the bodice?
I would say 12-15 inches
LOVE this!!!!! I was getting ready to do a bow holder using a rectangular canvas but this is so much cuter! Any tips on how you would package this to give as a gift so as not to mess up the tulle skirt?
yes i essentially fold it in half and then tuck the tulle under one more time, (so its kinda folded in thirds)
Then i take a ribbon and lightly wrap it from the back and tie it in a soft bow on the front. When you undo the ribbon it will have a crinkle, but a day of hanging between clothing will straight the skirt out. NEVER IRON the skirt. It will flatten out the tulle and possibly burn.
Great! Thanks so much!
I absolutely love this!! I stumbled across it on Pinterest, and it’s the perfect gift for my friend’s upcoming baby shower. It looks a little bit complicated, hopefully I will be able to do it well, but I love your design. Thanks SO much for sharing this pattern with us!
You are very welcome!
I am going to set out on the adventure of a lifetime and try to make 23 of these!! So I have a couple of questions…
First, they are for my daughters pee wee cheer squad so I wanted to make the skirt a little shorter (more like a cheer skirt). Would this work?
Also, where is the best place to get ribbon in bulk?
Thank You! :^)
Thanks! The instructions are amazing. How big is the bodice in this example? I can’t tell from the pictures.
Very cute..going to make these for my daughter and 2 nieces. I was wondering, though, what’s the purpose of the “back bow”? And would it work to just use the template that I make for the core of the bodice to trace out the felt for the back? Thanks!
The back bow can help hide flaws, but it also “finishes” the look. Not everyone hangs it at just a wall, some people hang in windows, etc. Might as well do it pretty all the way around! You can use your template for the felt, but i do it on the back end in case I happen to trim the bodice during my work.
I love this!
love your directions – thank you for sharing – I have 4 grandaughters who would lov these !
Thank you so much for sharing this tutorial and all your little secrets to make a successful project!
I can’t wait to make this for my little girls!
I love the tutorial and plan on starting one of these tomorrow as soon as I can get back from the fabric store. One question…when making the skirt, how much tulle is in each tie? I know the first listing of items says 6 yards total, but I wasn’t sure how you split it up. Thanks!
just depends on how long your skirt is i suppose
here is how I measure, this may help http://www.youtube.com/watch?v=BjanCTPttb4
I can’t tell how big these are from the pictures. I know they can be any length skirt you want but can you give me an idea…is the bodice about 12″ long and the skirt 3 times that? Thanks…so cute
Wow..I can’t wait to make theses for my 2 granddaughters. They are going to love them!! Thank you so much for the pattern and tutorial!!
Thank you for this tutorial. I found it very informative and can’t wait to try this idea for my grand-daughter.
I love these! Adorable. I have seen them in boutiques and the sell for mucho dollars! I have several nieces that maybe getting these for Christmas. That is if I can get off Pinterest and actually get into my craft room! Thanks for the tutorial.
I love you!! This was a great tutorial!
All together about how many yards of tulle do you use?
Hi,
I LOVE your tutorial!! It makes this project seem so easy. I was wondering if you ever did the middle hanging ribbon with loops to hold headbands? If you did is there any way for you to post how to do that. My daughter always seems to lose them for some reason. Lol thank you so much!!!
Yep…thats actually really easy. Take your length of the ribbon and double it in half. Put a dab of hot glue every few inches and fold the ribbon on itself. It will leave loops in between each glue spot to slide your headband through.
I love these! I can’t wait to try out the tutorials to make them for my daughter and nieces for Christmas this year. I know it’s a bit early, but I would have to make 8 of them, so I’m sure it will keep me busy the next 6 months. lol. Thank for the tutorial. I will post pics as I get them done.
I just wanted to say that I LOVE LOVE LOVE this idea!!! Everything is beautiful!! My mom saw a bow holder at a store a few days ago. She was talking about buying one and I got online today and came across your website and fell in love!! I sent her a few pics of yours that you have on your website and asked her if the other bow holders were cuter than these?… Her response was OMG NO THOSE ARE SOOOO CUTE!! I’ve printed out all of your instructions and we are going to tackle this project this weekend!! We are so excited!!! I will post some pics if they come out cute! lol I’m sure they will because you have gone into great detail on these instructions! You rock!! I’m so excited!! 🙂
i cant wait to see yours! Please send to me your shot and feel free to ask question if you hvae them
If you dont mind me asking how much did you charge for these when you were making them?
It just depended on the materials, whether it was a premium, and the size. I also made them for stores and was in showrooms…and have been doing them for 4 years, so I am not sure I am comparable to some that are out there now. Generally I charged $69-$129 on each custom made item. I just got sick of doing it every day…takes me 3 hours for each one on an order and that takes a toll on your body.
Thank you for posting these instructions! I had made one previously based on instructions I found elsewhere, but yours goes above and beyond. Now I will have to make more!
I have two questions:
1. What size ribbon did you use for the bodice criss-crossing?
2. Can you please post a tutorial for your bows? I love them! (Especially the mini ones at the bottom!)
Thanks!
Thankyou! It makes me feel great to show other moms that love crafts how to make things.
1) The spool I have here doesnt have a size listed on it. Its from Hobby Lobby, double sided satin, 99C, 20 yards. Its the one size up that tiny tye ribbon i use, which is 1/8th, so my *guess* is its 1/4th.
2) HA! I wish that was my bow. I buy the tiny ones prepackaged for also 99C for 4 at Hobby Lobby. I have found the tails on them are better purchased when its that size. The ones on the top I did tie, but those are nothing to brag about. 🙂
So pretty! I’d love to make one for my niece!
Thank you so much for posting these instructions. Your work is beautiful. I bought all the materials to make one of these for 4 little girls in my family and your instructions have made me feel more confident in tackling this project! My only question would be how do you attach your wings if you chose to add them? Thanks again!
Thanks michelle! All wings have a spot between that holds them together. What I would do is lay that on the back and take an extra piece of felt, cut into a strip, and lay that where it hot glues on either side to hold that piece on there. Think of it like a plus sign..the wings are the sideways and the felt is up and down. Then i take the wings and secure them on the back by the wing. Because its usually pourus (like tulle), I take a small bow or large rhinestone and glue the back of that and then position in the wing where it is glued to the back of the bodice. Its not really great for shipping, but if you dont have to find an extra large box, it works perfect for the house.
Awesome, Thanks!