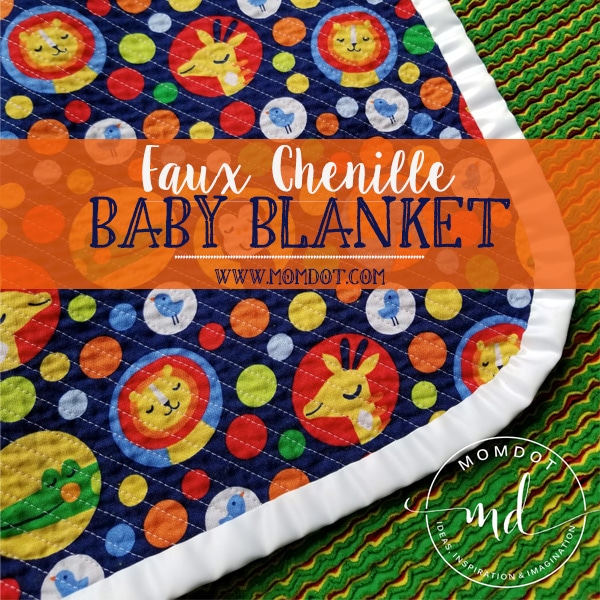
DIY: Simple Baby Blanket
These Faux Chenille Baby Blankets are super soft and fun to make. They make great baby shower gifts for friends, loved ones, or… yourself!
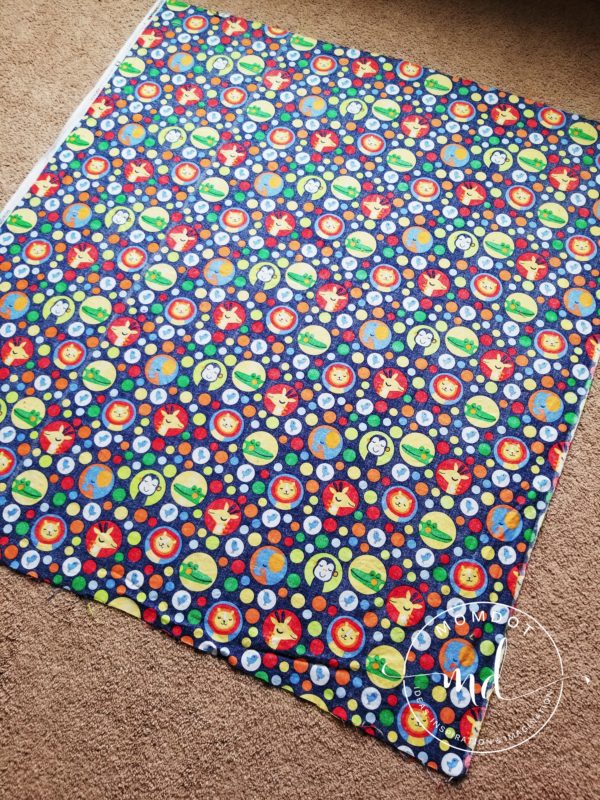
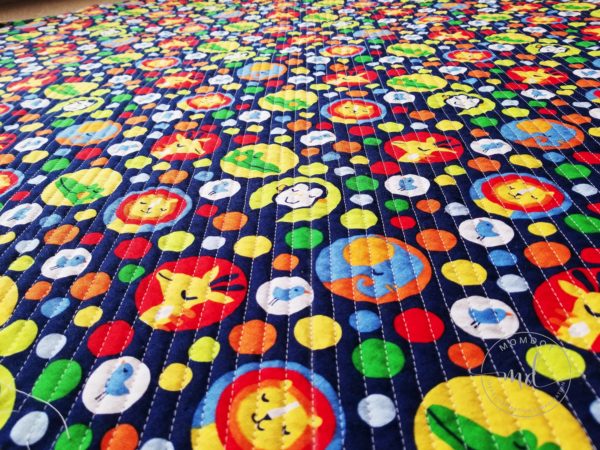
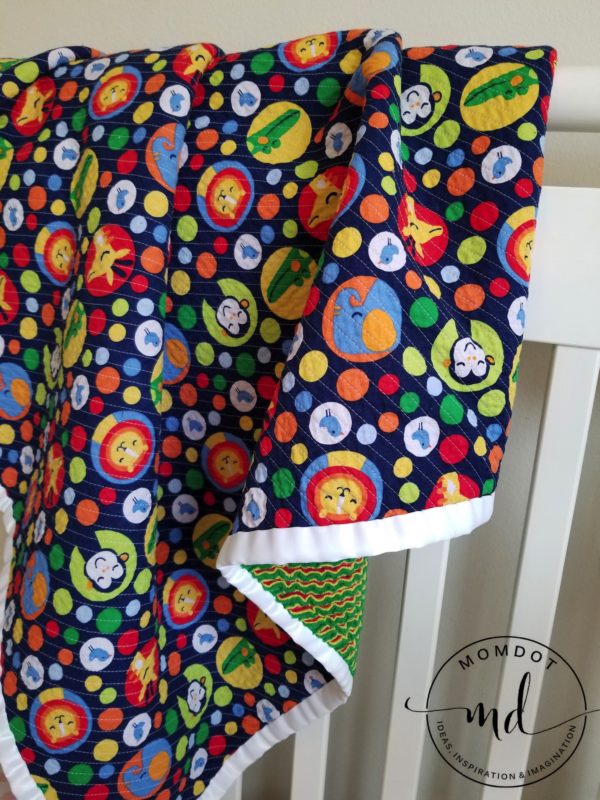
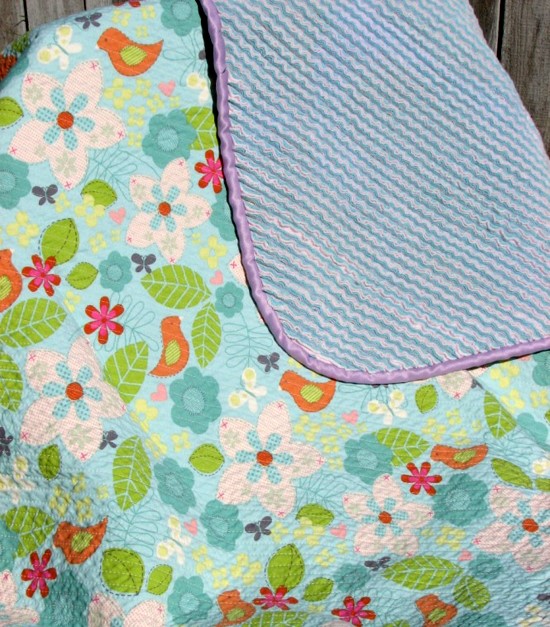
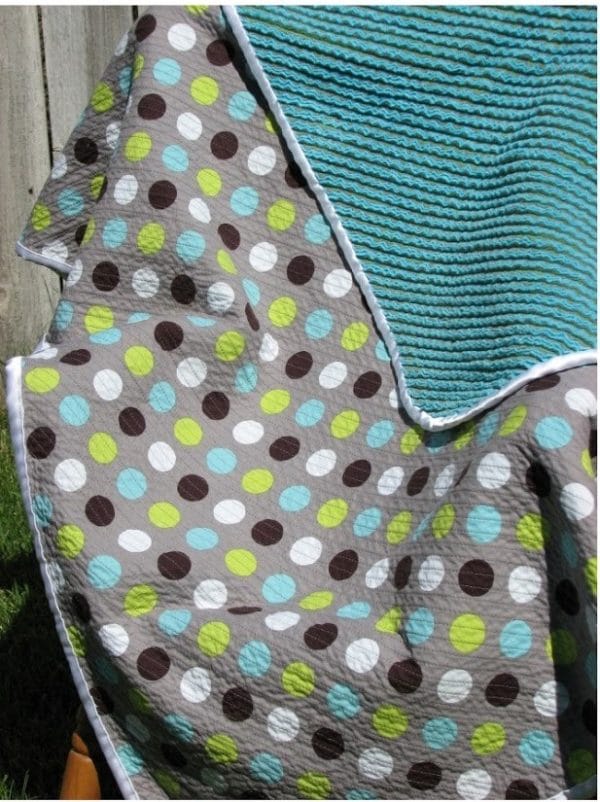
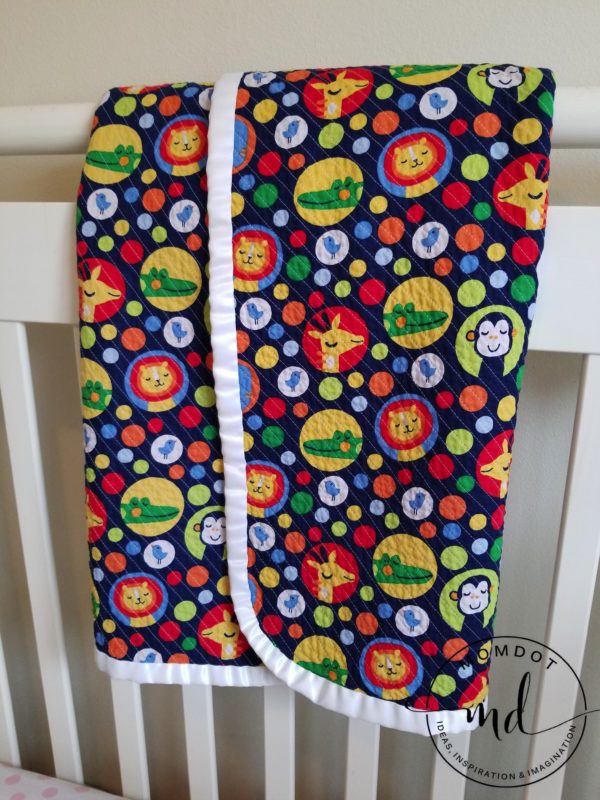
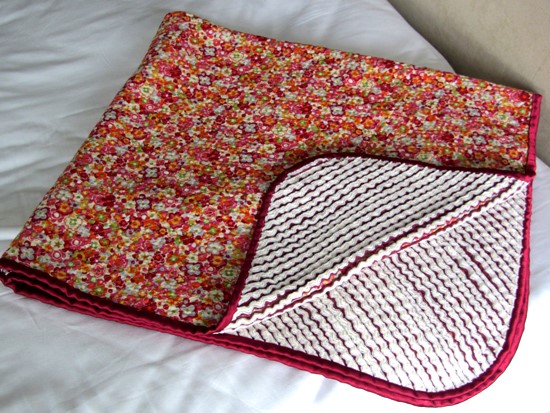
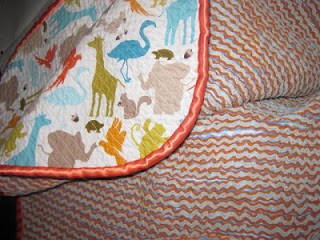
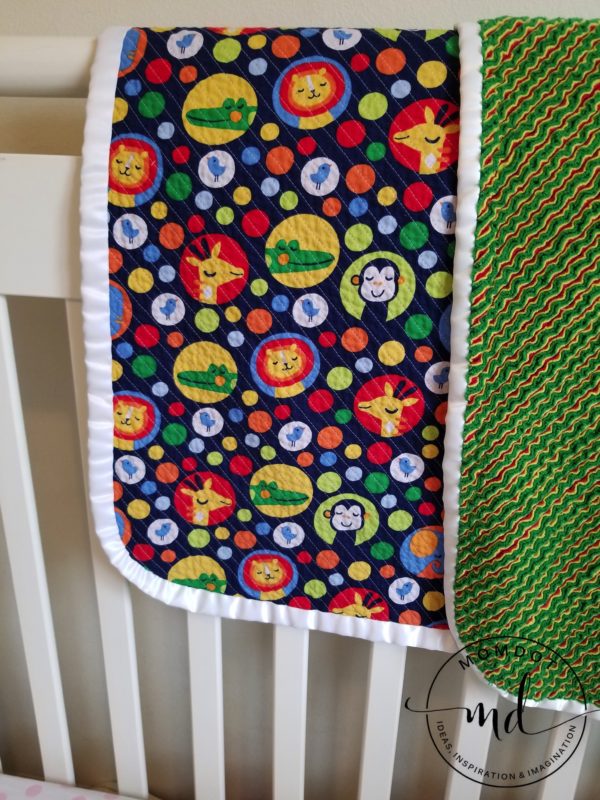
Don’t these blankets look so soft and comfy? Layers and layers of soft flannel make these blankets perfect for snuggling a sweet baby in.
Simply put: layers of flannel are sewn together on the back of a patterned fabric by rows and rows of diagonal lines, and then cut. The final blanket is washed which gives it the soft and beautiful faux chenille look.
Pretty basic, easy enough for even the most beginner sewer!
How to Make a Faux Chenille Baby Blanket
There are lots of different tutorials already out there for these awesome blankets. When I made my first faux chenille baby blanket, I used a great tutorial. However, I’ve learned a few things along the way (through trial and error), so I thought I would make my own tutorial, with my two-cense thrown in, so hopefully you don’t have to make the same mistakes.
Supplies You’ll Need
– 1 ¼ yards for your main fabric, you’ll want this to be a print (cotton works best for this). Helpful Hint: I like to select fabrics with a few different colors to coordinate the flannel to. If you choose a patterned print with a more solid color base, such as a chevron fabric print, choose 3-4 colors from your preferred color scheme.
– 1 ¼ yards each of 3 or 4 fabrics for the chenille part. Flannel works best for this. If it has a pattern, just know that you really won’t be able to see it after it’s all cut up and washed.
– ¼ yard fabric for quilt binding. This can be any fabric (cotton, flannel, satin, etc) I personally love using satin, it takes WAY more patience to work with, but the end result is SO worth it. I suggest using cotton if you are a beginner. You can also buy pre-made bias tape to use for the binding if you don’t want to make your own. I especially like to do this if I am going to do satin binding. Pre-made satin bias tape is ah-mazing!
– Faux chenille cutter This is not absolutely necessary, you can use regular scissors, but it cuts the cutting process from 2-3 hours down to about 45 minutes. If you are going to make more than one of these blankets then, I highly suggest you get one.
– Even Feed Walking Foot, again not necessary, but a quilting presser foot helps keep your fabric from shifting more than a regular presser foot.
– Quilting pins (curved safety pins). Regular safety pins will work too, however, the curved ones go through the layers of fabric easier. And with 4-5 layers of fabric, you want easier!
– Yarn or String
Sewing basics:
- Sewing machine,
- matching thread (I love Guttermann thread),
- sewing scissors (gingher are a favorite of mine,)
- acrylic ruler,
- fabric marking pen/pencil OR chalk
- pins
Before You Begin:
Pre-wash all your fabrics. There are many different reasons why this is important, here are a few:
– Flannel shrinks! Because you have 3 or 4 layers of it, with the possibility that they could all shrink differently, you want the shrinking to happen before it is all sewn together. Otherwise it could cause some weird bunching or pulling.
– Flannel creates a lot of lint. Because you sew the blanket and cut it up, it creates even more than normal. By pre-washing the fabrics, you will save some wear on your washer and dryer by splitting up the amount of lint that will come off in two loads, instead of one.
– Just in case the dyes in your fabric bleed, that will happen in the pre-wash instead of after it is all sewn together, therefore the colors won’t bleed together. Helpful Hint: Color Catchers were well for bleeding fabrics.
Laying Fabrics Out:
After your fabrics are all washed, 1) either remove them immediately from the dryer and start the next step, so they don’t get wrinkled, or 2) just be sure to iron them before you start to get all your wrinkles out.
Lay out your patterned fabric on a large solid surface with the pattern face down.
Then lay your flannels down, one at a time, on top of the back fabric. If the flannel you are using has any sort of print you want this face up. Remember you won’t really see the print on the flannel after it is cut and washed. As you lay each layer down smooth them out. I like to put my brightest/boldest color on the bottom, directly next to the back side of the patterned fabric, because it will stand out the most after it is done. If it’s the top layer, it might be a little too bold.
Because flannel tends to “grab” other flannel, basting spray is, thankfully, not necessary.
It’s okay if your fabrics aren’t squared off or if one layer is longer than another, you will fix this all at the end. Just try to center them on top of each other, like I did in the picture below. Smooth it out as best you can. I usually smooth it all out then flip the whole thing over, smooth that side, then flip it all back over again just to make sure there are no big wrinkles in it.

After it is all smoothed out, flip the whole thing over. Now the main pattern fabric should be on top. Smooth it out one more time.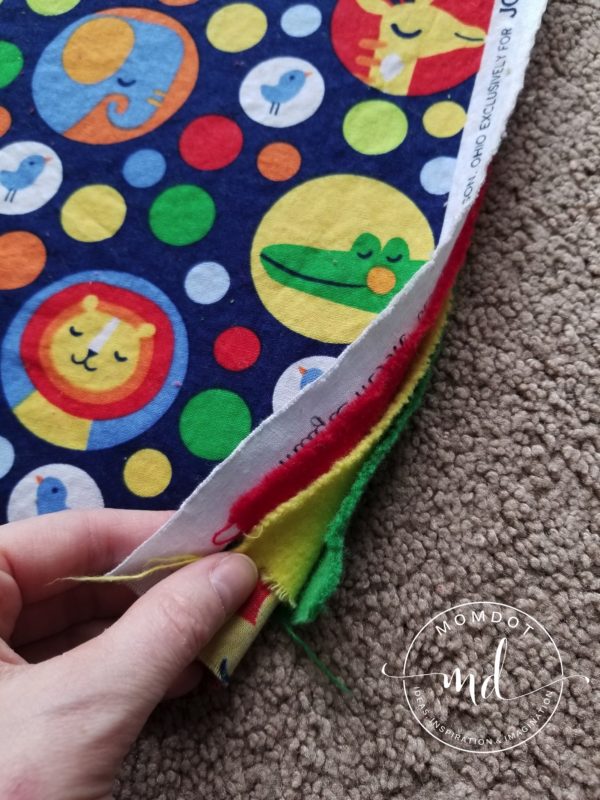
Preparing Your Quilt For Sewing Lines:
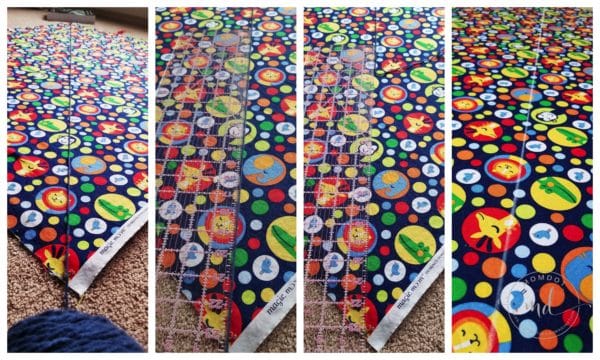
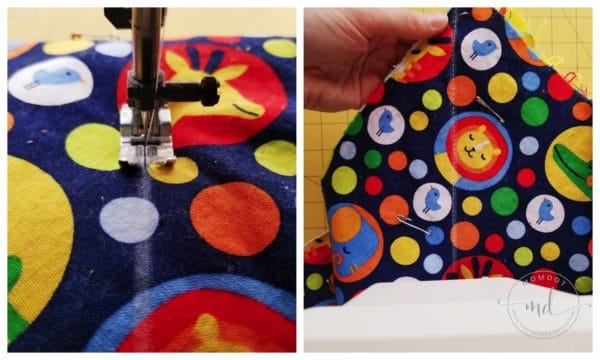
Now you are going to draw your line with your fabric marker or chalk. You only need to draw one line. You will sew right over the top of the drawn line, then use the width of your sewing presser foot as a guide to make the rest of the lines. Use a piece of yarn, running the length of the quilt from one corner to the other, diagonally. If you have someone that can hold the string straight and taut for you, great. Otherwise, just place some books on one end, so it doesn’t move.

If you have an acrylic ruler or yardstick you will need it for this, if not a book or other straight edge will work. Lay it down just to the side of your yarn and then draw a line with your fabric marking pen/pencil or chalk (just make sure it will wash off!).
Next you will want to use the quilting pins and pin the layers together. Your pinning doesn’t have to be perfect, you will remove the pins as you go. Put enough in to help hold it together while you are moving it. I usually use a couple dozen pins.
After your line is drawn, roll both corners up to the line.

Ready to Sew:
Prep your sewing machine before you sew. Because you will be sewing 4-5 layers of fabric together, and the majority of those are flannel, you want to make sure to take care of your machine. I always start with a new needle and oil my machine before I start.
Helpful Hint: If you can, fill 3 or 4 extra bobbins before you start. These quilts take a lot of thread. By having extra bobbins ready-wound, you will be able to quickly change one out and keep going.
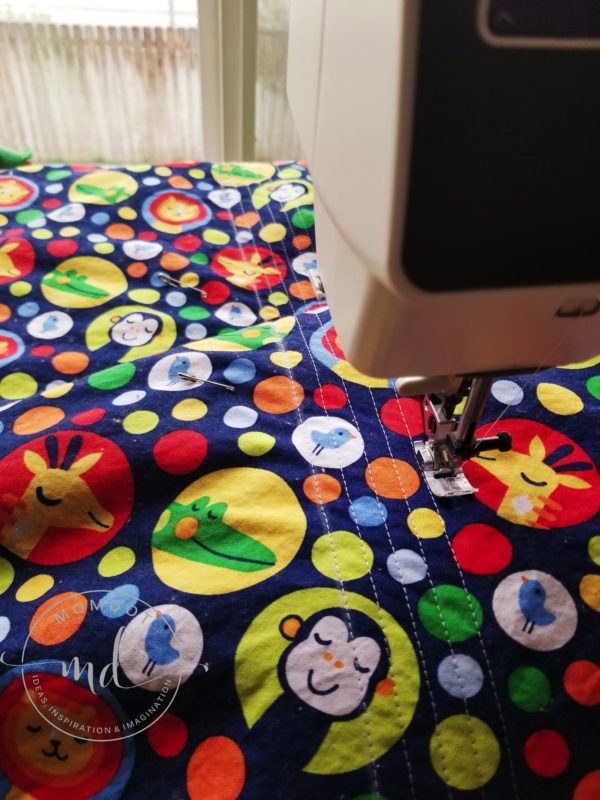
Now for the fun/time consuming part: sewing! On average it takes me about 3-4 hours to sew all my lines. Don’t let this scare you! It’s not hard, it’s just tedious. I like to move my machine to my living room and sew while I watch a movie– it makes the time go by much faster. Another way to break it up, if you don’t have 2 hours to sit in front of the tv and sew, is: sew 10 lines one way, flip it, sew 10 lines the other way, and then walk away. Come back later and do the same thing; before you know it, you’ll be done! Also, keep in mind: your lines get shorter and shorter as you go, because they are diagonal, so the first line you sew is the longest.
Sew your first line right over the top of the line you drew. Also, you do not need to backstitch at the beginning or ends of any of your lines.
The next line you sew will be to the right of your first one. Position your needle all the way to the right and use the left side of your sewing foot as a guide to keep your lines straight. You want your lines to be about 3/8” apart. Helpful Hint: Use a measuring tape or ruler to measure from the previous sewn line to the needle point placement.

Continue sewing lines to the right of the last sewn line, using your presser foot as the guide for each one.
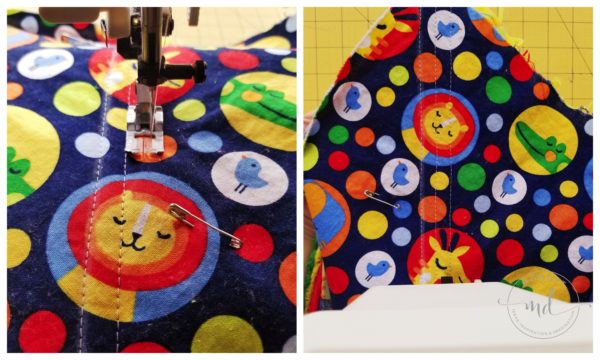
The closer your lines are together, the better (although, do not sew closer than 3/8″). After you wash it, your fabric curls up. If the lines are sewn too far apart, then there will be big gaps after it’s washed. You don’t want that! (In the picture above you can see how my foot is right next to the line I just sewed and the needle is positioned as far to the right as it will go.)
Now just sew, sew, sew! Remove the pins as you get to them, smoothing out the fabric often. You don’t want any wrinkles in the top layer of fabric. If any puckers show up in the flannel layers, it’s not the end of the world. After it’s all cut and washed you won’t even be able to tell they were ever there.
Look at all those beautiful lines!

Making Your Quilt Square:
Once all your lines are sewn, you are going to square it. You don’t square it until this point, because, as you will notice, the fabric shifts and stretches during the sewing process.
You want to cut it so that all your layers end up the same. Because it shifts during sewing (and to begin with your fabrics probably aren’t all the same size), your cotton fabric will probably be sticking out the most, leaving your layers of flannel slightly shifted and different sizes.
- Fold the blanket in half with the flannel on the outside, patterned fabric inside.

- On the right side of the quilt, line up the 1″ line on your acrylic ruler with the fold. Look at your layers and determine how far in you need to cut, so that all the layers will end up the same size.
 Helpful Hint: After I make each cut, I like to look at the “fabric sandwich.” If I can see all the colors of layers in both the cut off piece and the quilt, then I know I’ve cut far enough in. If I can’t see all the layers then I need to cut again.
- Repeat step 2 on the left side of the quilt.
- Unfold the quilt and re-fold it so that your cut, straight edges are now together. Repeat steps 2 and 3.

 Helpful Hint: After I make each cut, I like to look at the “fabric sandwich.” If I can see all the colors of layers in both the cut off piece and the quilt, then I know I’ve cut far enough in. If I can’t see all the layers then I need to cut again.


Now it’s square! It always amazes me that after sewing 100+ lines they don’t detract from the print or stand out more! 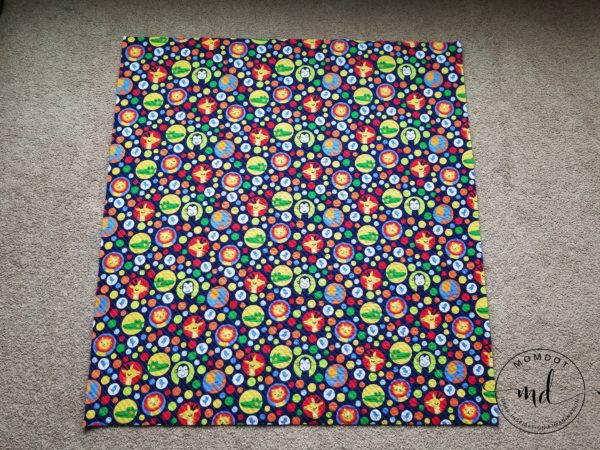
Making Your “Faux Chenille”
Next step: cutting! Again, don’t be scared, but this can take a really long time. I recommend a Faux Chenille Cutter, it will save your life. Well, maybe not your life, per se, but definitely your dominate hand. I made two blankets before I got a Faux Chenille Cutter and they each took me about 3-4 hours just to CUT. Now, they take me about 45 minutes with the Faux Chenille Cutter. Seriously, they are a-ma-zing! Trust me, your hand will thank you!
If you are using scissors, just start cutting. Start at one end and move to the next. Make sure you do not cut through the back layer! Only cut through the 3 or 4 layers of flannel. At the beginning of each row take an extra second to make sure you don’t cut through your back, patterned cotton layer. This extra second might save you a lot of heartache!!
If you are using a Faux Chenille Cutter, I recommend making about a 1 1/2″ snip with your scissors to start each line. The reason being: after you square off your blanket your strings are left loose (there’s no backstitching to hold them in place), so if you go right at it with the Faux Chenille Cutter, it can pull some of your threads undone. You don’t want that!!
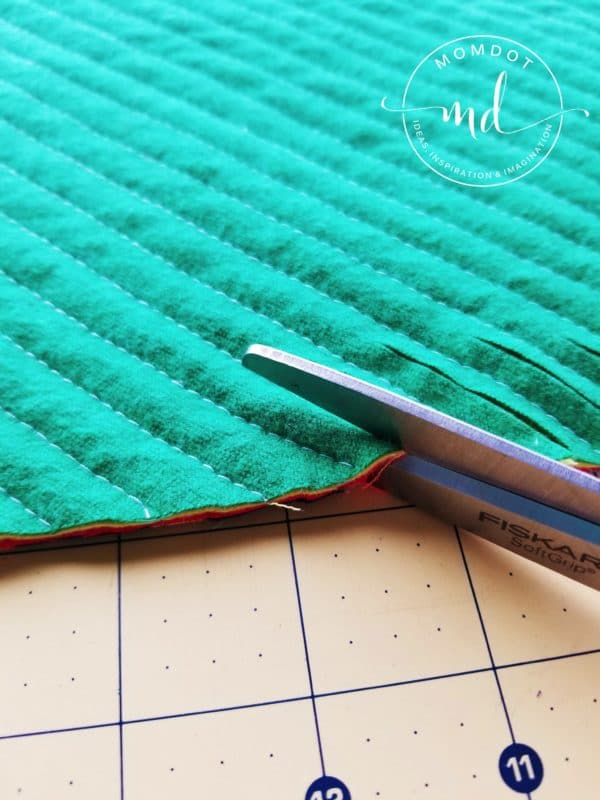

Then grab your Faux Chenille Cutter and cut the rest of the length of the lines. Once you are done with the cutting, you are SO close to being done!
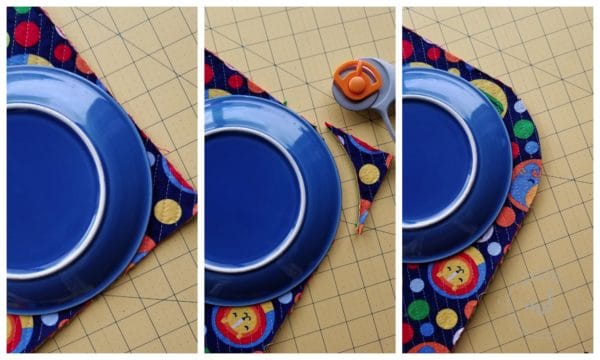
This next step is personal preference, but I like to round my corners. If you prefer squared corners, that’s great, just leave it how it is and move on to binding. I like the rounded corners because I feel like it just makes the blankets look “softer.” Since they are for babies, I like the “soft” look.
If you want to round your corners, get a plate and use that as your guide. Set it where you want your corners to be and use your rotary cutter to cut it, or trace the plate and use scissors.
Binding Your Quilt:
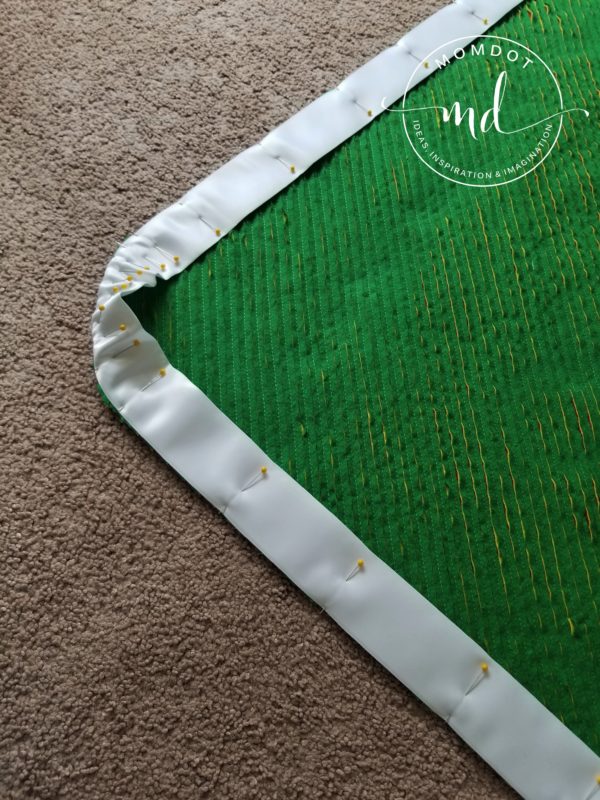
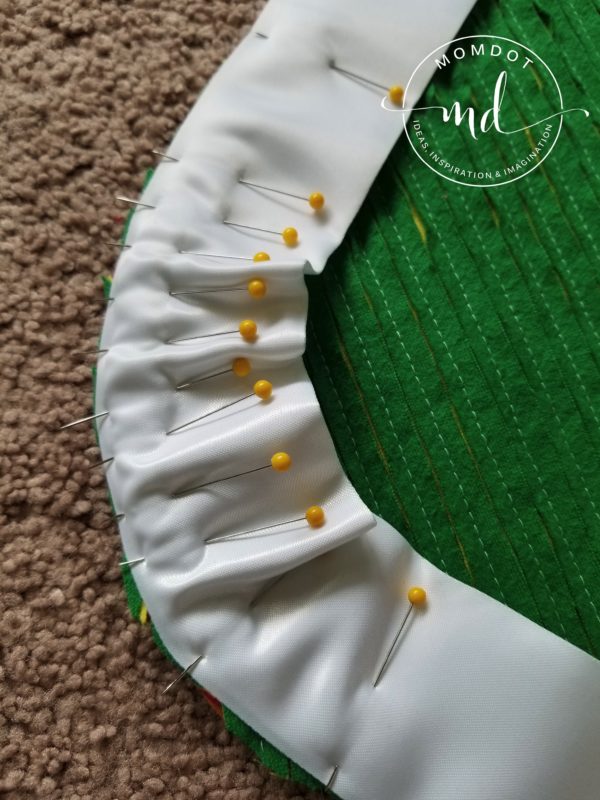
Lay the quilt flat on the ground flannel side up. Half-way down one side of the quilt is where you are going to start pinning your binding on with the fray, raw edges pointing off of the blanket. You want to leave a “tail” of bias that goes farther than halfway down the side of the quilt, but the first pin will be put in half way down the side. You want about an 8-10″ tail.
Helpful Hint: When pinning your binding onto your quilt, place the binding without pulling it too tight. If pulled too tight, it will gather and distort your edges. Place it, do not pull it!
I like to put pins in about every 6″. When you get to the corner, if you curved your corners, use lots of pins to gently curve the bias around the corner.
After it is all pinned in place, you will begin sewing. If you made your own bias tape and it was 2.25″ wide, you will use the right edge of your foot with the needle in the far left position as your guide. If you bought pre-made satin binding like me, you can use the 1/2″ line as your guide (needle in the center position) like I did. This made the finished binding on the front wider than on the back. You could also use the 5/8″ line as your guide and the finished binding will be closer to equal on the front and back.
Backstitch at the beginning and end. Leave an 8-10″ tail at both ends, the tails should overlap a few inches.

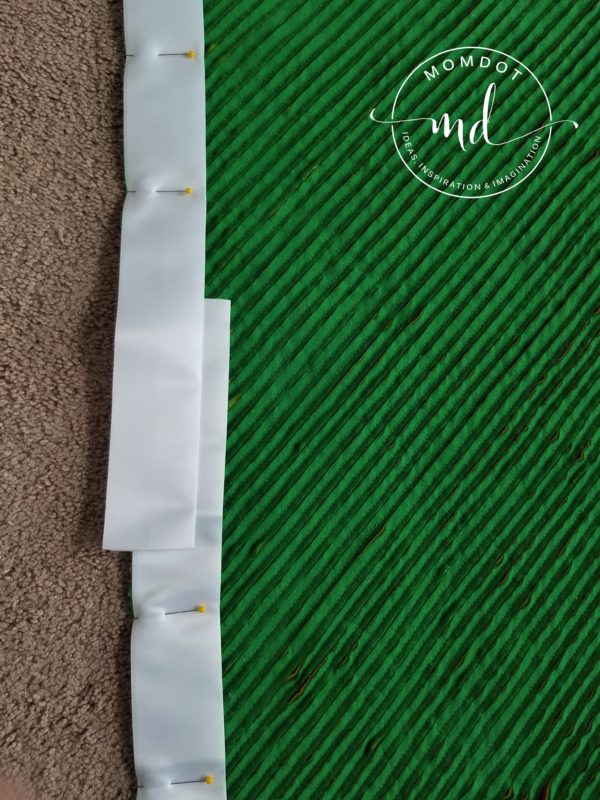
Half-way between where you started sewing and where you ended, cut your tails so that they only overlap 1/4″.
Unfold the bias tape. Put right sides together, pin, and sew a 1/4″ seam connecting the two ends. 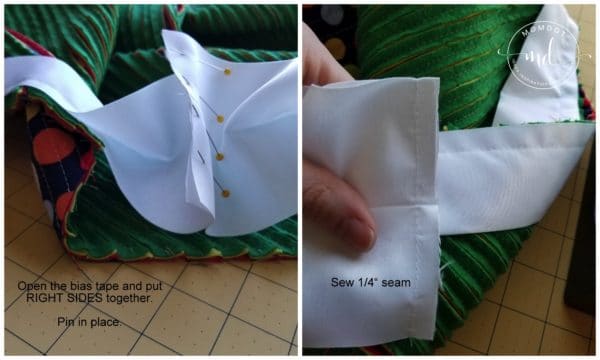
Fold the bias tape back to how it should be, pin the part that hasn’t been sewn down yet, and sew this part down. Be sure to backstitch at the beginning and end.

Fold the binding over to the front (no more raw, frayed edge!). Pin in place with pins, or I like to use quilting clips. Snap hair clips also work great! I pin about 8-10″ in place at a time. My clips are usually about 3″ apart.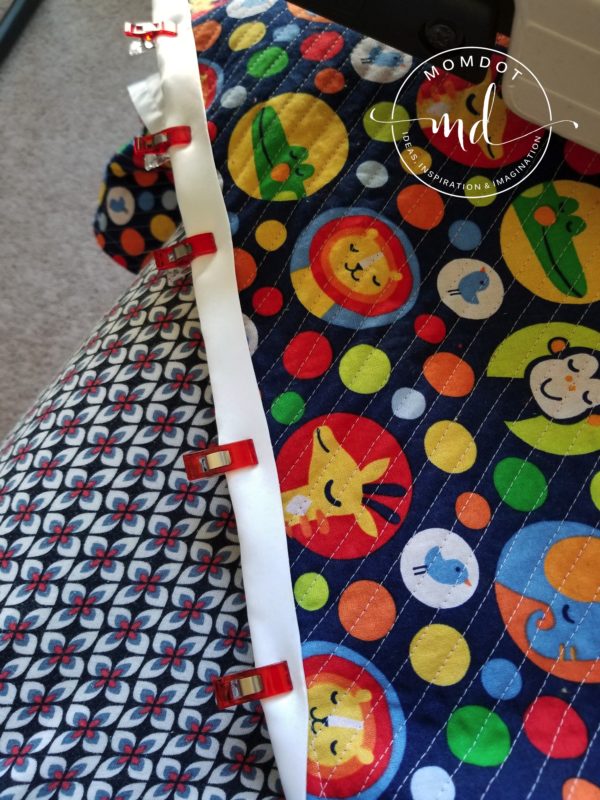
Thread a needle with a long piece of thread and make a nice, fat knot in one end of the thread.
Helpful hint: Do you know how to tie a “Quilter’s Knot”? If you don’t, learn, it will CHANGE YOUR LIFE. This is a good tutorial.
Begin by pulling your needle through the quilt about 1/4″ inch and then coming up and grabbing the fold of the binding about 1/4″. Be sure to pull the thread tight after each stitch. Your stitch through the quilt should be directly under the fold of the binding, making it “invisible“. 
When you run out of thread, just make a couple of knots on top of each other by sewing straight down through the binding and the quilt top then coming back up pretty close to the same spot. Knot the thread. Make 2 or 3 knots in the same spot. Start a new thread about 1 stitch back from where you ended the last thread. Continue to do your invisible stitches around the entire quilt.
The Finishing Touch:
Now, wash it!! Wash it on a gentle cycle, cold water and then dry it on low heat. It comes out SO soft!! I always get so attached to mine and hate (but love at the same time) giving them away. I want to keep them and snuggle in them! In the words of Agnes from Despicable Me: “IT’S SO FLUFFY!!”


Make sure the recipient knows that it is machine washable. The more you wash it, the softer it gets! I had a friend who was scared to use hers (fearing her baby spitting up on it, and then having to wash it because she thought it would lose its softness). She was very relieved when I informed her that the more she washed it the softer it got.
These Faux Chenille Baby Blankets are THE BEST! *All the heart eyes*
I just love all the possibilities with these quilts!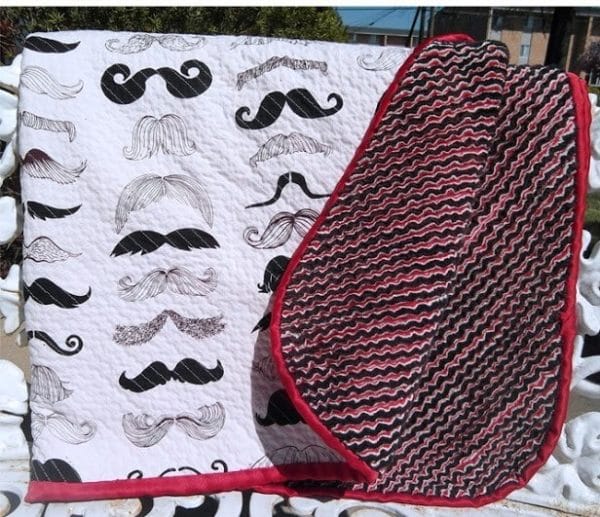
Now go turn on a movie and start sewing some lines! 😉
Don’t want to make one yourself? Want this adorable quilt for your own? Head on over to my shop and check out the ones I have available for purchase.
Check back soon for other Beginning Sewing Tutorials!! Up Next on my to-do list: Raw Edge Quilts
~Jamie, Owner of Burch Lane Designs
PS: Be sure to check out some of our other favorite tutorials here on Momdot!